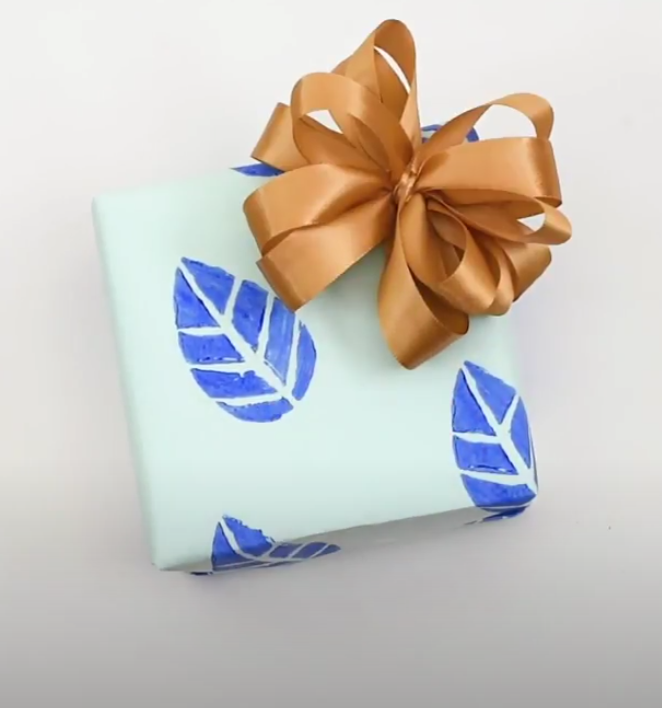
Create gift wrap with a potato stamp
Make your own decorative gift wrap using potato stamps, dipping them in paint, and stamping patterns on butcher or kraft paper with adult help.


Step-by-step guide to create gift wrap with a potato stamp
Step 1
Cover the table with newspaper to protect it from paint.
Step 2
Ask an adult to cut a potato in half so you have a flat stamping surface.
Step 3
Press a cookie cutter into the flat potato half to mark a fun shape.
Step 4
Ask an adult to carefully carve around the marked shape so your potato becomes a stamp.
Step 5
Squeeze small puddles of paint onto a paper plate or tray.
Step 6
Paint a thin even layer of paint onto the potato stamp using a brush or sponge.
Step 7
Stamp the painted potato onto scrap paper to practice your pressure and placement.
Step 8
Lay your butcher or kraft paper flat on the covered table so it is ready for stamping.
Step 9
Press the potato stamp firmly onto the kraft paper to make your first print.
Step 10
Wipe the stamp with a paper towel before changing to a new color or shape.
Step 11
Repeat stamping across the kraft paper with different colors and stamps until your design looks great.
Step 12
Let the gift wrap dry completely before folding or wrapping a present.
Step 13
Share a photo of your finished gift wrap on DIY.org.
Help!?
What can we use if we don't have a potato, cookie cutter, or butcher/kraft paper?
Use a firm foam craft block or a rubber eraser carved into a shape instead of a potato stamp, trace shapes with a template or the rim of a small jar instead of pressing a cookie cutter into the potato half, and substitute a flattened grocery brown paper bag or large sheet of scrap wrapping paper for the butcher/kraft paper.
My prints are blotchy or smudgy — how can we fix them?
Make sure you squeeze small puddles of paint and paint a thin even layer onto the potato stamp, practice stamping on scrap paper to find the right pressure, wipe the stamp with a paper towel before changing colors, and press the stamp firmly onto the kraft paper for a cleaner print.
How can this activity be adapted for toddlers or older kids?
For toddlers, have an adult do the cutting and carving and let the child brush paint onto the potato and press it onto the butcher/kraft paper with washable paint, while older kids can carve their own stamps, plan repeating patterns across the kraft paper, and experiment with layering colors and shapes.
How can we personalize or extend the gift wrap after stamping?
After the gift wrap dries completely, add hand-lettered names or metallic paint accents, cut matching gift tags from scrap paper and stamp them with the same potato stamps, or seal the paper with a clear varnish and share a photo on DIY.org.
Watch videos on how to create gift wrap with a potato stamp
D.I.Y Wrapping Paper // Potato Stamp
3 Videos

D.I.Y Wrapping Paper // Potato Stamp
Potato Print Wrapping Paper | Make It Magic
Can you believe you can make a DIY STAMP... using a POTATO?
Facts about printmaking and stamping for kids
🥔 Potatoes make great DIY stamps because their soft flesh is easy to carve into simple shapes.
🎨 Washable tempera paint is perfect for potato stamping—bright, kid-friendly, and easier to wash out of clothes.
🌍 Kraft paper is sturdy and recyclable, making it a popular eco-friendly choice for homemade gift wrap.
✂️ Pressing cookie cutters into a halved potato creates neat repeatable shapes quickly—adults should handle any cutting.
🧼 Potato stamping is low-mess and easy to clean: wipe stamps between colors and rinse them under water when finished.
How do I make potato-stamped gift wrap with my child?
What materials do we need to create potato-stamped gift wrap?
What ages is potato-stamped gift wrap suitable for?
What are the benefits, safety tips, and fun variations for potato-stamped wrapping?
