Show Us Your DIY Witch Costume
Make a safe DIY witch costume using cardboard, felt, glue, and fabric scraps; create a hat, cape, and harmless broom prop to wear and display.


Step-by-step guide to make a safe DIY witch costume
How To Make a Witch Costume for Kids | Channel Mum
Step 1
Clear a table and lay out all your materials so they are easy to reach.
Step 2
Cut a large semicircle from cardboard to make the hat cone.
Step 3
Roll the semicircle into a cone shape and secure the seam with tape.
Step 4
Cut a large circle from cardboard to make the hat brim.
Step 5
Cut a smaller circle from the center of the brim so the cone base will fit through.
Step 6
Tape the brim to the cone around the base to join them into a hat.
Step 7
Glue a sheet of felt over the outside of the hat to cover the cardboard.
Step 8
Decorate the hat by gluing fabric scraps or drawing fun designs with markers.
Step 9
Cut a cape shape from a large piece of fabric to your desired length.
Step 10
Attach a ribbon or elastic to the top corners of the cape so it ties around the neck.
Step 11
Roll a long strip of cardboard tightly to form a broom handle and tape it closed.
Step 12
Gather several fabric scraps around one end of the handle and tie them with ribbon to make harmless broom bristles.
Step 13
Put on your witch hat and cape and hold your broom to check how everything fits and looks.
Step 14
Share your finished witch costume on DIY.org
Help!?
What can we use if we can't find felt or sturdy cardboard for the hat and brim?
If you don't have felt for 'Glue a sheet of felt over the outside of the hat' or thick cardboard for the semicircle and brim cuts, substitute construction paper, poster board, an old cereal box for cardboard, or fabric from an old T-shirt to wrap and glue over the cone and brim.
The cone won't stay closed or the brim hole is too big—how do we fix that?
If the cone seam from 'Roll the semicircle into a cone shape and secure the seam with tape' keeps opening, reinforce it with extra tape or a line of glue inside, and if the brim hole is too big, trim the circle smaller and retest until the cone base fits snugly before taping the brim to the cone.
How can we adapt this project for younger or older kids?
For younger children, have an adult pre-cut the semicircle, brim, and cape and let them glue fabric scraps and tie ribbon (steps: cutting shapes, gluing, attaching ribbon), while older kids can measure and cut their own cardboard, stitch the cape's edges, and add painted or sewn decorations for extra detail.
What are some ways to personalize or upgrade the witch costume after finishing it?
To enhance the costume, add battery LED lights inside the hat's felt when you 'Decorate the hat,' insert thin wire around the 'Cut a large circle from cardboard to make the hat brim' edge to shape it, and swap the fabric-scrap broom bristles for colorful yarn tassels tied to the rolled cardboard handle for a sturdier look.
Watch videos on how to make a safe DIY witch costume
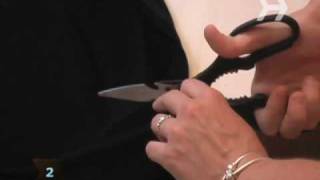
Easy DIY Witch Costume
3 Videos
Easy DIY Witch Costume
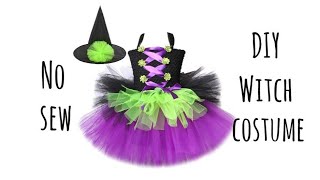
DIY Halloween Costume For Kids| Witch Costume No Sew Tutu Dress Tutorial 2-3 years old girl dress
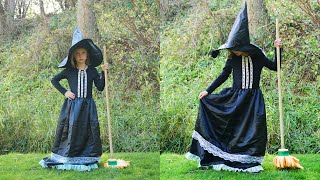
How to Make a Great Witch Costume
Facts about costume making for kids
🧙♀️ The pointed witch hat became a widely recognized image in 19th-century illustrations and stage costumes — it’s more costume tradition than ancient fact.
🪄 In folklore, witches’ brooms are often called "besoms" — originally simple household brooms made of twigs bound to a handle.
🧵 Felt is one of the oldest textiles and is made by matting and pressing fibers together, so it’s great for quick, no-sew costume pieces.
📦 Cardboard is lightweight, easy to cut and shape, and is a favorite material for budget-friendly hats and prop-making.
⚠️ Costume safety tip: use low-temp glue or craft glue for kids, add reflective tape or small LEDs for night visibility, and avoid long trailing fabric near streets.
How do I make a safe DIY witch costume (hat, cape, broom) step-by-step?
What materials do I need to make a DIY witch costume using cardboard, felt, glue, and fabric scraps?
What ages is this DIY witch costume suitable for?
How can I keep the DIY witch costume safe and comfortable for kids?
