Try cross stitching
Learn basic cross stitch to make a small embroidered sampler using embroidery floss, needle, and Aida fabric, practicing patterns and counting stitches.


Step-by-step guide to try cross stitching and make a small embroidered sampler
How To Make A Baby Cross Stitch
Step 1
Gather all your materials and put them on a clean flat table.
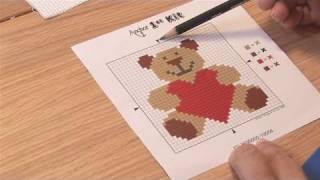
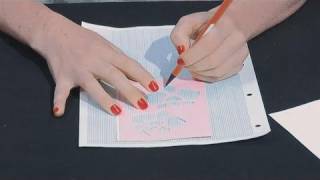
Step 2
Draw a tiny design on a small square of graph paper to plan your stitches.
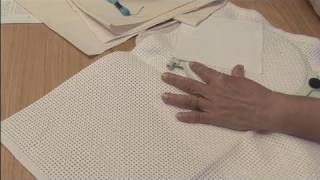
Step 3
Fold the Aida fabric twice to find the center.
Step 4
Mark the center lightly with the washable fabric marker.
Step 5
Place the fabric in the hoop with the center mark in the middle and tighten the hoop so the fabric is taut.
Step 6
Separate the six-strand embroidery floss into two or three strands for stitching.
Step 7
Thread the separated strands through the needle eye.
Step 8
Tie a small knot at the end of the floss to stop it from pulling through the fabric.
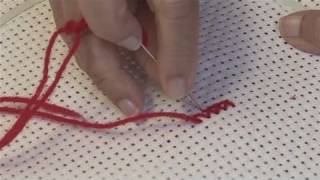
Step 9
Make one cross stitch at the center by bringing the needle up through the bottom-left hole then down through the top-right hole and finishing the X with the return diagonal.
Step 10
Continue stitching more crosses following your paper design row by row.
Step 11
Count the Aida squares as you stitch to keep your pattern even.
Step 12
When you finish a color area tie a secure knot on the back of the fabric to fasten the floss.
Step 13
Trim extra thread close to the knots with scissors.
Step 14
Remove your finished sampler from the hoop.
Step 15
Share a photo of your finished embroidered sampler on DIY.org.
Help!?
What can we use instead of Aida fabric, a washable fabric marker, or an embroidery hoop if they are hard to find?
If you don't have Aida fabric use tightly woven cotton and count threads like Aida, substitute a removable tailor's chalk or a soft pencil for the washable fabric marker to mark the center, and press the fabric over a plain saucer or use a picture frame as an alternative to an embroidery hoop.
My stitches look uneven or the pattern shifts—what should I check?
Check that the Aida fabric is taut in the hoop and the center mark is centered before stitching, recount the Aida squares from the marked center when you start each row, and make sure each cross stitch is finished with the return diagonal so tension stays consistent.
How can I adapt this cross-stitch activity for younger or older children?
For younger children simplify the graph-paper design to one or two large crosses, pre-thread a blunt tapestry needle with two separated strands and have an adult tie the starting knot, while older kids can draw more detailed graph designs, separate three strands themselves, and stitch multiple color areas independently.
How can we make the finished sampler more special or display it differently?
After trimming extra thread and removing the finished sampler from the hoop, press it lightly, add a stitched name or a backstitch border, then remount the fabric in the hoop as a frame or photograph the finished sampler to share on DIY.org.
Watch videos on how to cross stitch and make a small embroidered sampler
How To Do A Cross Stitch
4 Videos
How To Do A Cross Stitch
How To Start A Cross Stitch Pattern
How To Design Cross Stitch Patterns
How To Choose Cross Stitch Materials
Facts about embroidery and needlework for kids
🧵 Cross-stitch uses tiny X-shaped stitches to build up pictures — think of it as painting with thread!
🪡 Embroidery floss usually comes as 6 strands that you can separate to make thicker or thinner stitches.
🧮 Aida fabric has a built-in grid that makes counting stitches easy — 14-count Aida means about 14 stitches per inch.
📜 Samplers were historically used to practice and show off stitching skills; some antique samplers are hundreds of years old.
🎨 Cross-stitch charts work like pixel art: each square equals one stitch and one color.
How do I teach my child basic cross stitch to make a small embroidered sampler?
What materials do I need for a kid-friendly cross stitch sampler?
What ages is cross stitching suitable for children?
What are the benefits of teaching children to cross stitch?
