Draw an owl eye
Draw an owl eye using pencil and colored pencils, focusing on shape, shading, and bright highlights. Practice observing reference photos and texture.

Drawing Apps
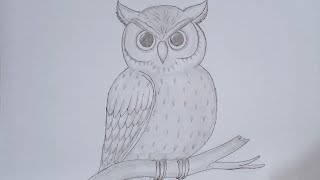
Step-by-step guide to draw an owl eye
Step 1
Gather all your materials and place them on a clean flat workspace.
Step 2
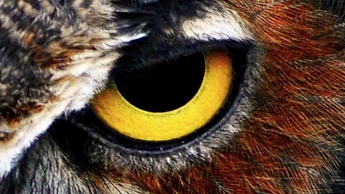
Look closely at your reference photo for one minute and notice the iris shape colors and where the bright highlight sits.
Step 3
Lightly draw a circle for the outer eye shape with your pencil.
Step 4
Draw a smaller circle inside for the iris and a tiny circle for the pupil.
Step 5
Sketch simple feather shapes around the eye to show the eyelid and surrounding feathers.
Step 6
Use the eraser lightly to remove any extra construction lines you do not need.
Step 7
Shade the pupil dark with your pencil while keeping the tiny circle for the highlight white.
Step 8
Choose a base color and color the entire iris evenly with light pencil strokes.
Step 9
Draw darker lines radiating from the pupil toward the iris edge to create texture.
Step 10
Layer additional colors with light strokes to build depth and gently blend them with more pencil strokes.
Step 11
Add short feather strokes around the eye following the feather direction to create realistic texture.
Step 12
Gently lift tiny bright highlights with the eraser where the light hits the iris and nearby feathers.
Step 13
Share your finished owl eye drawing on DIY.org.
Help!?
What can I use if I don't have colored pencils or a kneaded eraser?
If you don't have colored pencils, use crayons or watercolor paints to fill the iris in the step 'Choose a base color and color the entire iris,' and replace a kneaded eraser with a clean vinyl eraser or a white gel pen to make the tiny highlight in 'Gently lift tiny bright highlights...'.
My iris looks flat or smudged after coloring—what should I do?
If the iris looks flat or muddy, sharpen your pencils and use light, radiating strokes from the pupil as in 'Draw darker lines radiating from the pupil toward the iris edge' and then layer additional colors with light strokes to build depth instead of heavy smudging.
How can I adapt this owl-eye activity for younger or older kids?
For younger kids, pre-draw the outer eye and inner circles and let them color the iris in the 'Choose a base color' step with broad crayons, while older kids can add realistic texture by concentrating on 'Draw darker lines radiating...' and 'Layer additional colors...' to build depth.
How can we make the finished owl eye more personal or realistic?
To enhance and personalize the outcome, add short feather strokes around the eye following 'Add short feather strokes around the eye,' experiment with a white gel pen or tiny eraser lifts for extra highlights in the iris, or apply a small gloss varnish dab to the pupil before sharing on DIY.org.
Watch videos on how to draw an owl eye
How to Draw an Owl Step by Step Easy | Easy Draw for Kids
4 Videos
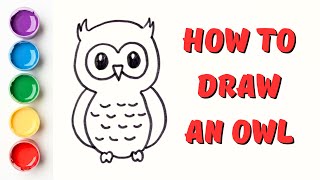
How to Draw an Owl Step by Step Easy | Easy Draw for Kids
How to draw a owl easy step by step.🦉🦉🦉

Owl Drawing 🦉🎨How to Draw Easy And Cute Owl,For Kids and Beginners|Step-by-Step Tutorial

How to draw OWL Easy Cute Drawing Tutorial for Kids & Beginners Step by Step Short #lidoartworks
Facts about pencil drawing and shading
🦉 Owls have very large eyes that take up a big part of their skull, which helps them see well in low light.
👁️ Owl eyes are more tube-shaped than round and can't move in their sockets — they rotate their heads up to about 270° instead.
🎨 A single tiny white highlight painted on an eye can make it look glossy and alive in a drawing.
✏️ Layering soft pencil shading with colored-pencil strokes creates realistic iris texture and depth.
🔍 Studying close-up reference photos helps you copy fine feather patterns, reflections, and subtle color shifts.
How do I draw an owl eye with pencil and colored pencils?
What materials do I need to draw an owl eye?
What ages is drawing an owl eye suitable for?
What are the benefits, safety tips, and variations for drawing an owl eye?
