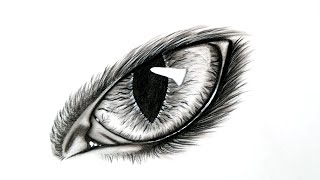
Draw a cat eye
Draw a cat's eye using pencil and colored pencils, practicing shapes, shading, highlights, and pupil details to create realistic depth step by step.


Drawing Apps
Step-by-step guide to draw a cat's eye
Step 1
Gather all your materials so everything is ready to draw.
Step 2
Lightly draw a large almond shape for the outer outline of the cat eye.
Step 3
Draw a circle or oval inside the almond to mark the iris.
Step 4
Draw a vertical slit in the center of the iris to make the pupil.
Step 5
Lightly sketch the shape of the highlight where the light will hit the eye.
Step 6
Shade the iris with light pencil strokes radiating outward from the pupil to build texture.
Step 7
Choose two or three colored pencils and layer color in short radial strokes from the pupil toward the edge of the iris.
Step 8
Darken the pupil and the outer rim of the iris with your black colored pencil to add contrast.
Step 9
Gently blend the colored areas with a blending stump or cotton swab to smooth transitions.
Step 10
Add fine radial lines with a sharp colored pencil to create realistic texture in the iris.
Step 11
Draw thin curved lines above and below the eye to form the eyelids and frame the eye.
Step 12
Use your eraser to lift graphite in the highlight shape to make the reflection bright.
Step 13
Darken shadows around the eye and inside the corners to increase depth and realism.
Step 14
Share your finished cat eye on DIY.org
Help!?
What can we use if we don't have a blending stump or a black colored pencil?
If you don't have a blending stump use a cotton swab or a piece of tissue to gently blend the colored areas (step 9), and if you lack a black colored pencil darken the pupil and outer rim with a soft graphite pencil or a careful black fineliner (step 8).
My iris looks muddy or the highlight disappeared after blending—what should I do?
If the iris gets muddy, build color with light radial strokes and layer slowly (steps 5–6), then redraw fine radial lines with a sharp colored pencil (step 10) and lift the highlight with your eraser (step 13) to restore contrast.
How can I change the activity for younger or older kids?
For younger kids simplify by drawing a large almond, one colored pencil, and skipping detailed blending and fine lines (omit steps 5–10), while older kids can add extra color layers, sharper radial texture (step 10), and deeper shadows around the eye (step 12) for realism.
What are easy ways to make the cat eye more special or make it into a bigger project?
To enhance the piece, add metallic or white colored-pencil highlights in the iris (step 6 and 13), sketch surrounding fur and stronger eyelid shadows (steps 11 and 12), or create a series of different-colored irises and share the finished cat eye on DIY.org (step 14).
Watch videos on how to draw a cat's eye
How to Draw a Cat Eye Step By Step | Eyes Animal Drawing
4 Videos
How to Draw a Cat Eye Step By Step | Eyes Animal Drawing
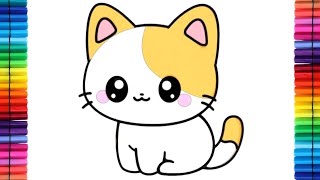
How to Draw a Cute Cat Step by Step: Fun & Easy Drawing Tutorial for Kids and Beginners!
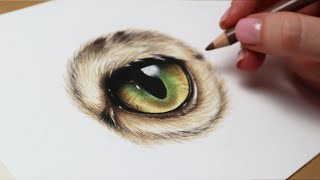
How to draw a realistic cat eye in coloured pencil | Step by step tutorial
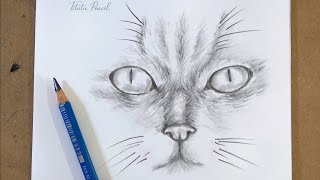
Learn to Draw REALISTIC Cat Eyes | Pencil Drawing
Facts about pencil drawing and shading
🐱 Cats have vertical slit pupils that help them judge distance and control how much light enters—handy for hunting at dawn and dusk!
👁️ A tiny white highlight painted on the cornea is one of the fastest tricks to make an eye look wet and alive.
✏️ Varying pencil pressure and small circular or cross-hatch strokes is how artists build smooth shading and realistic form.
🎨 Colored pencils layer beautifully—light layers of different colors blended together create richer, more natural hues than a single color alone.
🌟 The 'glow' you sometimes see in cat photos comes from the tapetum lucidum, a reflective layer behind the retina that boosts night vision.
How do I draw a cat's eye step by step?
What materials do I need to draw a realistic cat eye?
What ages is drawing a cat's eye suitable for?
What are the benefits of drawing a cat's eye?
