Use Scratch to design a sprite
Design and program a Scratch sprite: draw a character, add costumes, create movement and simple interactions using blocks, then test and share your project.


Step-by-step guide to use Scratch to design a sprite
How to Add Sprites in Scratch | Scratch Tutorial
Step 1
Open Scratch in your web browser and click Create to start a new project.
Step 2
Delete the default cat sprite by selecting it and clicking the trash icon.
Step 3
Click the Paint button under "Choose a Sprite" to open the paint editor.
Step 4
Draw your character in the paint editor using the pencil and fill tools.
Step 5
Create a second costume by clicking the duplicate or new costume button and change the pose slightly.
Step 6
Rename your sprite to your character’s name by clicking its name above the sprite thumbnail.
Step 7
Click the Code tab for your sprite to begin adding blocks.
Step 8
Add a movement script: attach a "when green flag clicked" block and inside put blocks that make the sprite move and bounce at the edge.
Step 9
Add a right-arrow control: attach a "when right arrow key pressed" block and add "change x by 10" under it.
Step 10
Add a left-arrow control: attach a "when left arrow key pressed" block and add "change x by -10" under it.
Step 11
Add a click interaction: attach a "when this sprite clicked" block and add a "say Hello! for 2 seconds" block under it.
Step 12
Test your project by clicking the green flag and using the arrow keys and clicking the sprite to try the movements and interactions.
Step 13
Share your finished creation on DIY.org.
Help!?
What can we use if the Paint button or a web browser isn't available?
Use Scratch Desktop or upload an image as a sprite, or pick an existing sprite from the "Choose a Sprite" menu instead of using the Paint editor in a web browser.
My sprite doesn't move or bounce at the edge—what might be wrong?
Make sure you're on your sprite's Code tab and that a "when green flag clicked" block is attached to a "move ___ steps" block plus an "if on edge, bounce" block so movement and bouncing are connected.
How should I adapt the activity for younger or older children?
For younger kids, have an adult or the child pick and rename a ready-made sprite and use a single "when right/left arrow key pressed" with "change x by" block, while older kids can draw multiple costumes, duplicate and tweak poses, add sounds, variables, or more complex scripts after the "when green flag clicked" block.
How can we personalize or extend the project before sharing on DIY.org?
Personalize by adding unique details in the Paint editor, animate movement by switching between the two costumes when arrow keys are pressed, add a "say" or sound under "when this sprite clicked", and create a backdrop or scoring variable to enhance the project before sharing on DIY.org.
Watch videos on how to use Scratch to design a sprite
Create a Sprite with the Scratch Paint Editor | Tutorial
4 Videos
Create a Sprite with the Scratch Paint Editor | Tutorial
Scratch Basics - A Beginners Guide to Scratch
Bring Your Drawings Into Scratch | Tutorial
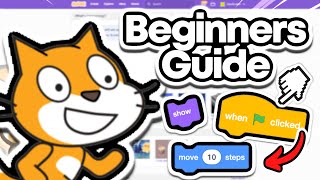
Beginners Guide To Scratch (VERY Simple)
Facts about block-based coding with Scratch
🐱 Scratch's default sprite is the Scratch Cat — it's the character you see when you open a new project.
🎮 Scratch was first released in 2007 by MIT's Lifelong Kindergarten group to help kids learn coding through play.
🧩 Scratch uses block-based coding with puzzle-like blocks so you can snap commands together without typing syntax.
🎨 Each sprite can have multiple costumes, and simple walk animations often use just 2–4 costumes to look alive.
🌐 The Scratch website lets people share and remix projects, connecting millions of creators around the world.
How do I design and program a Scratch sprite step by step?
What materials and software do I need to design a Scratch sprite?
What ages is designing and programming a Scratch sprite suitable for?
What are the benefits and safety tips for making Scratch sprites?
