Sew your own plushie
Sew a small stuffed plushie using fabric, thread, simple stitches, and stuffing; learn pattern tracing, sewing techniques, and finishing with safe adult supervision.


Step-by-step guide to Sew your own plushie
Easy How to Sew a Felt Penguin Plushie | Free Pattern + Beginner Kids Sewing Tutorial
Step 1
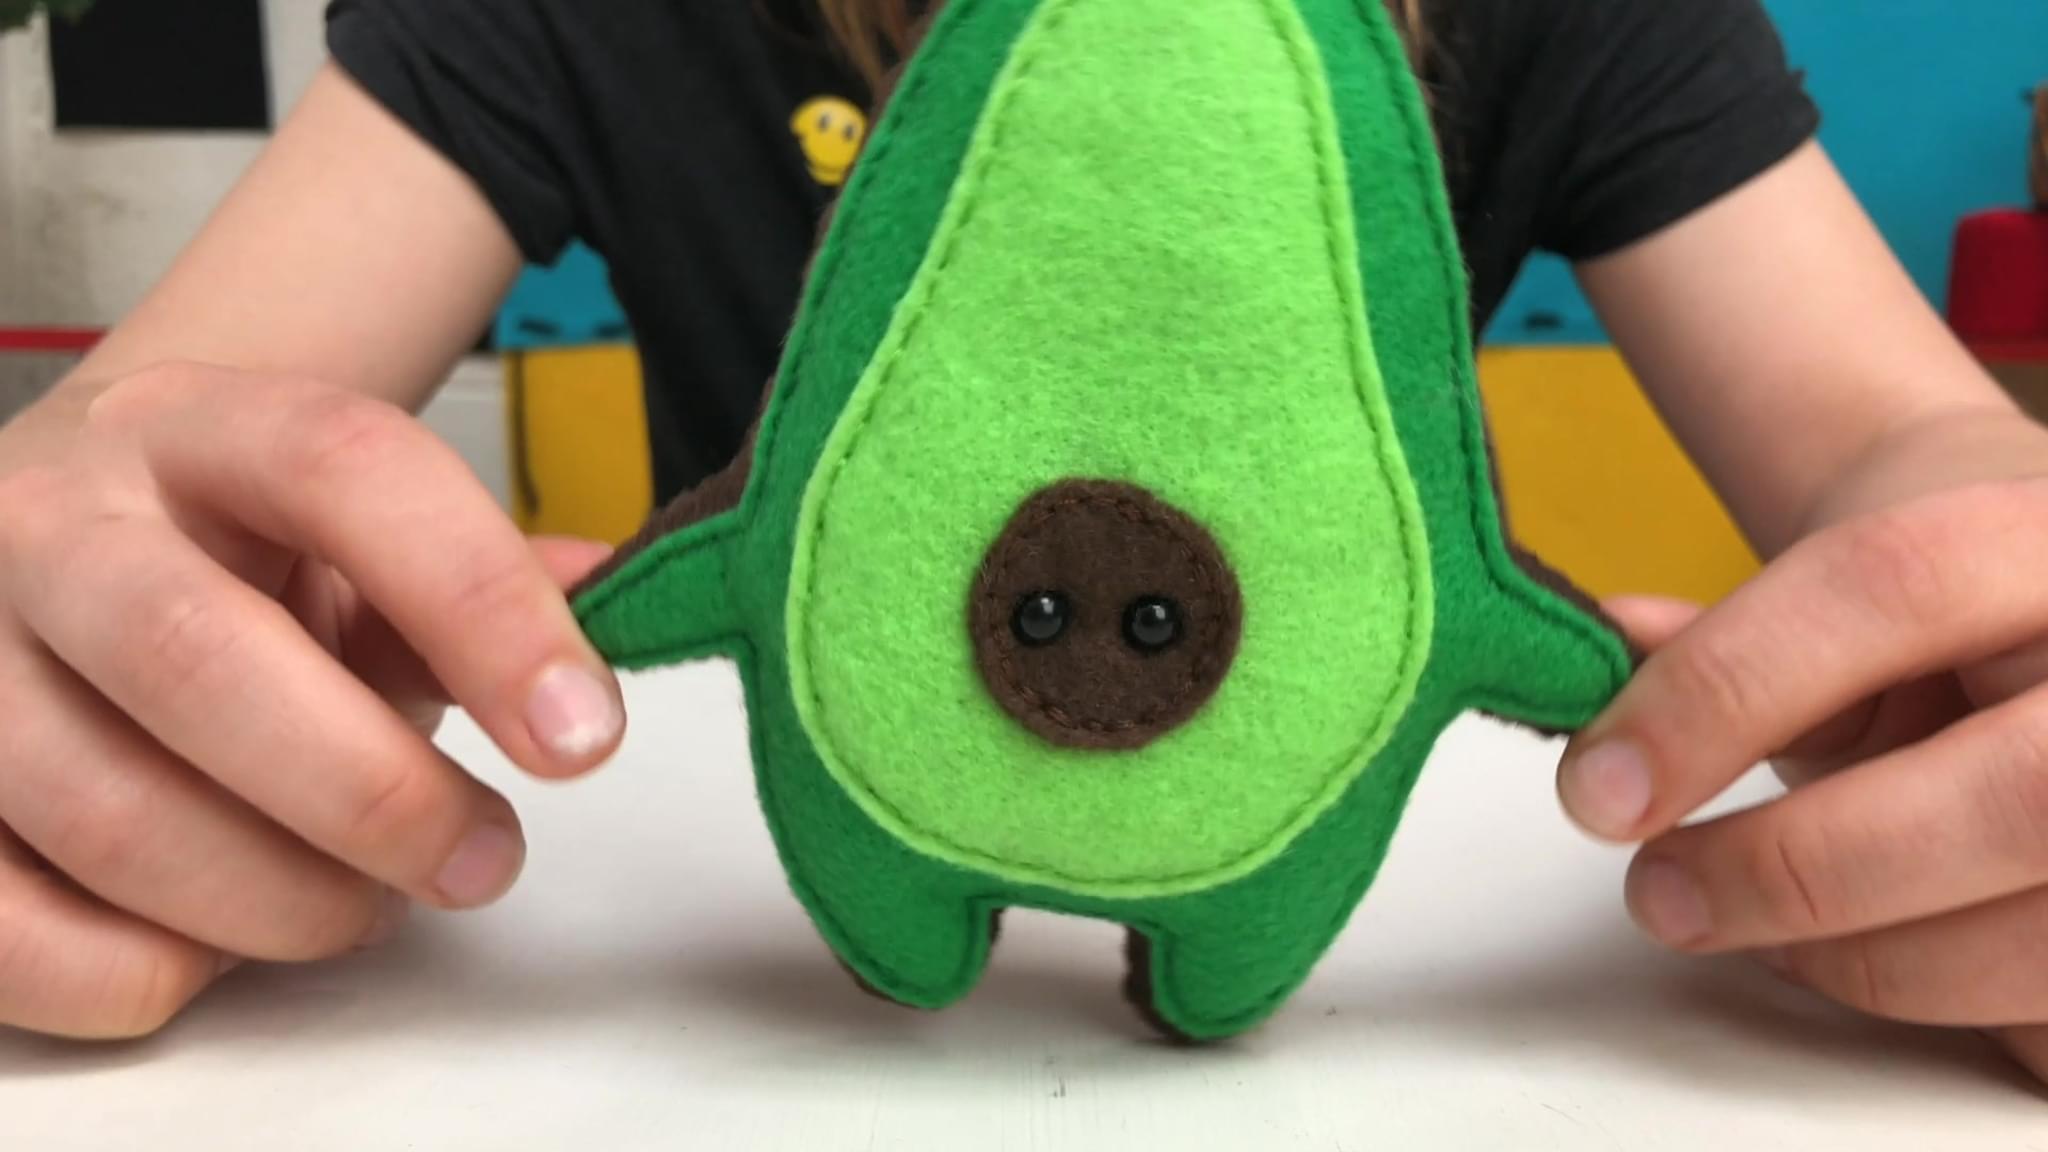
Pick a simple shape like a heart star or animal and draw the pattern on paper.
Step 2
Place the paper pattern on your fabric and trace around it twice so you have two matching shapes.
Step 3
Cut out the two fabric shapes carefully along your traced lines.
Step 4
Pin the two fabric pieces together with the right sides facing each other and match the edges.
Step 5
Cut a length of thread about 18 inches long.
Step 6
Thread the needle with the thread.
Step 7
Tie a small knot at the end of the thread.
Step 8
Sew around the edge with a running stitch or whipstitch leaving a 2 inch opening for stuffing.
Step 9
Trim the seam allowance and clip small curves to help the shape turn smoothly.
Step 10
Turn the plushie right side out through the opening so the seams are hidden inside.
Step 11
Stuff the plushie evenly using small amounts of stuffing until it is soft and puffy but not overfilled.
Step 12
Sew the opening closed with small neat stitches and tie off the thread.
Step 13
Sew or embroider on eyes a nose and any decorations using felt scraps or embroidery thread.
Step 14
Share your finished plushie on DIY.org
Help!?
What can we use if we can't find fabric, stuffing, or a sharp sewing needle?
Use an old cotton T‑shirt or sock for the fabric, pillow stuffing or clean scrap fabric for stuffing, and a large plastic yarn needle or blunt tapestry needle with doubled embroidery floss instead of a sharp hand-sewing needle when you thread in Step 6.
My plushie is hard to turn right-side-out and the seams look bulky—what should I do?
Before turning in Step 10, trim the seam allowance and clip small curves as described in Step 9 (without cutting your stitches) and use a blunt tool like a chopstick to gently push out corners so the shape turns smoothly.
How can we adapt this project for different age groups?
For preschoolers, have an adult trace and cut the paper pattern and use glued felt decorations, while kids 7–11 can pin, sew the running or whipstitch in Steps 4–8, and teens can add embroidery and detailed decorations in Step 13.
How can we enhance or personalize the finished plushie?
Add a small pocket or hanging loop before sewing the opening closed in Step 11, tuck a tiny bell or washer in with the stuffing in Step 10 for sound, and embroider a name or unique decorations in Step 13 before sharing on DIY.org in Step 14.
Watch videos on how to Sew your own plushie
How to Sew an Easy Felt Dolphin Plushie - Pattern & Sew Along for Beginners & Kids!
4 Videos
How to Sew an Easy Felt Dolphin Plushie - Pattern & Sew Along for Beginners & Kids!
Easy How to Sew a Felt Ladybug Plushie | Free Pattern + Beginner Kids Sewing Tutorial
How to Sew an Easy Felt Elephant Plushie - Pattern & Sew Along for Beginners & Kids!

How to make plushies, a beginner tutorial, YOU CAN DO IT
Facts about sewing for kids
🧵 Hand stitches like the running stitch, backstitch, and whipstitch are all you need to assemble a sturdy plushie.
🐻 Stuffed toys (plushies) became widely popular in the early 20th century and are made worldwide in countless styles.
✂️ Using a paper pattern makes cutting fabric fast and accurate — many kids start by tracing simple shapes like hearts or stars.
🪡 Choosing a blunt-tipped needle for children and having adult supervision reduces pokes and keeps sewing safe and fun.
🎨 Decorating a plushie with different fabrics, buttons, and simple embroidery is an easy way to make each toy a one-of-a-kind character.
How do I sew a small stuffed plushie with a child?
What materials and tools do I need to sew a children's plushie?
What ages are suitable for sewing a plushie with adult supervision?
What are the benefits and safety tips for sewing a plushie with kids?
