Make a spider using LEGO®
Build a movable LEGO® spider using bricks and connectors, design eight legs and a body, and learn symmetry, counting, and simple engineering.


Step-by-step guide to make a spider using LEGO®
LEGO SPIDER (Tutorial)
Step 1
Gather your materials and find a flat clean workspace to build on.
Step 2
Pick the bricks you want to use for the spider body so the block will be wide enough for eight legs.
Step 3
Stack and snap those bricks together to build a sturdy central body for your spider.
Step 4
Choose four spots along one side of the body where you will attach legs and remember their positions.
Step 5
Attach a connector or small plate to each of the four chosen spots on that side.
Step 6
Add matching connectors to the opposite side aligned with the first four so the placement is symmetrical.
Step 7
Slide one leg piece onto each connector so you have four legs on each side for eight legs total.
Step 8
Press two small round pieces onto the front of the body to make eyes.
Step 9
Bend or pivot each leg piece so it can move up and down freely.
Step 10
Gently push the spider to test how the legs move and watch for smooth motion.
Step 11
Count the legs out loud to make sure there are eight total.
Step 12
Adjust leg angles for balance if the spider tips or does not move smoothly.
Step 13
Share your finished movable LEGO® spider on DIY.org.
Help!?
What can we use if we don't have the specific connectors or small plates called for in the instructions?
Use 1x1 clips, hinge plates, or Technic pins inserted into a small plate as substitutes for the connectors or small plates when you 'Attach a connector or small plate to each of the four chosen spots' and when you 'Add matching connectors to the opposite side'.
The legs won't slide or the spider keeps tipping—what should we check and fix?
Check that you 'Stack and snap those bricks together to build a sturdy central body' by adding extra bricks or a baseplate, make sure each connector is aligned front-to-back before you 'Slide one leg piece onto each connector', and adjust leg angles or add a heavier brick to the center to improve balance.
How can I adapt this project for different ages?
For younger children use larger bricks and pre-attach the connectors so they only 'Slide one leg piece onto each connector' and count the legs, while older kids can use Technic pieces or hinge bricks to create articulated joints and experiment with leg motion as they 'Bend or pivot each leg piece so it can move up and down freely'.
How can we personalize or extend the finished movable LEGO® spider?
Customize colors and patterns, swap the 'two small round pieces' for translucent studs or printed eye pieces, add a turntable plate under the central body for spinning motion, or build a small habitat before you 'Share your finished movable LEGO® spider on DIY.org'.
Watch videos on how to make a spider using LEGO®
LEGO Spider MOC & Tutorial
3 Videos
LEGO Spider MOC & Tutorial
How to Build a LEGO Spider with only 10 pieces of LEGO - LEGO Halloween Tutorial
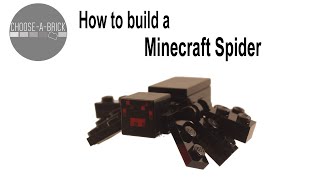
How to make a LEGO Minecraft Spider? | Step-by-Step Instructions
Facts about LEGO building and basic engineering
🕷️ Spiders have eight legs — that’s 4 on each side, perfect for practicing counting and symmetry while you build!
🧱 LEGO makes about 36 billion bricks every year — more than 4,000 for every person on Earth!
⚙️ Engineers often use four-bar linkages and simple mechanisms to turn rotation into leg-like walking motions — great for movable LEGO spiders.
📏 Bilateral symmetry (mirror-image left and right) is common in animals and very useful when designing pairs of legs for balance and looks.
🔩 LEGO Technic beams, pins, and connectors let you build strong, movable joints without glue, so your spider can pose and wiggle safely.
How do I build a movable LEGO spider step-by-step?
What materials and LEGO pieces do I need to make a spider?
What ages is this movable LEGO spider activity suitable for?
What skills and learning benefits will my child get from building a LEGO spider?
