Make a Yeti using LEGO®
Build a LEGO® Yeti model using assorted bricks, learn balance, texture, and color choices, then pose and photograph your snowy creature.


Step-by-step guide to make a Yeti using LEGO®
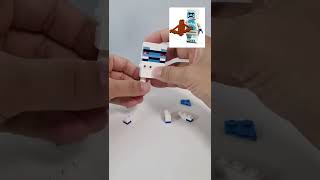
LEGO Logan Paul's "Yeti" - Build Tutorial
Step 1
Clear a flat workspace and gather all the LEGO pieces you need so everything is close by.
Step 2
Pick a color scheme for your Yeti using mostly white and one bright accent color so your creature looks snowy and fun.
Step 3
Stack bricks to build a chunky torso about 4 to 6 bricks high to give your Yeti a sturdy body.
Step 4
Attach slope and textured pieces to the torso to add fur-like texture and make the body look fluffy.
Step 5
Build two sturdy legs using identical stacks of bricks so your Yeti can stand up.
Step 6
Attach the legs to the bottom of the torso and press firmly so they hold in place.
Step 7
Build two arms with big hands or claws and snap them onto the sides of the torso.
Step 8
Create a head using a few bricks and add eyes and a mouth with small round pieces to give your Yeti a face.
Step 9
Add small details like a belly patch claws or a colorful scarf with plates and tiles to show your Yeti’s personality.
Step 10
Test the Yeti’s balance by gently nudging it and then move heavier bricks lower or widen the feet if it keeps tipping.
Step 11
Place your Yeti on a snowy backdrop like cotton or white paper and pose it for a photo.
Step 12
Share a photo of your finished LEGO Yeti on DIY.org so everyone can see your frosty creation.
Help!?
What can I use if I don’t have slope or textured LEGO pieces to add fur-like texture to the torso?
If you don't have slope or textured pieces to add fur-like texture to the torso, stagger standard bricks and overlapping plates or use small studs and tiles to mimic the fur effect.
My Yeti keeps tipping over — what should I try?
If the Yeti keeps tipping, follow step 11 by moving heavier bricks lower or widening the feet, or press the legs firmly into a larger baseplate and add extra plates under the feet to improve stability.
How can I adapt the build for younger or older kids?
For younger kids, simplify by pre-building a 4–6 brick chunky torso, using big bricks for legs and sticker or large round pieces for the face, while older kids can add hinged joints, detailed slope-texturing, and a patterned scarf with plates and tiles for extra challenge.
How can we personalize or extend the Yeti to make it more creative?
To personalize and extend the activity, swap the bright accent color, add a removable scarf with plates and tiles, create articulated arms or a posable head with hinge pieces, and pose your Yeti on a cotton or white-paper snowy backdrop for photos to post on DIY.org.
Watch videos on how to make a Yeti using LEGO®
How to build "Yeti" from Lego Minecraft Twilight Forest #shorts ( 레고 마인크래프트 21186 얼음성 예티 만들기)
4 Videos
How to build "Yeti" from Lego Minecraft Twilight Forest #shorts ( 레고 마인크래프트 21186 얼음성 예티 만들기)
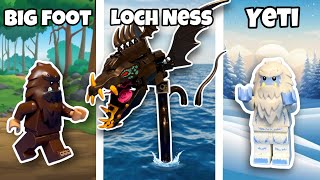
I Built Mythical Creatures In Lego!

How to Build EASY Characters out of LEGO Bricks!

LEGO BUILDS you can use in REAL LIFE...
Facts about LEGO building for kids
🐾 The Yeti (or Abominable Snowman) is a legendary creature from Himalayan folklore with reported footprints found in snowy passes.
🧱 The modern LEGO brick design from 1958 is backward-compatible—bricks from decades ago can still snap together with new ones.
❄️ Snowflakes form six-sided patterns because of water's molecular structure, and no two flakes are exactly identical in detail.
⚖️ A low, centered weight (center of mass) and symmetrical supports help small models stay balanced and avoid toppling.
📸 Tiny changes in camera angle, lighting, and background can make a LEGO creature look huge, dramatic, or perfectly snowy for photos.
How do you build a LEGO® Yeti?
What materials do I need to make a LEGO® Yeti?
What ages is building a LEGO® Yeti suitable for?
What are the benefits and safe variations of this LEGO® Yeti activity?
