Build a land vehicle
Build a simple cardboard land vehicle using cardboard, skewers, bottle cap wheels, and rubber bands; test how wheel size, weight, and friction affect motion.


Step-by-step guide to build a cardboard land vehicle
Young Engineers: Wind-Powered Sail Car - Easy DIY STEM Activity for Kids
Step 1
Gather all the materials on a clear table so everything is ready to use.
Step 2
Cut a cardboard rectangle about 20 cm long and 10 cm wide to make the vehicle base.
Step 3
Use the ruler to mark two axle positions 2 cm in from each short end across the width of the base.
Step 4
Cut two straw pieces about 3 cm long and tape them under the marks to make axle holders.
Step 5
Push a wooden skewer through each straw holder so the skewers stick out equally on both sides.
Step 6
With adult help poke a small centered hole in each bottle cap so the skewer can slip through the cap.
Step 7
Push a bottle cap onto each skewer end and secure each wheel by wrapping a small rubber band on the skewer beside the cap.
Step 8
Trim any skewer ends that touch the ground and spin each wheel to make sure they turn freely and line up straight.
Step 9
Make a ramp by propping a sheet of cardboard on a stack of books at a gentle angle and draw a clear start line at the top.
Step 10
Run three controlled tests: for the wheel-size test swap to different sizes of bottle cap wheels and run three times recording distances or times; for the weight test add coins to the base and run three times recording results; for the friction test roughen or add tape to the wheel surfaces and run three times recording results, keeping all other factors the same for each test.
Step 11
Share your finished cardboard land vehicle and what you learned about how wheel size weight and friction affect motion on DIY.org.
Help!?
What can we use if we don't have wooden skewers, drinking straws, or bottle caps?
If you don't have wooden skewers use straightened large paperclips or thin chopsticks as axles, replace the 3 cm straw axle holders with folded cardboard strips or short rigid pasta pieces, and swap bottle caps for round cardboard discs punched with a small centered hole or foam craft wheels.
My wheels won't spin freely — how do I fix them?
Check that the 3 cm straw holders taped under the marked axle positions aren't crushed, widen the hole in each bottle cap a little, add a small rubber band or bead on the skewer beside each cap as a spacer, and trim any skewer ends that touch the ground so the wheels turn freely.
How can we change the activity for younger or older kids?
For younger kids have an adult pre-cut the 20 cm × 10 cm cardboard base, pre-poke cap holes and use larger blunt craft wheels for easy assembly, while older kids can precisely mark the axle positions with the ruler, swap multiple bottle-cap sizes, run the three tests and record and graph the results.
How can we make the vehicle more interesting or study more variables?
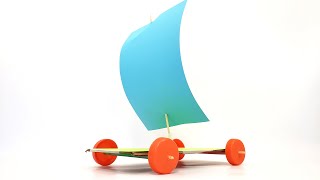
Personalize the cardboard base with paint and stickers, add a paper sail on a straw mast to test wind effects, vary the ramp angle by changing the book stack to measure distance changes, or attach a removable payload of coins to extend the weight test before sharing results on DIY.org.
Watch videos on how to build a cardboard land vehicle
How To Make RC Tipper Truck From Cardboard || Very Simple || The Crafts Crew
4 Videos
How To Make RC Tipper Truck From Cardboard || Very Simple || The Crafts Crew
How To Make a Car - Powered Car - Very Simple
How to Build a Toy Car - Science Project
Build a Wind-Powered Car | STEM Activity
Facts about forces and motion
🛞 Doubling a wheel's diameter doubles the distance it rolls in one rotation—distance per turn = π × diameter!
🧪 Smooth, low-friction surfaces (like tile) let a toy car coast much farther than rough surfaces (like carpet).
🟠 Rubber bands store elastic energy—stretch or twist one and it can power a tiny car for several meters.
📦 Corrugated cardboard is strong for its weight because of the wavy middle layer—folds and triangles add extra stiffness.
♻️ Two bottle caps glued together make wider, more stable wheels, which many DIY toy-makers use from recycled materials.
How do you build and test a simple cardboard land vehicle?
What materials do I need to build the vehicle?
What ages is this activity suitable for?
What are the benefits of building and testing a cardboard vehicle?
