Solder your system
Assemble and solder a simple LED circuit board with adult supervision, using safety goggles and a soldering iron to learn electronics basics.


Step-by-step guide to assemble and solder a simple LED circuit board
Beginner's Guide to Soldering Electronics Part 1
Step 1
Put on your safety goggles so your eyes are protected.
Step 2
Ask an adult to plug in the soldering iron and place it in its stand to heat up.
Step 3
Clear a flat workspace so you have room for the PCB and tools.
Step 4
Place the PCB on the helping hands or tape it to the table so it cannot move.
Step 5
Find the LED and identify the longer lead as the positive (+) leg.
Step 6
Insert the LED into the PCB with the longer lead in the '+' hole.
Step 7
Bend the LED leads slightly outward on the back of the PCB to hold the LED in place.
Step 8
Insert the resistor into its holes on the PCB so its leads pass through the board.
Step 9
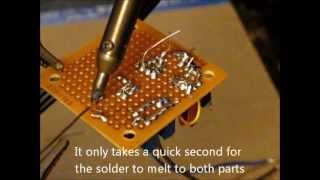
Ask an adult to solder the LED leads on the back of the PCB by heating each pad and applying a small amount of solder until it flows around the lead.
Step 10
Ask the adult to solder the resistor leads in the same way so each joint is shiny and secure.
Step 11
Use wire cutters to clip the excess leads close to the solder joints and clean the iron tip on the damp sponge.
Step 12
Insert the coin cell battery into the holder with the correct polarity to power the circuit and check that the LED lights; if it does not light ask an adult to help check solder joints.
Step 13
Share a photo and description of your finished LED circuit on DIY.org.
Help!?
What can I use if I don't have helping hands, a PCB, or a coin cell holder?
Use masking tape or clothespins to secure the PCB (instead of helping hands), substitute a perfboard or cardboard with copper tape for the PCB, and hold the coin cell in place with tape while keeping the battery's polarity matching the '+' hole.
The LED doesn't light after inserting the battery—what should we check?
Ask an adult to reheat any dull or blobbed solder joints until they are shiny, verify the LED's longer lead is in the '+' hole and the coin cell is inserted with correct polarity, and confirm the resistor leads are soldered into the correct holes.
How can we adapt this soldering activity for younger or older kids?
For younger children have the adult do all soldering while the child places the LED and resistor, bends leads, and clips excess, and for older kids let them solder under supervision, try smaller components, or design a multi-LED circuit.
How can we extend or personalize the finished LED circuit?
Decorate the PCB, add additional LEDs in parallel with correctly calculated resistors, include a toggle switch between the resistor and battery, or add a 555 timer or microcontroller to make the LED blink before sharing a photo on DIY.org.
Watch videos on how to assemble and solder a simple LED circuit board
Soldering Tutorial for Beginners: Five Easy Steps
4 Videos
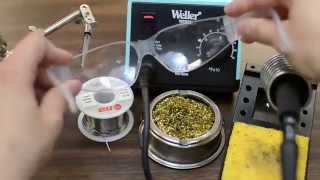
Soldering Tutorial for Beginners: Five Easy Steps

HOW TO SOLDER! (Beginner's Guide)
How to solder electronics components - video for beginners

iFixit's Soldering 101: Beginners Guide
Facts about electronics and soldering safety for kids
🔥 Solder melts between about 180°C and 220°C depending on the alloy — that's hot enough to burn, so always use a stand and adult supervision!
💡 LEDs can glow with only about 2 volts and 10–20 milliamps, which is why they use very little power and can last a long time.
🛠️ A good solder joint looks shiny and smooth; a dull, grainy joint is called a "cold joint" and may fail electrically.
👓 Safety goggles protect your eyes from tiny, hot blobs of solder and flying wire bits — never skip them!
♻️ Many hobbyists choose lead-free solder for safety and the environment, but it generally melts at a higher temperature than leaded solder.
How do I assemble and solder a simple LED circuit board with my child?
What materials and tools do I need to assemble and solder a simple LED circuit board?
What ages is soldering a simple LED circuit board suitable for?
What are the benefits, safety tips, and variations for kids soldering an LED circuit?
