Make a solar concentrator
Build a simple solar concentrator from cardboard and aluminum foil to focus sunlight onto a thermometer or dark surface, observing warming with adult supervision.

Step-by-step guide to make a solar concentrator
DIY Solar Concentrators, Made Better.
Step 1
Gather all the materials and put them on a flat table.
Step 2
Use the pencil and ruler to draw a large circle about 25 centimeters across on the cardboard.
Step 3
Cut out the circle with safety scissors.
Step 4
Cut a straight line from the outer edge to the center of the circle to make a slit.
Step 5
Overlap the two cut edges so the cardboard becomes a cone shape.
Step 6
Tape the overlapped seam so the cone keeps its shape.
Step 7
Trim the very tip of the cone to make a small hole about 1 centimeter wide.
Step 8
Cut pieces of aluminum foil to roughly fit the inside curve of the cone.
Step 9
Line the inside of the cone with the aluminum foil shiny side facing inward and press it flat.
Step 10
Tape or glue the foil edges so each piece stays in place inside the cone.
Step 11
Color a small metal cap or a round piece of cardboard black with the marker or paint and let it dry.
Step 12
Take the cone outside with an adult and remember not to look directly at the sun.
Step 13
Point the cone’s wide opening toward the sun and place the thermometer stem or the black disk at the cone tip where the light concentrates.
Step 14
Slowly adjust the cone until you see the brightest spot on the black disk or thermometer and wait three minutes while watching the thermometer without touching the bright spot.
Step 15
Carefully remove the thermometer and read the temperature and then share your finished solar concentrator on DIY.org.
Help!?
What can we use instead of aluminum foil or a thermometer if those are hard to find?
If you don't have aluminum foil use a shiny baking tray, reflective emergency blanket, or mirror pieces cut to fit inside the cone in place of the foil, and if you lack a thermometer use an oven or meat thermometer, a digital probe, or the black-painted cardboard disk from step 11 to observe warming instead.
Why don't I see a bright spot on the black disk or a temperature change after following the steps?
If the bright spot is dim or the temperature doesn't rise, check that the cone seam is tightly taped and the foil is pressed smooth against the curve (steps 5 and 9), that the cone tip is trimmed to about 1 cm (step 6), and slowly re-angle the cone toward the sun until the brightest spot appears (step 12).
How can I modify the activity for younger children or make it more challenging for older kids?
For younger children have an adult draw and cut the circle and form the cone while the child tapes and lines the foil (steps 1–9), and for older kids add angle measurements, compare different reflector materials, or time and calculate energy concentration using the thermometer (steps 2, 9, 12–13).
How can we extend or personalize the solar concentrator project?
To extend the project, mount the cone on a cardboard stand with a protractor to track the sun, test different foil types or cone sizes and record thermometer readings to compare outcomes, and decorate the cone exterior before testing (steps 2–6, 9, 12–14).
Watch videos on how to make a solar concentrator
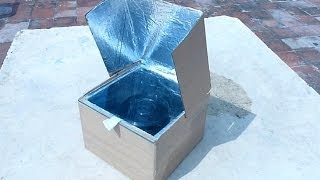
How to Build a Solar Concentrator!
4 Videos
How to Build a Solar Concentrator!
How to make a simple solar cooker to understand the use of solar energy

BEGINNER FRIENDLY Step-by-Step: DIY SOLAR GENERATOR for Emergency Power, RV, Shed... Ampere Time
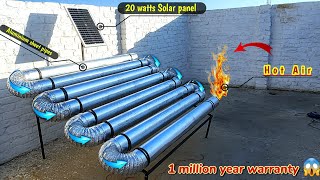
DIY Solar Air Heater: Step-by-Step Guide to Build Your Own Home Solar Heater| Life Time Free
Facts about solar energy and simple solar experiments
☀️ On a clear day the Sun delivers about 1,000 watts of energy per square meter — roughly the power of a small space heater hitting every square metre.
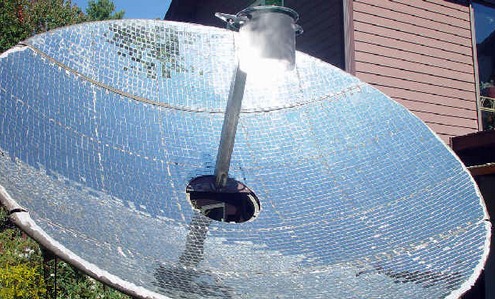
🔭 Parabolic reflectors bounce parallel sunlight toward a single focal point, concentrating lots of energy in one tiny spot.
🥚 Small parabolic solar cookers can get hot enough to fry an egg — perfect for showing how focused sunlight becomes heat.
🪞Household aluminum foil can reflect more than 80% of visible sunlight when shiny-side-out, making it a cheap, kid-safe mirror material for projects.
⚠️ Focused sunlight can cause burns or start fires quickly — always use with adult supervision, never look at the bright spot, and keep flammables away.
How do you build a simple solar concentrator from cardboard and aluminum foil?
What materials do I need to make a solar concentrator at home?
What ages is this solar concentrator activity suitable for?
What safety precautions and benefits should I know about this solar concentrator?
