Make a solar dehydrator
Build a solar dehydrator from a cardboard box, black tray, clear cover and mesh to dry fruit while learning about solar energy and preservation.

Step-by-step guide to make a solar dehydrator
Simple Solar Dehydrator (DIY)
Step 1
Gather all your materials on a clean table so everything is ready to build your solar dehydrator.
Step 2
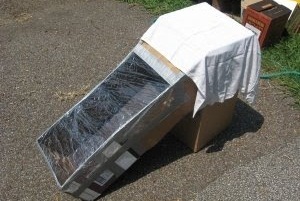
Use the ruler and marker to draw a large rectangle on the top or front of the box where the clear window will go.
Step 3
With adult help cut out the rectangle so you have an opening for sunlight to enter the box.
Step 4
Tape the clear plastic sheet over the opening so it makes a tight transparent cover that will trap heat inside.
Step 5
Place the black tray flat at the bottom of the box to act as a heat absorber.
Step 6
Measure and cut the mesh so it fits inside the box as a shelf above the black tray.
Step 7
Tape two rolled-up pieces of cardboard or small supports inside the box to hold the mesh shelf in place.
Step 8
Set the mesh on the supports so it forms a steady drying platform above the black tray.
Step 9
Wash your fruit thoroughly under running water to make it clean and safe to dry.
Step 10
With adult help slice the fruit into thin even pieces so they dry faster and evenly.
Step 11
Lay the fruit slices in a single layer on the mesh leaving small gaps between pieces for air to flow.
Step 12
Put your dehydrator outside with the clear cover facing the sun and leave it in a warm sunny spot to dry, checking every few hours and turning slices if needed.
Step 13
When the fruit feels dry and leathery store the pieces in an airtight container and taste your homemade snack.
Step 14
Share photos and a short description of your finished solar dehydrator and dried fruit on DIY.org so everyone can see your cool project.
Help!?
What can we use if we can't find the clear plastic sheet, black tray, or mesh?
Tape a clean picture-frame glass or a clear window pane or shower curtain over the cut-out opening instead of the clear plastic sheet, use a black baking sheet or line a shallow tray with black construction paper for the black tray, and cut a clean window screen or cheesecloth to size for the mesh shelf.
Why isn't the fruit drying or the box getting hot and what should we check?
If the box stays cool or slices stay moist, re-seal the clear plastic sheet edges with extra tape as in the 'tape the clear plastic sheet' step, move the dehydrator to a sunnier spot, make sure the black tray is flat at the bottom to absorb heat, and slice the fruit thinner during the 'With adult help slice the fruit' step so pieces dry faster.
How can we adapt this activity for different age groups?
For toddlers have an adult do cutting and slicing while the child washes fruit and lays slices on the mesh, for elementary kids let them measure and help cut the rectangle and mesh and place the rolled-up cardboard supports, and for teens let them build multiple mesh shelves, experiment with angles for sun exposure, and record drying times to post on DIY.org.
How can we extend or personalize the solar dehydrator to get better results or make it unique?
Paint the inside of the box black before placing the black tray to boost heat absorption, tape a small thermometer under the clear cover to monitor interior temperature while drying, add extra mesh shelves on more rolled-up cardboard supports to dry more slices at once, and decorate the outside before sharing photos on DIY.org.
Watch videos on how to make a solar dehydrator
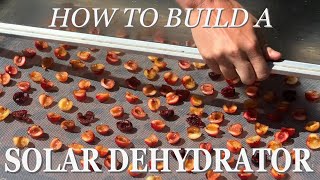
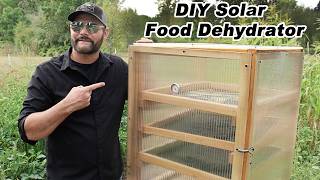
Sustainable homesteading: Our DIY Solar Food Dehydrator FULL Build!
4 Videos

Sustainable homesteading: Our DIY Solar Food Dehydrator FULL Build!
How I built a Solar Dehydrator for $20 - Full Build Tutorial

How To Make A Solar Dryer At Home | Step-by-Step Guide
How To Build A 100% SOLAR Food Dehydrator. Simple Off Grid Food Preservation - No Electricity.
Facts about solar energy and food preservation
☀️ A simple solar dryer can reach about 50–70°C (122–158°F) — hot enough to safely dehydrate many fruits without electricity.
🖤 A black tray absorbs more sunlight and converts it to heat, speeding up the drying process.
🕸️ Using a mesh rack lifts fruit so air can flow underneath and keeps bugs and dirt away from the food.
🍓 Drying fruit can remove up to around 70–80% of its weight (mostly water), concentrating flavor and sweetness.
♻️ Building a dehydrator from a cardboard box and clear cover is an easy form of upcycling — low-cost and eco-friendly!
How do I build a solar dehydrator from a cardboard box to dry fruit?
What materials do I need to make a cardboard solar dehydrator?
What ages is building a solar dehydrator suitable for?
What safety tips should I follow when kids build and use a solar dehydrator?
