Make a solar electric panel
Build a small solar electric panel using mini solar cells, wires, and tape to power an LED while learning about sunlight, circuits, and clean energy.

Step-by-step guide to make a solar electric panel
Solar Energy - How Do Solar Panels Work? - [Video for Kids] #education #learningjunction
Step 1
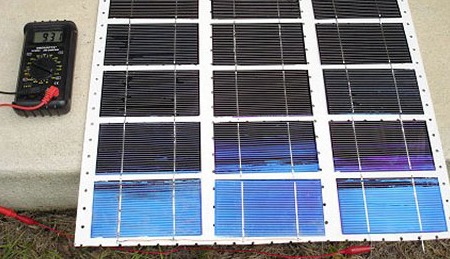
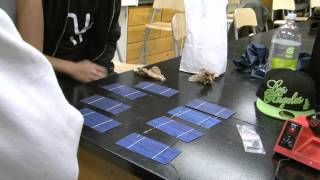
Lay the cardboard on a table and place the four mini solar cells face up in a straight row with a tiny gap between each.
Step 2
Use the ruler and marker to draw a light rectangle around the row so you know where to keep the cells.
Step 3
Cut three short strips of aluminum foil about 2 centimeters long to use as tiny electrical bridges.
Step 4
Fold one foil strip thin and tape it so it touches the shiny metal pad on the right side of the leftmost cell and the shiny pad on the left side of the next cell.
Step 5
Fold the second foil strip thin and tape it so it touches the shiny pad on the right side of the second cell and the shiny pad on the left side of the third cell.
Step 6
Fold the third foil strip thin and tape it so it touches the shiny pad on the right side of the third cell and the shiny pad on the left side of the fourth cell.
Step 7
Tape each solar cell down to the cardboard so the cells and foil bridges do not move.
Step 8
Ask an adult to help and strip about 1 centimeter of insulation off each end of two short wires.
Step 9
Tape one stripped wire end securely to the free metal pad on the left edge of the leftmost cell.
Step 10
Tape the other stripped wire end securely to the free metal pad on the right edge of the rightmost cell.
Step 11
Connect the LED by taping the longer lead to the wire on the rightmost cell and the shorter lead to the wire on the leftmost cell, keeping the leads pressed gently to the wires.
Step 12
Take your solar panel into bright sunlight and point the cells straight at the sun to see if the LED lights.
Step 13
If the LED does not light, press and re-tape any loose foil or wire contacts until the LED turns on.
Step 14
Share a photo and a short description of your finished solar electric panel on DIY.org.
Help!?
What can we use if mini solar cells are hard to find?
If mini solar cells are unavailable, salvage similar cells from an old garden light or calculator and place them face up in a straight row on the cardboard as instructed.
The LED won’t light — what should we check first?
First check the folded aluminum foil bridges, taped wire ends, and LED lead polarity (longer lead to the rightmost wire, shorter to the leftmost) and press or re-tape any loose contacts per the instructions.
How can I adapt this activity for younger or older kids?
For younger children have an adult pre-cut the foil strips and strip the wire insulation while the child tapes cells and connects the LED, and for older kids let them strip wires themselves, try soldering the foil bridges, or add a switch or extra cells as a challenge.
How can we extend or personalize the finished solar panel?
To extend the project, paint the cardboard, add a clear plastic cover, and add more mini solar cells connected with extra foil bridges in series to power a brighter LED or a small motor.
Watch videos on how to make a solar electric panel
How do solar panels work? - Richard Komp
4 Videos
How do solar panels work? - Richard Komp
Tutorial: Solar Cell Operation
Lab 4: Wiring Solar Panels, Part II: Activities

Lab 4: Wiring Solar Panels, Part I: Lecture
Facts about solar energy and basic circuits
☀️ The Sun pours more energy onto Earth in one hour than humans use worldwide in an entire year — that's a lot of clean power to explore!
🔋 Most small silicon solar cells generate about 0.5 volts each, so you can stack (series) several to reach the voltage an LED needs.
💡 LEDs can light using only a few milliamps of current, which makes them perfect for tiny DIY solar projects.
⚡ Putting cells in series raises voltage while putting them in parallel raises current — simple wiring tricks that change what your panel can power.
🌎 Solar panels produce electricity without burning fuel, so they help reduce greenhouse gases and are a great way to learn about sustainability.
How do you build a small solar electric panel to power an LED?
What materials do I need to build a mini solar panel?
What ages is this activity suitable for?
What safety tips should I follow when building a solar panel with kids?
