Shoot wide-angle timelapse
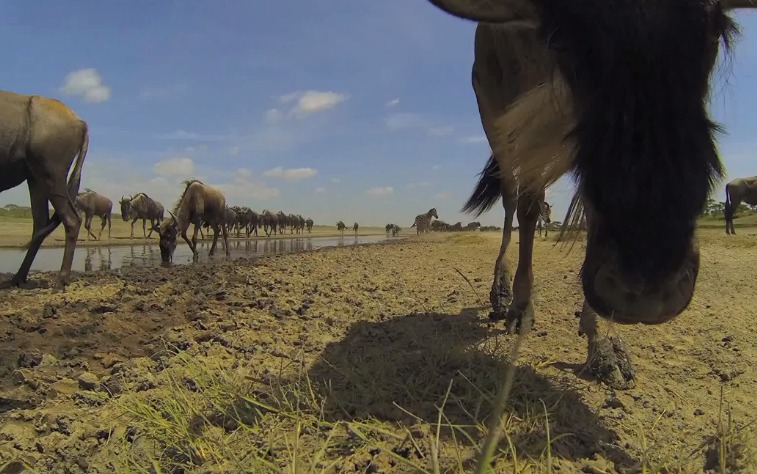
Use a smartphone or camera with a wide-angle lens to shoot a timelapse of clouds or a playground, learning framing and timing.

Step-by-step guide to shoot a wide-angle timelapse
Learn How To Create A Milky Way Time Lapse (start to finish)
Step 1
Choose whether you will film clouds or a playground and pick a nearby safe spot to set up.
Step 2
Check the weather and light and pick a time when clouds are moving or the playground is busy for at least 15 minutes.
Step 3
Attach the wide-angle lens to your device or switch to the wide-angle lens on your camera.
Step 4
Mount your device on the tripod or place it on the sturdy surface and make sure it cannot tip over.
Step 5
Point the camera and frame the shot so you see lots of sky or the whole playground with space for movement.
Step 6
Open your timelapse mode or intervalometer app and set the shooting interval to 2–5 seconds and the total shooting time to at least 15 minutes.
Step 7
Lock the focus and exposure and set the white balance so the picture does not change while recording.
Step 8
Start the timelapse recording and avoid touching or moving the camera while it runs.
Step 9
Check the setup briefly every 5–10 minutes to make sure the camera is steady and battery or storage is okay.
Step 10
Stop the recording when the planned time is up and save or export the timelapse video to your device.
Step 11
Review and lightly edit the clip if needed (trim or set playback speed) and then share your finished creation on DIY.org
Help!?
What can we use if we don't have a wide-angle lens or a tripod?
Use your device's built-in wide-angle camera or switch to the camera's wide-angle setting and stabilize the device on a sturdy surface or stack of books if you don't have a tripod.
My timelapse shows flickering brightness or the camera moved—what should I do?
Stop the recording, follow step 7 to lock focus and exposure and set a fixed white balance, remount the device more securely as in step 4, then restart and check battery and storage every 5–10 minutes as suggested in step 8.
How can I adapt this activity for different ages?
For younger kids have an adult pick the spot, attach the wide-angle lens, and mount the device while the child chooses clouds or playground scenes, and for older kids let them set the 2–5 second interval, lock focus/exposure, edit, and share on DIY.org themselves.
How can we extend or personalize the timelapse beyond the basic instructions?
Frame a colorful foreground object in step 5, try varying the 2–5 second interval or total shooting time, and after stopping the recording use the trim, speed, or music options in the edit step before sharing on DIY.org.
Watch videos on how to shoot a wide-angle timelapse
How to PROPERLY Use a Wide-Angle Lens | Cinematography
4 Videos

How to PROPERLY Use a Wide-Angle Lens | Cinematography
How to draw a classroom in one point perspective, timelapse
Insta360 X3 Timelapse Tutorial
Master your Wide Angle Lens with these 10 Tips
Facts about time-lapse photography
📱 Many smartphones include a built-in timelapse mode — some can even record timelapses in 4K using interval settings.
☁️ Clouds can move surprisingly fast: high-altitude winds can push them at over 100 km/h, making dramatic timelapses.
🎥 Wide-angle lenses capture much more of a scene — a 24 mm lens on a full-frame camera shows roughly an 84° field of view.
⏱️ Timelapse compresses time: shooting one photo every 5 seconds for 1 hour yields about 24 seconds of video at 30 fps.
🧭 A steady tripod and a level horizon make timelapses look professional — tiny shakes and tilts become obvious when sped up.
How do you shoot a wide-angle timelapse with a child?
What materials do I need to shoot a wide-angle timelapse?
What ages is a wide-angle timelapse activity suitable for?
What safety tips should I follow when shooting a timelapse with kids?
