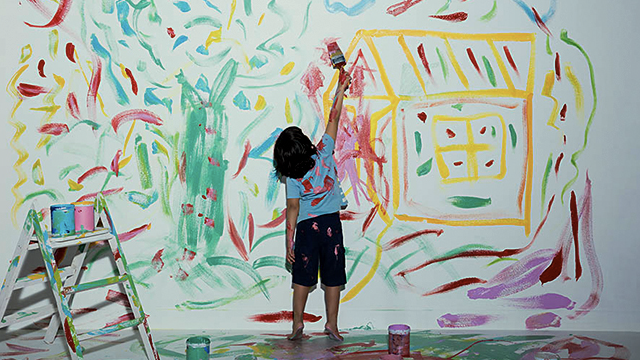
Draw something giant
Draw a giant animal or landscape on large paper or sidewalk using chalk; plan proportions, use measuring steps, and explore scale, color, and creativity.

Drawing Apps
Step-by-step guide to draw a giant animal or landscape
Step 1
Pick a giant animal or landscape you want to draw and say its name out loud.
Step 2
Decide how big your drawing will be by choosing a length and width in feet or meters.
Step 3
Measure the chosen space and mark the four corners with chalk or tape.
Step 4
Make a small thumbnail sketch on scrap paper showing the main parts and where they sit.
Step 5
Draw a simple grid on your big space with evenly spaced lines using the tape measure or string.
Step 6
Lightly sketch the main shapes onto the big area using the grid to keep proportions correct.
Step 7
Measure one or two key parts (like head width or mountain height) and adjust your sketch so sizes match your thumbnail.
Step 8
Choose which chalk colors you will use for big areas and which for details.
Step 9
Fill in the large color areas first using broad strokes of chalk.
Step 10
Add smaller details like eyes texture grass or waves with finer chalk lines.
Step 11
Add outlines and simple shadows with darker or lighter chalk to make parts stand out.
Step 12
Write your name and a short title near the edge of your drawing.
Step 13
Share your finished creation on DIY.org
Help!?
What can I use instead of sidewalk chalk or a tape measure if I can’t find them?
If you don’t have sidewalk chalk use washable tempera paint, crushed pastels, or thick sidewalk crayons and replace the tape measure in Step 4 with a yardstick, a marked rope, or a long piece of string.
What should I do if my big drawing looks out of proportion or the grid lines are uneven?
Re-check the measurements from Step 4, erase or blend back the affected grid squares, then use your thumbnail sketch from Step 5 and measure one or two key parts as in Step 6 to rescale and correct the sketch.
How can I adapt this activity for younger or older kids?
For younger children, shrink the drawing area, pre-draw the grid and main shapes in Steps 3–6 and use thicker chalk, while older kids can use more grid squares, finer chalk for Step 9 details, and add complex shadows in Step 10.
How can we make the finished giant drawing more special or longer-lasting?
Enhance the project by adding natural textures like leaves or sand to areas in Step 9, taking a photo timelapse while filling in Steps 8–10, and following Step 11 to write your name and share the final image on DIY.org.
Watch videos on how to draw a giant animal or landscape
How to Draw a Monster - Step by Step for Kids
4 Videos
How to Draw a Monster - Step by Step for Kids
How to Draw Trex dinosaur (Draw for Kids) Beginner vs Pro - Easy Step By Step

How To Draw Godzilla
How To Draw A Spinosaurus Dinosaur
Facts about large-scale drawing and proportions
🖍️ Julian Beever creates pavement chalk drawings that look three-dimensional from a single vantage point.
🎨 Street painting festivals happen worldwide where artists fill whole streets with giant chalk murals.
📏 Artists often use grids or counting footsteps to keep proportions correct when drawing big designs.
🌧️ Chalk drawings are temporary — rain and foot traffic can wash them away, so take photos to preserve them.
👣 Measuring with steps or a simple grid helps you scale a small sketch into a giant animal or landscape accurately.
How do I draw a giant animal or landscape on large paper or sidewalk?
What materials do I need to draw a giant chalk animal or landscape?
What ages is this giant drawing activity suitable for?
What are the benefits of drawing large-scale animals or landscapes with chalk?
