Draw a map to a wizard's lair
Draw a detailed map leading to a wizard's lair, planning landmarks, compass directions, scale, and a clear route while practicing map symbols.


Step-by-step guide to draw a map to a wizard's lair
How to draw a Fantasy Map - tutorial for beginners
Step 1
Gather your Materials so you have everything ready to draw and color.
Step 2
Decide a map scale and write it at the top of the page (for example 1 cm = 50 paces).
Step 3
Draw a small scale bar that matches your chosen scale so distances are clear.
Step 4
Draw a neat border around the edges of your paper to frame the map.
Step 5
Draw a compass rose showing North and label N E S W so the map has direction.
Step 6
Mark the starting point (like a village) with a clear dot and a small name.
Step 7
Mark the wizard’s lair with a special symbol (like a star or tower) and label it "Wizard's Lair."
Step 8
Lightly plan the route by placing small pencil dots from the start to the lair.
Step 9
Draw the route over the dots using a dashed or solid line so the path is easy to follow.
Step 10
Sketch important landmarks along the route (for example a forest a river a bridge) with simple drawings.
Step 11
Create a simple symbol for each type of landmark and draw that symbol near each sketch.
Step 12
Draw a legend box in a corner and place each symbol with its name inside the box.
Step 13
Label any compass directions on the map edges and add short notes like "2 km north of the bridge."
Step 14
Trace important lines and symbols with your black marker and gently erase extra pencil marks.
Step 15
Color your map and then share your finished wizard's lair map on DIY.org
Help!?
What can we use if we don't have a black marker or colored pencils listed in the materials?
Use a dark ballpoint or fine-tip permanent pen to 'trace important lines and symbols with your black marker,' and substitute crayons, washable markers, or glued-on colored paper for 'color your map' if colored pencils are missing.
What should we do if the route looks messy or the pencil dots smudge when tracing the path?
Lightly plan the route with pencil dots as instructed, then use a ruler for straight 'route' lines, let ink dry before erasing, and gently remove extra pencil marks with a soft eraser to avoid smudges or torn paper.
How can I change the activity to suit different ages while still following the map steps?
For younger kids simplify by skipping the scale bar and using stickers for landmarks and a pre-drawn 'compass rose,' while older kids can calculate exact distances with the 'scale' and add labeled notes like '2 km north of the bridge' and a more detailed 'legend box.'
What are easy ways to make the wizard's lair map more creative or challenging after finishing the basic steps?
Personalize and extend the map by adding a backstory for the 'Wizard's Lair,' drawing secret traps or alternate routes on the 'route' line, creating a coded legend in the 'legend box,' or building a small 3D model of key 'landmarks' to photograph and post to DIY.org.
Watch videos on how to draw a map to a wizard's lair
Fantasy Map Making | Step-by-Step
4 Videos
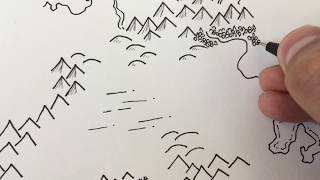
Fantasy Map Making | Step-by-Step
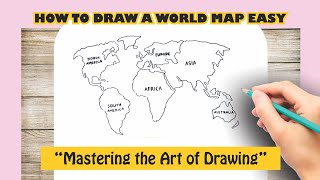
How to Draw a World Map Easy
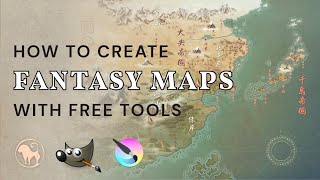
How to Create Fantasy Maps with Free Tools (GIMP, Krita)
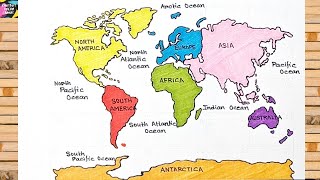
How to Draw a World Map Easily : Step-by-Step Tutorial for Beginners
Facts about map reading and cartography
🗺️ The oldest known map is a Babylonian clay tablet from around 600 BCE — people have been mapping places for thousands of years!
🧭 A compass rose shows directions on a map, and magnetic compasses were widely used by sailors from about the 1100s onward.
📏 A map scale tells you how much the real world is shrunk — 1:10,000 means 1 cm on the map equals 100 meters in real life.
🔍 Map symbols are a secret code: trees for forests, blue lines for rivers, and triangles often mean mountains—learn them and you can 'read' any map.
✨ Famous fantasy mapmakers like J.R.R. Tolkien drew whole worlds on paper, and the 'X marks the spot' treasure idea became popular after Treasure Island (1883).
How do you draw a map to a wizard's lair?
What materials do I need to draw a wizard's lair map?
What ages is drawing a wizard's lair map suitable for?
What are the benefits, safety tips, and fun variations for a wizard's lair map?
