Construct a pocket amplifier
Build a small battery-powered pocket amplifier using a speaker, portable battery, audio jack, simple circuit, and safe assembly to boost phone or instrument sound.


Step-by-step guide to construct a pocket amplifier
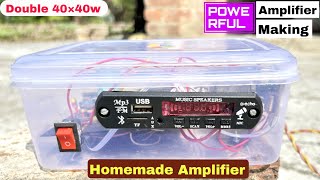
Make simple powerful Amplifier using TDA2050, Homemade Amplifier 12v
Step 1
Gather all materials and put them on a clean table so you can reach everything easily.
Step 2
Make sure the portable battery pack is charged and ready to use.
Step 3
Look at the speaker and find its two metal terminals where wires will connect.
Step 4
Look at the amplifier module and find the screw terminals labeled for the speaker outputs.
Step 5
Use the wire stripper or scissors to strip about 1 centimeter of insulation off both ends of two short pieces of hookup wire.
Step 6
Secure one stripped wire to the speaker positive terminal and the other to the speaker negative terminal using electrical tape so each wire is attached firmly.
Step 7
Loosen the amplifier speaker output screws with the small screwdriver and insert the speaker wires into the matching output terminals then tighten the screws to hold the wires.
Step 8
Find the amplifier power input screws and the battery pack positive and negative leads so you know which way to connect them.
Step 9
Secure the battery pack leads to the amplifier power terminals matching + to + and - to - and tighten the screws so the power is connected safely.
Step 10
Plug one end of the 3.5 mm audio cable into the amplifier input jack.
Step 11
Plug the other end of the 3.5 mm audio cable into your phone or instrument headphone jack.
Step 12
Turn on the battery pack or the amplifier power switch to power up your pocket amp.
Step 13
Play music or strum your instrument at low volume on your device and slowly increase the volume until the sound is boosted clearly.
Step 14
Decorate the amplifier with colored tape or markers and tidy the wires with electrical tape to make it look awesome.
Step 15
Share a photo or video of your finished pocket amplifier on DIY.org so everyone can see your creation.
Help!?
What can we use if we can't find the portable battery pack listed in the materials?
If the portable battery pack is unavailable use a 9V battery with a battery-snap-to-terminal adapter or a USB power bank with a 5V-to-terminal adapter, making sure the adapter voltage matches the amplifier power input before connecting the battery pack leads.
If I follow the steps and there's no sound, where should I check first?
First check that the speaker wires are stripped about 1 cm, securely taped to the speaker terminals, correctly inserted and tightened in the amplifier speaker output screws, and that the battery pack is charged and connected + to + and - to - at the amplifier power terminals.
How should this activity be changed for younger kids versus older kids?
For younger children have an adult pre-strip the wires, pre-loosen the amplifier screws, and supervise taping and terminal connections, while older kids can strip and tighten themselves and teens can add soldered joints and design a decorated enclosure.
How can we improve or personalize the finished pocket amplifier?
You can build a small cardboard or 3D-printed enclosure to tidy and protect the speaker and amplifier, add an LED power indicator at the amplifier power terminals, and optionally attach a Bluetooth receiver to the 3.5 mm input for wireless playback before decorating with colored tape or markers.
Watch videos on how to construct a pocket amplifier
DIY Class AB Power Amplifier for Beginners
4 Videos
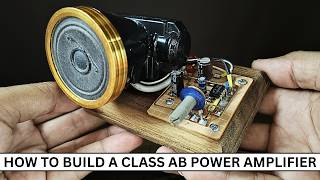
DIY Class AB Power Amplifier for Beginners
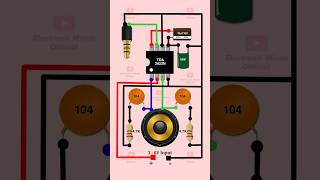
Mini Audio Amplifier Circuit with TDA2822N #amazingproject
DIY Amplifier Tutorial: How to Make Your Own Amplifier at Home
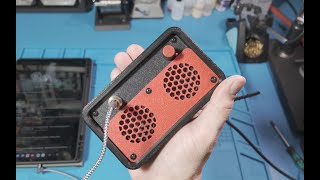
DIY Mini Guitar Amp from Salvaged Bluetooth Speaker - Easy 3D-Printed Build!
Facts about electronics and circuitry for kids
🔊 Tiny amp chips like the LM386 can deliver about 0.5–1 watt — enough to boost a phone or drive a small speaker.
🔋 A single 9V or a small USB power bank can run a pocket amp for hours at low volume; louder playback drains batteries faster.
🎛️ Many pocket amps only need one amplifier chip plus a few resistors and capacitors — you can build one in an afternoon!
🎧 The little 3.5mm headphone jack (TRS) is a super-easy way to send phone or instrument output into your amp.
🛡️ Safe kid-friendly builds use insulated wires, secure battery holders, low voltages, and adult supervision for soldering or hot glue.
How do you build a pocket amplifier to boost phone or instrument sound?
What materials do I need to construct a pocket amplifier?
What ages is this pocket amplifier activity suitable for?
What safety tips and variations should parents consider for this pocket amplifier?
