Draw a wizard
Draw a wizard using simple shapes, pencils, and colors. Learn proportions, facial expressions, costume details, and add magical effects step by step.

Drawing Apps
Step-by-step guide to draw a wizard
Step 1
Clear a space and put your paper pencil eraser and coloring materials in front of you.
Step 2
Lightly draw a circle near the top third of the paper for the wizard’s head.
Step 3
Draw a light vertical center line from the top of the paper down to where the feet will be to help with proportions.
Step 4
Sketch an oval or rectangle under the head along the center line for the torso.
Step 5
Draw two simple lines from the shoulders for the arms and small circles for the hands.
Step 6
Draw two straight lines from the bottom of the torso for the legs and add small ovals for the feet.
Step 7
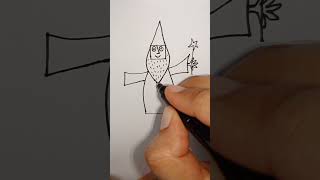
Draw a tall triangle on top of the head for the wizard hat and add a curved brim around the forehead.
Step 8
Draw two simple eyes and light eyebrows to give your wizard an expression.
Step 9
Draw a nose and a mouth that match the expression you want your wizard to have.
Step 10
Add hair or a beard using curved lines to show age or style.
Step 11
Draw a flowing robe and a belt using long curved lines and a few simple folds.
Step 12
Draw a staff or wand next to one hand and add a circle or star at the top.
Step 13
Erase the light center line and any extra sketch marks to clean up your drawing.
Step 14
Color your wizard using your coloring materials choosing colors for skin hat robe and accessories.
Step 15
Add magical effects like sparkles swirls and stars around the hat and staff and then share your finished creation on DIY.org.
Help!?
What can we use if we don't have an eraser or coloring pencils?
If you don't have an eraser or colored pencils, use a kneaded eraser or a clean corner of white bread to lift light sketch marks like the center line and swap in washable markers or crayons to color the wizard's skin, hat, robe, and accessories.
My wizard's arms and legs look crooked—how do we fix that?
If the arms or legs look uneven, lightly recheck and redraw them using the vertical center line and shoulder/hip positions as guides, then erase extra sketch marks to keep the wizard balanced.
How can I change the activity for younger or older kids?
For younger kids, simplify by drawing big basic shapes (circle head, triangle hat) and coloring with crayons, while older kids can add beard detail, robe folds, shading, and intricate magical effects with colored pencils or markers.
What are some fun ways to make the wizard more special or advanced?
To enhance the drawing, glue small fabric or foil to the robe, sprinkle glitter on the stars around the hat and staff, vary the hat and staff designs, and write a short wizard backstory to share with your finished creation on DIY.org.
Watch videos on how to draw a wizard
Draw a Simple Wizard with Me! 🧙♂️✨ | Fun & Easy Drawing Tutorial
4 Videos
Draw a Simple Wizard with Me! 🧙♂️✨ | Fun & Easy Drawing Tutorial

How to Draw a Wizard | Easy Step-by-Step Drawing Tutorial for Kids

How to Draw a Wizard Step by Step | Twinkl Illustrators | Twinkl Kids Tv

How to draw a Wizard - Illustration Live with Frank Rodgers
Facts about drawing and character design for kids
🧙♂️ Famous wizards like Gandalf and Merlin are often shown with long beards and robes — a quick costume shortcut to show age and wisdom.
✏️ Artists often measure body proportions in 'heads' — an adult figure is typically about 7–8 heads tall for realistic proportions.
🎨 Using complementary colors (opposites on the color wheel) makes magical glows and spells pop against a character's outfit.
👀 Eyes and the mouth are the most expressive facial features; small changes there can show happy, stern, surprised, or mysterious wizards.
✨ To draw a glowing spell, layer soft light tones, blur the edges slightly, and add tiny white highlights for sparkle.
How do I help my child draw a wizard step by step?
What materials do I need to draw a wizard with my child?
What ages is this wizard drawing activity suitable for?
What are the benefits of drawing a wizard for children?
