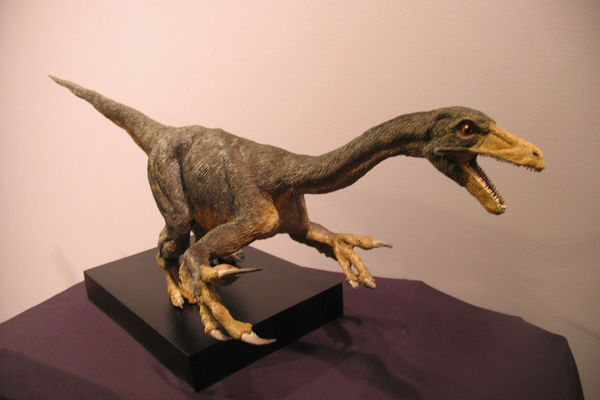
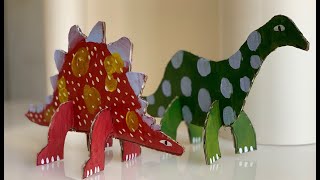
Make a dinosaur model
Build a simple dinosaur model using cardboard, clay, or recycled materials. Paint, assemble movable parts, and learn about dinosaur shapes and balance.


Step-by-step guide to make a dinosaur model
DIY Spinosaurus Using Cardboard - How to Make a Dino-mite Craft! | DIY Dinosaur Using Cardboard
Step 1
Pick which dinosaur you want to make for your model like a T-rex or a long-neck.
Step 2
Use a pencil to draw simple shapes for the body head tail and legs on the cardboard.
Step 3
Cut out each cardboard shape carefully with scissors.
Step 4
Roll and shape clay pieces for the head feet and any thick parts you want to add.
Step 5
Glue the clay pieces onto the matching cardboard parts and let the glue hold them.
Step 6
Mark the spots on the body and on each limb where you want movable joints to be.
Step 7
Make small holes at each marked joint spot using the tip of a pencil or scissors with adult help.
Step 8
Join each limb to the body by pushing a paper fastener or toothpick through the holes and securing it so the parts can move.
Step 9
Press extra small clay pieces onto the body to add eyes spikes scales or other details.
Step 10
Paint your dinosaur with colours and patterns you like.
Step 11
Let the paint and clay dry completely in a safe place.
Step 12
Stand your dinosaur on a flat surface to see if it balances.
Step 13
If it tips over adjust the tail angle or spread the legs until it stands steady.
Step 14
Share a photo of your finished dinosaur model and tell what you learned about its shape and balance on DIY.org
Help!?
What can we use instead of modeling clay or paper fasteners if we don't have them?
Use crumpled aluminum foil or tightly rolled newspaper wrapped with masking tape as a substitute for clay and use a wrapped toothpick, sturdy brad, or a straightened paper clip as a movable joint instead of a paper fastener, then glue them onto the cardboard shapes.
My dinosaur's legs are floppy or fall off—what should I try?
If limbs are loose after pushing a paper fastener or toothpick through the holes, make the holes slightly smaller, wrap the toothpick with tape, add a dab of glue at the joint, or press extra clay around the hole when you join each limb to the body to tighten the connection.
How can I adapt this activity for different ages?
For younger children, have an adult pre-draw and pre-cut the cardboard shapes and supervise making holes and joining limbs, while older kids can draw more detailed dinosaur shapes, make pencil-tip holes themselves, experiment with wire armatures inside clay pieces, and paint finer patterns.
How can we make the model more realistic or interactive?
Enhance your dinosaur by pressing textured items like bubble wrap or small pasta shells into the clay for scales, adding an extra paper fastener for a movable jaw, painting detailed colors and patterns, and mounting the finished dinosaur on a painted cardboard base to test and adjust its balance.
Watch videos on how to make a dinosaur model
How to make dinosaur with clay | Clay Modelling Dinosaur
4 Videos
How to make dinosaur with clay | Clay Modelling Dinosaur
Tutorial How to Make Dinosaurs With Recyclable Materials - Dinosaur Crafts -Recycled Dinosaurs
How To Make A Cardboard Dinosaur |DIY Easy Cardboard Dinosaur Triceratops | Dinosaurs For Kids
Make your own 3D Dinosaurs!
Facts about model making for kids
🦕 Dinosaurs lived during the Mesozoic Era for about 165 million years — way longer than humans have existed!
⚖️ Balance matters: a model’s center of mass must sit over its feet or it will tip — adding a bit of weight to the tail can help stabilize it.
♻️ Recycled materials like cardboard, bottles, and scrap fabric are perfect for dinosaur textures and keep stuff out of the trash.
🎨 Air-dry clay hardens without a kiln and acrylic paint works great on cardboard, clay, and plastic for colorful dinosaurs.
🔧 Simple joints using brads, straws, or cloth hinges make fun movable limbs so your dinosaur can pose and play.
How do I make a simple dinosaur model at home?
What materials do I need to make a cardboard and clay dinosaur?
What ages is this dinosaur model activity suitable for?
What are the benefits and safety tips for making dinosaur models?
