Assemble a model rocket kit
Assemble a model rocket kit with adult supervision, identify parts and basic aerodynamics, decorate it, and prepare for a supervised outdoor launch.


Step-by-step guide to assemble a model rocket kit
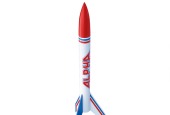
Estes "Mini Alpha" model rocket assembly
Step 1
Open the rocket kit box and lay all parts out neatly on a clean workspace.
Step 2
Check the parts against the kit parts list and tell your adult if anything is missing.
Step 3
Put on your safety goggles before you touch any rocket parts.
Step 4
With your adult, point to and name the body tube nose cone fins engine mount parachute and launch lug.
Step 5
Ask your adult to explain how the nose cone reduces air resistance and how fins help keep the rocket flying straight.
Step 6
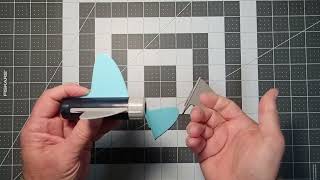
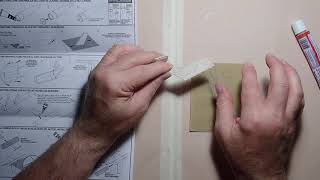
Lightly sand each fin root to make the fin edges smooth and ready for glue.
Step 7
Dry-fit each fin on the body tube and mark each fin’s location with a pencil.
Step 8
Glue the fins to their marked positions on the body tube following the kit directions.
Step 9
Insert the engine mount into the back of the body tube and secure it as the kit instructions say.
Step 10
Decorate your rocket with colouring materials and let the decorations dry completely.
Step 11
Stuff the recommended amount of recovery wadding into the body tube as the kit instructs.
Step 12
Fold the parachute neatly and tuck it into the body tube above the wadding.
Step 13
Attach the nose cone securely onto the body tube.
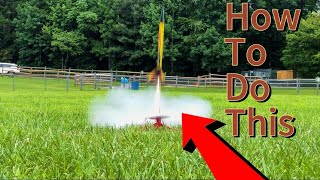
Step 14
With your adult, choose a safe open launch site and then have the adult set up the launch pad connect the controller insert the engine and igniter and perform the final safety checks and supervised launch.
Step 15
Share a photo and a short description of your finished rocket and launch experience on DIY.org.
Help!?
What can we use if the kit’s parachute, recovery wadding, or safety goggles are hard to find?
Use only manufacturer-approved replacement parachutes and flame-resistant recovery wadding bought from a hobby shop, and substitute missing goggles with ANSI-rated safety glasses before you 'put on your safety goggles' in the instructions.
My fins keep shifting or the glue doesn't hold—what should we try?
If fins shift, repeat the 'lightly sand each fin root' and 'dry-fit each fin' steps, mark locations with a pencil, then use the kit-recommended adhesive and hold a straightedge against the body tube while the glue cures following the kit directions.
How can we adapt the build for different age groups?
For younger children let them sort parts, name the body tube/nose cone/fins and decorate while an adult handles sanding, gluing, and the engine/igniter/launch steps, and for older kids let them perform sanding, marking, gluing, engine mount insertion and learn about how the nose cone reduces air resistance under supervision.
How can we personalize or extend the rocket project after assembly?
After decorating as instructed, personalize the rocket with reflective tape or a painted emblem, and consider adding a lightweight altimeter or small camera that fits inside the body tube and stays within the kit's recommended weight limits to record flight data to share on DIY.org.
Watch videos on how to assemble a model rocket kit
Assembling the Estes Alpha iii Model Rocket with step by step instructions.
4 Videos
Assembling the Estes Alpha iii Model Rocket with step by step instructions.
Estes "Celestial Explorer" model rocket assembly
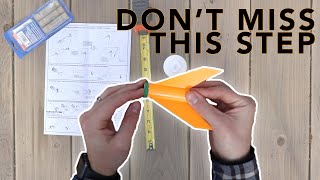
How To Build and Launch Your Own Model Rocket!
Estes "Wizard" model rocket assembly
Facts about model rocketry for kids
🚀 Some model rockets can fly over 1,000 feet high — small kits reach a few hundred feet while bigger motors go much higher.
🧩 Common rocket parts are the nose cone, body tube, fins, engine mount, and a recovery device like a parachute or streamer.
🏭 Estes Industries, founded by Vern Estes in 1958, helped popularize model rocketry by selling easy kits and reliable engines.
🔠 Rocket motors are letter-classified (A, B, C…) and each letter roughly doubles the total impulse—so higher letters mean more power.
🛡️ The National Association of Rocketry (NAR) publishes safety codes; with adult supervision and the code, launches are safe and fun.
How do I assemble a model rocket kit with my child?
What materials and tools do we need to build and launch a model rocket?
What ages is assembling and launching a model rocket suitable for?
What safety precautions should we follow when assembling and launching a model rocket?
