Make environment textures
Make environment textures using crayons, paint, sponges, and found materials to create repeating patterns and surface details for dioramas or game backgrounds.

Step-by-step guide to make environment textures
Texture INTERACTIVE FOR KIDS
Step 1
Gather all your materials and put them on a clear table space so everything is easy to reach.
Step 2
Choose the cardboard or sturdy paper base that will become your diorama or background surface.
Step 3
Pick six different found materials to make texture stamps like a leaf bubble wrap a fabric scrap a twig a sponge piece and a cardboard edge.
Step 4
Squeeze small amounts of each paint color onto separate sections of a paper plate to make your paint palettes.
Step 5
Test each found material by pressing it into paint and stamping on scrap paper to see the mark it makes.
Step 6
Choose which textures will represent parts of your scene for example bumpy for rocks leafy for bushes and dotted for sand.
Step 7
Colour large areas of your base with crayons to make a bright base layer for your textures.
Step 8
Dip a clean sponge in a light wash of paint and dab it across an area to create a soft background wash.
Step 9
Dip one found material lightly into paint so it is covered but not dripping.
Step 10
Press that found material onto your base repeatedly to make a neat repeating pattern in the area you chose.
Step 11
Repeat steps 9 and 10 with your other found materials to add different repeating patterns across the scene.
Step 12
Use crayons to draw small surface details like grass blades veins or tiny stones over the painted textures.
Step 13
Let your artwork dry completely on a flat surface so the paint and crayons stay in place.
Step 14
Share a photo of your finished texture scene on DIY.org so other kids can see your cool patterns.
Help!?
What can we use instead of hard-to-find items like bubble wrap, twigs, or sponges listed in step 3?
If you can't find the bubble wrap, twig, or sponge from step 3, substitute crumpled aluminum foil for bubble wrap, a rolled strip of corrugated cardboard for a twig edge, and a kitchen scrub pad or folded paper towel for a sponge piece.
My stamps are smudging or leaving faint marks—how can I fix this during steps 5 and 9–11?
If stamps smudge or are faint when following steps 5 and 9–11, blot excess paint on scrap paper from the test in step 5, press evenly and firmly when stamping, and adjust paint thickness so it's covered but not dripping as instructed in step 9.
How can I adapt the activity for different ages while following steps 3–11?
For younger kids, simplify steps 3–11 by using three large textures, bigger stamps, and washable paints, while older kids can layer multiple repeating patterns and add fine crayon details from step 11 for more complex scenes.
How can we extend or personalize the texture scene before sharing it on DIY.org as in step 13?
To extend and personalize the project, glue small real natural items or fabric scraps onto your diorama base, add a short written caption or mini story about the scene, or fold the cardboard into a 3D diorama before photographing for step 13.
Watch videos on how to make environment textures
Evan-Moor's Teaching Kids Art: Learning About Texture with Paint
4 Videos
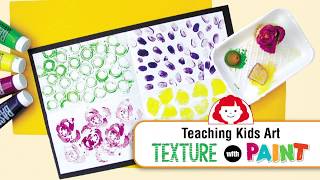
Evan-Moor's Teaching Kids Art: Learning About Texture with Paint
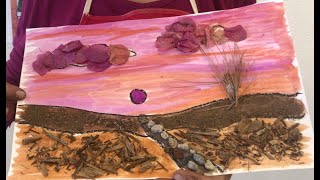
The Art of Nature for Kids - A Nature Collage
Art Education - Elements of Art - Texture - Getting Back to the Basics - Art For Kids - Art Lesson
🍃 Nature-Texture Rubbing Art for Kids
Facts about texture techniques and surface design
🖍️ Crayola introduced the first colored wax crayon box in 1903, helping make crayons a kid-favorite art tool for generations.
🧽 Sea sponges are commonly used by artists to dab paint and create natural-looking textures for landscapes and diorama scenery.
♻️ Upcycling found materials (cardboard, leaves, fabric scraps) not only adds one-of-a-kind surface detail but also cuts down on craft waste.
🔁 M.C. Escher popularized tessellations—clever repeating patterns that still inspire background art and game tile designs.
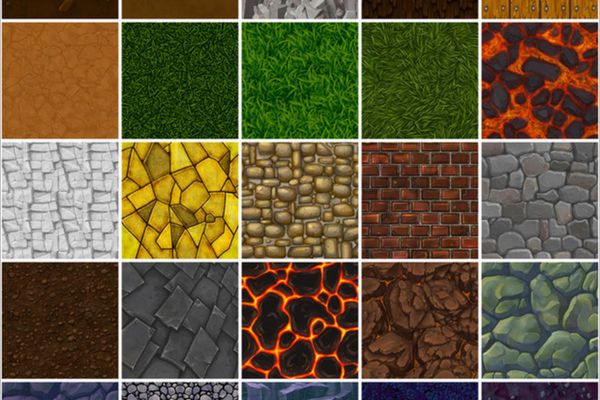
🎮 Game artists often use small repeating 'texture tiles' (texture maps) to build big environments while keeping file sizes small.
How do you make environment textures for dioramas and game backgrounds?
What materials do I need to create environment textures?
What ages is this texture-making activity suitable for?
What are some variations and creative ideas for environment textures?
