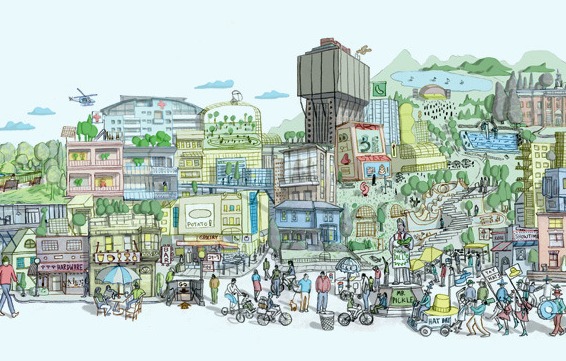
Draw a fantasy neighborhood
Draw a fantasy neighborhood filled with imaginative houses, parks, and creatures. Plan layout, sketch details, color, and label features to tell a story.

Drawing Apps
Step-by-step guide to draw a fantasy neighborhood
How To Draw A Farm Collection - Art For Kids Hub
Step 1
Gather all your materials and find a flat workspace where you can draw without interruptions.
Step 2
Lightly draw the main layout of your fantasy neighborhood with roads parks and open spaces.
Step 3
Choose and mark spots for five special places like a treehouse castle candy shop flying-car garage or bubble pond.
Step 4
Sketch each imaginative house in its marked spot using big simple shapes so each looks different.
Step 5
Draw parks playgrounds gardens and paths connecting the houses using curvy or zigzag lines to make it fun.
Step 6
Sketch friendly creatures and fantasy vehicles near the places where they belong so they look part of the neighborhood.
Step 7
Add small details to each building and creature like windows doors roofs scales or wings to give personality.
Step 8
Trace your favorite pencil lines with the fine-tip black pen to make the important shapes stand out.
Step 9
Gently erase the extra pencil lines that you no longer need so your drawing looks clean.
Step 10
Color the houses parks creatures and background using your coloring materials to make everything bright.
Step 11
Write short labels for each place and one-line story notes that explain what happens there.
Step 12
Create a small legend and add a title at the top so viewers understand your symbols and story.
Step 13
Add final tiny decorations like stickers sparkles or patterns and sign your name in a corner.
Step 14
Take a photo of your finished fantasy neighborhood and share it on DIY.org.
Help!?
What can I use if I don't have a fine-tip black pen, stickers, or special coloring materials?
Use a sharpened dark pencil or a thin felt-tip marker to trace your favorite pencil lines, replace stickers with hand-drawn sparkles or glued paper cutouts, and color with crayons, colored pencils, or watered-down markers before photographing your finished neighborhood to share on DIY.org.
My pen bleeds and pencil lines smudge—how can I fix that when tracing and erasing?
To prevent ink bleed and smudging when you trace favorite lines with a fine-tip black pen, test the pen on scrap paper, let each traced area dry fully, and then gently erase the extra pencil lines with a soft eraser as the instructions say.
How can I adapt this activity for different ages or abilities?
For younger children, simplify by drawing only three big special places (like a treehouse, candy shop, and bubble pond) and using chunky crayons and pre-drawn shapes, while older kids can add tiny details, a full legend, and one-line story notes and trace with a fine-tip pen as in the steps.
How can we extend or personalize our fantasy neighborhood once it's finished?
Extend the project by adding interactive paper flaps to hide one-line story notes, making a color-coded legend that links creatures to their homes, adding extra stickers or sparkles as final tiny decorations, and creating a short video tour to accompany the photo for DIY.org.
Watch videos on how to draw a fantasy neighborhood
How to draw Easy Village Landscape Art by Pencil
4 Videos
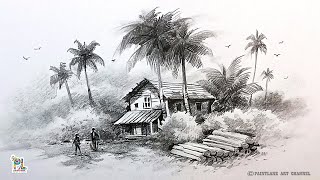
How to draw Easy Village Landscape Art by Pencil

How to draw Landscape Art for Beginners | Children Scenery Art
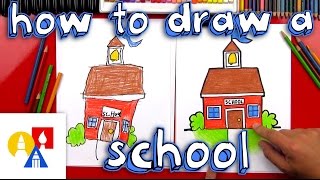
How To Draw A Cartoon School
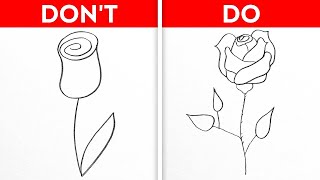
Fun & Easy Drawing Tutorial For Beginners
Facts about drawing and storytelling for kids
🗺️ Medieval mapmakers sometimes drew sea monsters and mythical places—maps used to tell stories as much as show routes.
🏡 Real neighborhoods can contain thousands of homes, but a fantasy neighborhood can pack in floating houses, mushroom cottages, and more!
🎨 Fantasy art often blends real-world architectural details with imaginative elements to make magical places feel believable.
🐉 Mythic neighborhoods frequently include creatures like dragons, sprites, or talking trees—characters that can drive your neighborhood's stories.
📏 Using a simple scale (for example 1 cm = 10 m) helps keep your drawn streets, parks, and houses sized consistently—or you can ignore it for a surreal look!
How do you draw a fantasy neighborhood filled with imaginative houses, parks, and creatures?
What materials do I need to draw a fantasy neighborhood?
What ages is this activity suitable for?
What are the benefits of drawing a fantasy neighborhood?
