Make a screen print
Make a simple screen print using a cardboard frame and mesh, cut a stencil, apply water-based paint, and transfer your design onto paper or fabric.

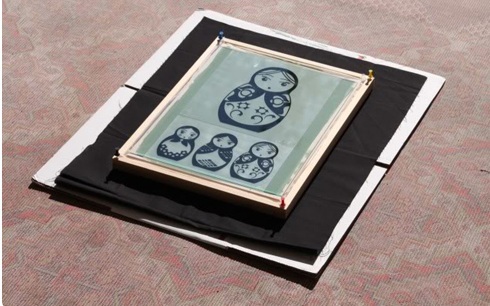

Step-by-step guide to make a simple screen print
DIY SCREEN PRINTING w/ Starter Kit! | Screen Life
Step 1
Spread the plastic sheet on your table to protect it from paint.
Step 2
Trace a rectangle near the center of the cardboard leaving a 2 inch border to make a frame.
Step 3
Cut out the traced rectangle to create the cardboard frame using scissors or a craft knife with adult help.
Step 4
Lay the mesh over the top of the frame and smooth it flat so there are no wrinkles.
Step 5
Tape the mesh to the back edges of the cardboard all the way around to hold it tightly.
Step 6
Draw a simple design on the stencil paper using a pencil.
Step 7
Cut out the drawn shapes from the stencil paper to make holes where paint will pass through.
Step 8
Tape the stencil flat onto the top of the mesh so the cut shapes sit over the frame window.
Step 9
Tape the paper or fabric to the table under the frame so it cannot move while you print.
Step 10
Pour a small amount of water-based paint onto the plate or shallow tray.
Step 11
Dab the sponge or roll the paint so it is evenly loaded but not dripping.
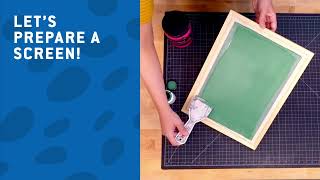
Step 12
Press the loaded sponge or roller firmly across the mesh over the stencil to push paint through in even strokes.
Step 13
Lift the frame straight up off the paper or fabric to reveal your printed design.
Step 14
Leave your print to dry completely before touching it.
Step 15
Share your finished creation on DIY.org
Help!?
What can we use if we don't have mesh or stencil paper?
If you don't have mesh, stretch and tape a clean nylon stocking or a piece of window screen over the cardboard frame, and if you lack stencil paper use thin cereal-box cardboard or clear acetate from packaging so you can cut shapes in Step 6.
My print is coming out blotchy or paint is leaking under the stencil—what should I check?
Check that the mesh is smoothed flat and taped tightly with no wrinkles (Steps 4–5), load the sponge lightly on the plate so paint is not dripping (Steps 10–11), press with even firm strokes (Step 12), and lift the frame straight up to avoid smudging (Step 13).
How can I adapt this screen-printing activity for different ages?
For preschoolers, use pre-cut large shapes on thick paper, washable paint and an adult to dab the sponge (Steps 6,10–11), while older kids can draw detailed stencils, cut them with a craft knife with supervision (Step 3) and try multi-layer printing.
What are some ways to extend or personalize our screen prints?
Try printing multiple layers with different stencils and colors (Steps 6,11–13), use fabric paint to print on T-shirts or tote bags (Step 12), and let each layer dry completely before adding the next for crisp results.
Watch videos on how to make a simple screen print
The Basics of Screen Printing | Screen Printing Tutorial
4 Videos
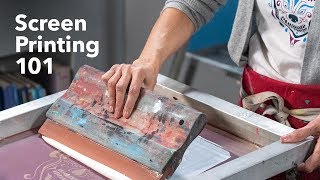
The Basics of Screen Printing | Screen Printing Tutorial
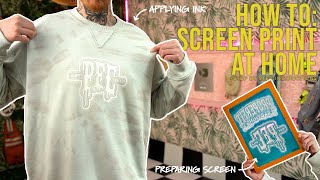
How to Screen Print at Home (STEP BY STEP GUIDE)(Supplies, Coating Screen, Burning screen, Printing)
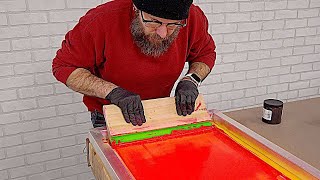
Getting Started in Screen Printing. How it Works and What You Need!
DIY Screen Printing Using Speedball's Advanced All-In-One Screen Printing Kit
Facts about printmaking for kids
🎨 Screen printing (also called silkscreen) has roots in ancient China and parts of Asia going back over 1,000 years.
🖼️ Pop artist Andy Warhol popularized silkscreen prints in the 1960s, making repeat-image artworks like his Marilyns famous.
👕 Water-based inks soak into fabric for a soft, breathable finish and are easier to clean up—great for kid-friendly projects.
🧦 You can make a working DIY screen from a cardboard frame and stretched nylon (like an old stocking) or simple mesh—no press required!
🧽 A squeegee pushes paint through the stencil: a steady, even scrape usually gives the clearest, crispest print.
How do you make a simple screen print using cardboard and mesh?
What materials do I need to make a cardboard-frame screen print?
What ages is simple cardboard-frame screen printing suitable for?
What are the benefits of making screen prints with children?
