Build a screw press
Build a small hand-operated screw press from wood, a large bolt, washers, and a handle to press paper or fruit safely with adult supervision.


Step-by-step guide to build a small hand-operated screw press
How does a screw press work
Step 1
Sand all wooden pieces until smooth and splinter-free so they are safe to handle.
Step 2
Use a pencil to mark the center of the top beam where the bolt will go.
Step 3
Drill a hole through the top beam at your mark sized to the bolt so the bolt can slide through.
Step 4
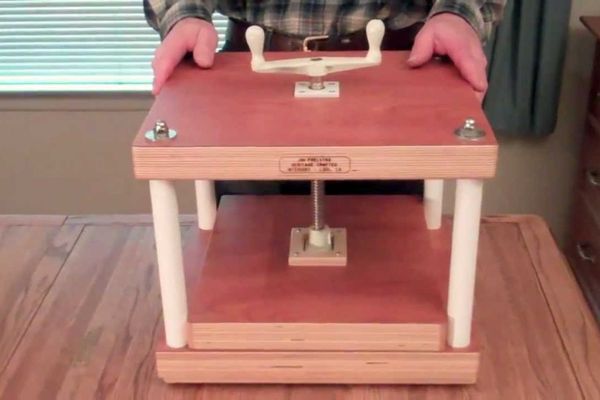
Attach the two upright posts to the base board with screws to make two sturdy vertical supports.
Step 5
Screw the top beam to the tops of the uprights to form a C-shaped frame with the drilled hole centered.
Step 6
Drill a shallow pocket in the center of the small wooden pressing block sized to hold the wing nut so the nut sits flush.
Step 7
Glue the wing nut into the pocket in the pressing block so the nut is fixed to the block and the wings remain free to turn; let the glue set.
Step 8
Insert the bolt down through the hole in the top beam so the threaded end points toward the base.
Step 9
Place a washer and nut on top of the top beam and tighten to hold the bolt securely in place so the bolt cannot slide up or down.
Step 10
Slide a washer onto the threaded bolt under the top beam and then slide the glued pressing block with its wing nut onto the bolt so the nut engages the threads.
Step 11
Put the paper or fruit to be pressed on the base board centered under the pressing block.
Step 12
Turn the wing nut clockwise by hand slowly to lower the pressing block and press the paper or fruit; stop when the pressure is right and do not over-tighten.
Step 13
Share a photo and story of your finished screw press on DIY.org
Help!?
What can we use instead of a wing nut or specific bolts if they are hard to find?
If you can't find a wing nut, glue a standard hex nut into the pressing block's drilled pocket and glue or screw a short wooden dowel or large washer to that nut to act as a hand-turning handle for the 'Glue the wing nut' and 'Turn the wing nut clockwise' steps.
Why won't the pressing block move when I turn the wing nut, and how can I fix it?
If the pressing block doesn't lower when you turn the wing nut, verify the glued nut's threads match the bolt, ensure the washer and top nut on the top beam are tightened so the bolt cannot slide, and if it still binds remove the pressing block, sand or re-drill the pocket, and re-glue the nut in the correct orientation.
How can this activity be adapted for different age groups?
For toddlers and preschoolers have an adult pre-drill holes and attach the uprights while the child sands pieces and turns the wing nut during 'Turn the wing nut clockwise', for elementary-age kids let them mark, drill with supervision, and screw the frame, and for teens challenge them to design a stronger pressing block or experiment with different bolt sizes.
How can we extend or personalize the screw press after it's built?
Personalize and improve your press by painting or carving the base and top beam, adding rubber pads to the pressing block and base to protect paper or fruit, mounting a removable juice tray on the base, or attaching a small spring scale to measure pressure while you 'Put the paper or fruit to be pressed' and 'Turn the wing nut clockwise'.
Watch videos on how to build a small hand-operated screw press
Simple Machine Screw | Nut and Bolt
4 Videos

Simple Machine Screw | Nut and Bolt
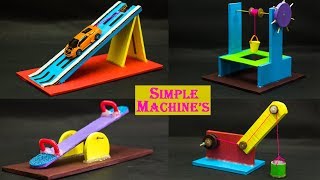
Simple Machine Projects
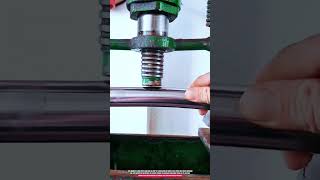
Manual Screw Press Machine for Shaping Steel Pipes with 500 Kg Pressure

Rube Goldberg Simple Machine Project using a wedge, screw, lever, wheel, inclined plane and pulley.
Facts about woodworking for kids
🛠️ The screw press is an ancient tool—early versions were used to press olives and grapes long before modern factories existed.
🔩 Turning a large bolt in a screw press translates a small twist into huge squeezing force — that mechanical advantage can reach tens to hundreds of times your input.
🍊 A compact hand fruit press can turn a few kilos of fruit into several liters of juice—great for family batches of cider or jam-making.
📄 Paperworkers and bookbinders used presses for centuries to flatten, dry, and finish sheets, helping books last longer.
👷 Even small DIY screw presses exert strong forces—always build them sturdy, clamp to a workbench, and use adult supervision for safety.
How do you build a small hand-operated screw press for pressing paper or fruit?
What materials do I need to build a child-friendly screw press?
What ages is making a wooden hand-operated screw press suitable for?
What safety precautions should we follow when using a homemade screw press?
