Make homemade book cloth
Make homemade book cloth by coating fabric safely with diluted glue or starch, then apply it to cover a small notebook to protect and decorate.


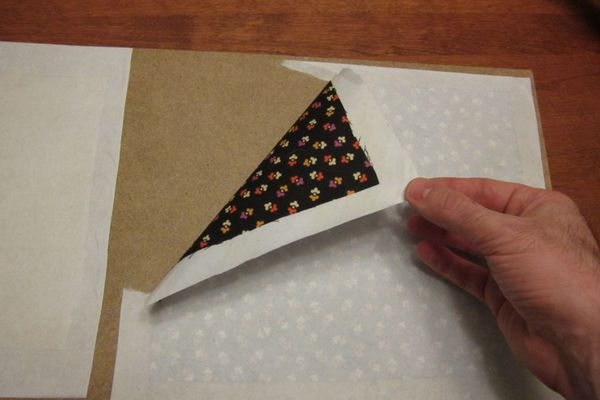

Step-by-step guide to make homemade book cloth
How to Make Your Own DIY Book Cloth
Step 1
Spread a plastic sheet or wax paper on your table to protect it from glue and paint.
Step 2
Lay the fabric flat on the protected surface and smooth out any wrinkles.
Step 3
Place the notebook face down in the center of the fabric and use a ruler and pencil to draw a border 2 cm outside all edges of the notebook.
Step 4
Cut the fabric along the pencil border to make a piece that will wrap around the notebook.
Step 5
Decide whether to use white glue or liquid starch as your coating and get the bottle ready.
Step 6
Prepare the coating by mixing equal parts white glue and water in the bowl if you chose glue or by pouring some liquid starch into the bowl if you chose starch; stir until smooth.
Step 7
Use the paintbrush or sponge to apply an even coat of the mixture to one side of the fabric.
Step 8
Let that coated side dry completely until it feels dry and stiff to the touch (about 20–30 minutes).
Step 9
Apply the coating to the other side of the fabric and let it dry completely.
Step 10
Decorate the dried fabric with markers or fabric paint to make a cool design.
Step 11
Place the notebook face down on the center of your decorated fabric.
Step 12
Fold one long edge of the fabric over the notebook cover and press firmly so it sticks, then fold the other long edge over and press firmly.
Step 13
Fold each short edge like you’re wrapping a present and press or tuck and trim any excess so the cover is neat.
Step 14
Share a photo of your finished book cloth cover and tell everyone what you learned by posting it on DIY.org.
Help!?
What can we use if we don't have liquid starch, white glue, or the fabric called for in the instructions?
If you don't have liquid starch, use the equal-parts white glue-and-water mixture from step 5 or Mod Podge, and if you don't have fabric, substitute an old cotton T-shirt or pillowcase cut to the 2 cm border you drew.
What should we do if the fabric wrinkles, bubbles, or doesn't stick when folding it over the notebook in steps 11–13?
If you get wrinkles, bubbles, or edges that won't stick, smooth the fabric flat before cutting in step 2, press firmly with a ruler or credit card while folding in steps 11–13, and apply another thin coat of the glue-and-water mixture from step 6 letting it dry fully between coats as in steps 7–8.
How can we adapt this activity for different ages, like preschoolers, elementary kids, and teens?
For preschoolers, have an adult pre-cut the fabric and let them decorate in step 10 with stickers or markers, elementary kids can follow steps 3–13 with supervision for cutting and folding, and teens can add sewing or embroidery after step 10 for a more advanced cover.
How can we enhance or personalize the finished book cloth beyond decorating in step 10?
After decorating in step 10, glue or sew on a ribbon closure, add an inside pocket before folding the short edges in step 13, or seal the surface with clear acrylic spray to protect your design before sharing on DIY.org.
Watch videos on how to make homemade book cloth
DIY Book Cloth for Bookbinding | Sea Lemon
4 Videos
DIY Book Cloth for Bookbinding | Sea Lemon
How to Make a Fabric Book for a Baby or Child
7 Ways of Making Your Own Bookbinding Cloth PLUS How to Use!
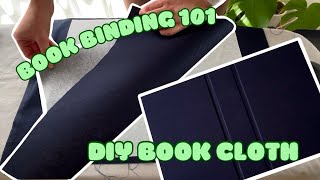
Bookbinding 101 - Make your own book cloth out of any fabric
Facts about bookbinding and fabric crafts
🧵 Buckram is a stiff cloth used in bookbinding that gets its firmness from being coated with glue or starch—just like homemade book cloth!
📚 People have been binding books into codices for over 2,000 years, turning loose pages into the books we use today.
🧴 Polyvinyl acetate (PVA) is the same family as white school glue and dries clear, making it great and safe for craft coatings when used properly.
🌾 Simple starch from flour or cornstarch can stiffen fabric so it holds shape—cooks and crafters have used this trick for centuries.
♻️ Covering a notebook with homemade book cloth can protect it for years and is a fun way to reuse scraps of fabric you already have.
How do I make homemade book cloth to cover a small notebook?
What materials do I need to make book cloth at home?
What ages is making homemade book cloth suitable for?
What are the benefits and safety tips for making book cloth with kids?
