Bind a flag book
Make and bind a colorful flag book using paper, scissors, glue, and tape. Attach flip out flags to tell stories and explore patterns.
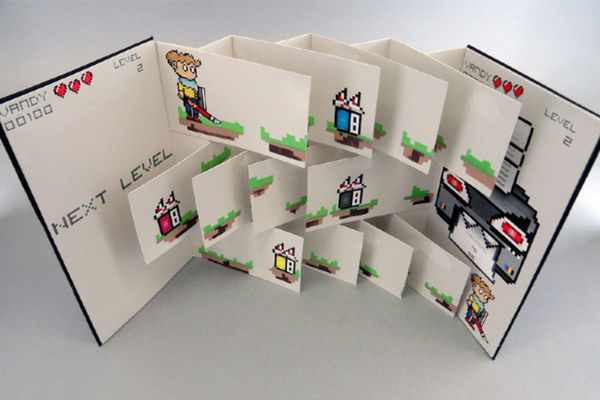
About this activity
Make and bind a colorful flag book using paper, scissors, glue, and tape. Attach flip out flags to tell stories and explore patterns.
What you need
Step by step
- 1
Step 1
Gather all the materials from the list and find a clean workspace.
- 2
Step 2
Use the ruler and pencil to draw a long rectangle on the plain paper about 28 cm by 10 cm.
- 3
Step 3
Cut the rectangle out along your pencil lines to make one long strip.
- 4
Step 4
Fold the long strip accordion-style into six equal panels by folding back and forth.
- 5
Step 5
Cut six small rectangular flags from the colored paper about half the width of one panel.
- 6
Step 6
Fold each colored rectangle in half lengthwise so each becomes a little tabbed flag.
- 7
Step 7
Put glue on the folded edge of each flag and press each flag onto alternating panels so the flags stick out and can flip.
- 8
Step 8
Secure the glued edges with small pieces of clear tape where the flag meets the panel.
- 9
Step 9
Cut two cover pieces from colored paper or cardstock slightly larger than one panel.
- 10
Step 10
Attach the front cover to the first panel and the back cover to the last panel with glue or tape.
- 11
Step 11
Draw pictures or write a short sentence on each flag to tell a story or show a pattern.
- 12
Step 12
Fan the book open and make sure every flag flips out smoothly.
- 13
Step 13
Share your finished flag book creation on DIY.org
Fun facts
How do you make and bind a colorful flag book with flip-out flags?
Cut 6–10 rectangles for pages and several smaller rectangles for the flip-out flags. Fold each page in half or create a simple spine by stacking pages and attaching a long strip of cardstock as a hinge. Glue or tape one short edge of each flag to successive folds or page edges so flags flip out. Decorate with markers, paint, or stickers. Reinforce edges with tape and let glue dry before flipping to test stories and patterns.
What materials do I need to make a flag book?
You’ll need construction paper or light cardstock for pages, smaller paper pieces for the flags, child-safe scissors, a glue stick (and white craft glue for stronger holds), clear tape, a ruler, and a pencil. Optional supplies: markers, crayons, stickers, patterned paper, a hole punch, brads or a stapler for a different binding, and scrap cardboard to reinforce the cover. Choose non-toxic, washable art supplies for younger children.
What ages is the flag book activity suitable for?
This activity suits ages about 4–10. Preschoolers (4–5) will enjoy decorating and flipping flags with adult help for cutting and gluing. Early elementary kids (6–8) can cut, arrange, and bind with supervision. Older children (9–10+) can design complex patterns, story sequences, and experiment with different bindings. Adapt complexity and tools to skill level, and always supervise sharp scissors or staplers for younger children.
What are the benefits and safety tips for making a flag book?
Making a flag book boosts fine motor skills, pattern recognition, sequencing, storytelling, and creativity. It also supports language development when kids narrate flip-out scenes. Safety tips: use child-safe scissors and non-toxic glue, supervise cutting and stapling, and avoid small embellishments for children under three. Reinforce edges with tape to prevent ripping. Try variations like color-pattern challenges, holiday themes, or turning flags into counting or vocabulary prompts.
Watch & Learn
Need help?
What can I use if I don't have clear tape, glue, or cardstock?
Use double-sided tape or a stapler to attach flags and covers, a glue stick or folded washi tape on the folded flag edges, and recycled cereal box or construction paper cut slightly larger than one panel for covers.
My accordion panels aren't even and the flags don't flip smoothly—how can I fix that?
Measure and mark the 28 cm strip into six equal panels (about 4.7 cm each), fold along the ruler for crisp accordion creases, and use less glue or place only small pieces of tape at the folded edge per the 'Secure the glued edges with small pieces of clear tape' step so each flag can flip freely.
How can I adapt this activity for different ages?
For younger children have an adult pre-cut the 28 cm by 10 cm strip and the six small colored flags and let them decorate with stickers, while older kids can increase the number of panels, use cardstock covers, write full sentences on each flag, or stitch the spine for durability.
How can we extend or personalize the finished flag book?
Before you 'Attach the front cover to the first panel,' personalize by laminating covers, punching holes and tying ribbon along the spine, adding photos or small glued objects to flags, or color-coding flags to create a sequence-based story.