Fold a book from a single sheet
Make a small eight-page book from a single sheet of paper by folding and careful cutting with child-safe scissors; decorate pages with drawings and stories.

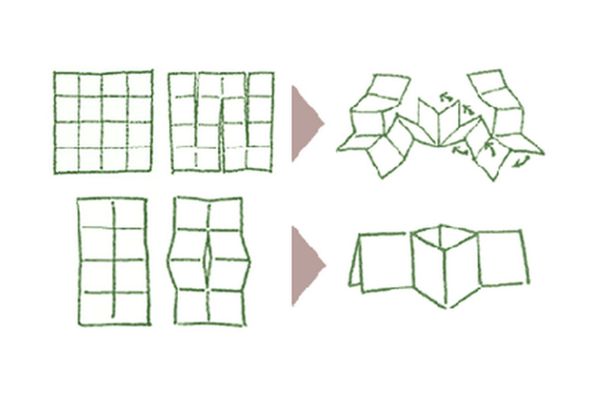

Step-by-step guide to fold a book from a single sheet of paper
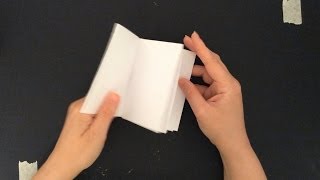
How to Make an Origami Book from Single Sheet of Paper - Easy DIY Papercraft Tutorial (ASMR)
Step 1
Place the sheet of paper flat on the table in portrait position.
Step 2
Fold the paper in half from top to bottom so the shorter edges meet and press the crease firmly.
Step 3
Fold the paper in half from left to right so the longer edges meet and press the crease firmly.
Step 4
Fold the paper in half from left to right one more time so the rectangle becomes a small stack and press the crease firmly.
Step 5
Turn the folded paper so the open edges are on your right and the folded edge is on your left.
Step 6
Using child-safe scissors cut a slit along the center crease from the open right edge toward the folded left edge and stop when you reach the middle so you do not cut all the way through.
Step 7
Carefully unfold the paper flat so you can see the slit running down the center.
Step 8
Fold the paper in half from top to bottom again so the slit stands up like a little tunnel in the middle.
Step 9
Push both ends of the folded paper gently toward the center so the slit opens and the paper collapses into a small booklet shape.
Step 10
Press each crease flat so the pages stay neat and the booklet looks tidy.
Step 11
Use your coloring materials to draw pictures and write a short story on each page to fill your eight-page book.
Step 12
Share your finished creation on DIY.org.
Help!?
What can I use if I don't have child-safe scissors or a single sheet of printer paper for this folded book activity?
If you don't have child-safe scissors, use blunt-tip safety scissors or have an adult carefully cut the slit with a craft knife along the center crease from the open right edge toward the folded left edge, and if you don't have printer paper use a single sheet of construction paper or a clean recycled magazine page folded in portrait position.
My slit accidentally went all the way through or the paper won't collapse into a booklet—what should I check or redo?
If the slit goes all the way through start with a new single sheet and when cutting the slit along the center crease stop at the middle, and if the paper won't collapse make sure you completed the three folds (top-to-bottom, then left-to-right twice), turned the open edges to the right with the folded edge on the left, and pressed each crease flat so the slit stands up like a tunnel.
How can I adapt the steps for younger children or make the project more challenging for older kids?
For younger children have an adult pre-fold and pre-cut the slit so they can focus on drawing with their coloring materials to fill the eight-page book, while older kids can use thicker paper, nest multiple sheets for a thicker book, add a stapled spine or simple sewing, and write a longer story on each page.
What are some easy ways to personalize or extend the eight-page booklet before sharing it on DIY.org?
Personalize the booklet by decorating the cover with collage, washi tape, or a title, adding a table of contents or tiny photos inside, pressing all creases flat for neat pages, and optionally making a series of themed booklets to photograph and share on DIY.org.
Watch videos on how to fold a book from a single sheet of paper
HOW TO MAKE A BOOK FROM A SINGLE SHEET OF PAPER
4 Videos
HOW TO MAKE A BOOK FROM A SINGLE SHEET OF PAPER
How to Make a Tiny Origami Notebook / Book from Single A4 Sheet - DIY Papercraft Tutorial
How to make a 8 page MINI BOOK with 1 sheet of paper, no glue, very easy
16 Page Book w/ One Sheet of Paper
Facts about paper folding and bookmaking for kids
📄 One sheet folded and cut carefully can make an eight-page mini-book — the classic single-sheet zine!
✂️ Scissors go back over 3,000 years to ancient Egypt; kid-safe scissors have rounded tips to protect little fingers.
📝 Small handmade books are often called 'zines' and have been used for DIY comics, stories, and art since the 20th century.
🎨 Miniature books are a real art form—some artists make tiny books so small they fit on a fingertip!
🌱 Making a book from one sheet is eco-friendly and perfect for using scrap paper and reducing waste.
How do you fold a single sheet into an eight-page book?
What materials are needed to make a one-sheet eight-page book?
What ages is folding a single-sheet book suitable for?
What safety tips should parents follow for this paper-book craft?
