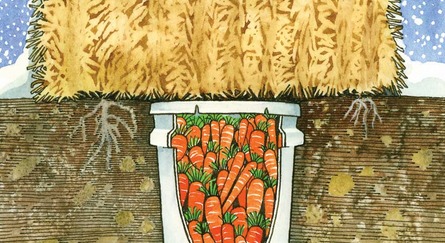
Build a root cellar
Build a small, insulated root cellar model with adult help using a box, soil, stones, and thermometers to learn how cool, stable storage preserves vegetables.


Step-by-step guide to build a small insulated root cellar model
DIY Root Cellar: Step-by-Step Guide for Fresh Produce
Step 1
Gather all Materials Needed and put them on your workspace.
Step 2
Clear a flat place to build your root cellar model.
Step 3
With an adult cut a small door near the bottom of one side of the box.
Step 4
Line the inside walls of the box with the insulation material.
Step 5
Tape the insulation in place so it stays against the box walls.
Step 6
Put the plastic tray inside the bottom of the box.
Step 7
Pour a 2 cm layer of small stones into the tray.
Step 8
Add a 6–10 cm layer of garden soil on top of the stones.
Step 9
Place the small vegetables on top of the soil.
Step 10
Cover the vegetables with a thin 1–2 cm layer of soil.
Step 11
Push one thermometer probe into the soil near the vegetables.
Step 12
Tape the second thermometer to the outside wall of the box at the same height as the inside thermometer.
Step 13
Close the box and seal the lid edges with tape.
Step 14
Put your model in a cool shaded spot and check both thermometers twice a day for three days, writing down each reading.
Step 15
Share your finished root cellar model and what you observed on DIY.org.
Help!?
What can we use instead of the rigid insulation, plastic tray, or special thermometer if we can't find them?
If rigid foam insulation isn't available, line the box with several layers of crumpled newspaper or bubble wrap taped to the inside walls, use a shallow plastic food container as the plastic tray, and substitute a kitchen or meat thermometer probe for the model thermometers.
What should we do if the insulation keeps coming loose or the lid won't stay sealed?
If the insulation peels away or the lid won't seal (steps 4–5 and 13), press the insulation flat, add extra tape strips to hold it against the box walls, make sure the plastic tray sits flush before adding stones and soil, and re-seal the lid edges with fresh tape.
How can we change the activity to suit younger kids or older kids?
For younger children have an adult cut the door and pre-line the box and pre-fill the tray with stones and soil so they can place and cover the vegetables (steps 3–8), while older kids can test different insulation materials, vary soil depth, and record and graph thermometer readings twice a day for three days (step 14).
How can we extend or personalize our root cellar model once it's finished?
To extend the activity, paint or label the box, add small compartments for different vegetables, run a comparison by placing identical models in different locations (sunny vs cool shaded) and track the thermometer readings for a week, then share photos and observations on DIY.org.
Watch videos on how to build a small insulated root cellar model
How We Built Our Root Cellar From Start To Finish For Sustainable Food Storage
4 Videos
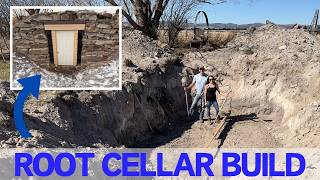
How We Built Our Root Cellar From Start To Finish For Sustainable Food Storage
How To Build A Root Cellar - Root Cellar Construction Ideas
How to Build a DIY Root Cellar for Food Storage at Home: Simple Steps & Safety Tips

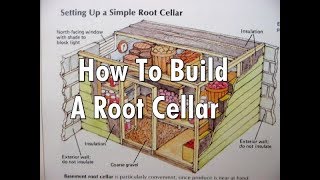
Tips on Building a Root Cellar to Store Food All Winter - A Homesteader's Guide
Facts about food storage and preservation
🥕 Root cellars can keep carrots, potatoes, and beets fresh for months by holding temps around 0–4°C (32–40°F).
🌡️ Buried boxes change temperature slowly because the soil acts like a blanket that keeps things steady day and night.
🪨 Stones and packed soil act as thermal mass — they soak up heat and release it slowly to protect veggies from big temperature swings.
🏚️ Before refrigerators, families relied on root cellars all winter to prevent food waste and store harvests until spring.
🍎 Keep apples away from other produce — apples release ethylene gas that can make nearby vegetables ripen and spoil faster.
How do you build a small insulated root cellar model with adult help?
What materials do I need to build a root cellar model?
What ages is this root cellar model activity suitable for?
What are the benefits and safety tips for building a root cellar model?
