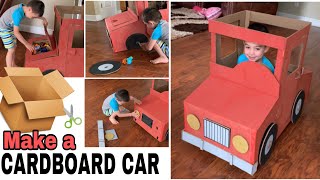
Build a vehicle
Build a small cardboard vehicle with bottle-cap wheels and wooden dowels or straws, test different axles and propulsion methods to learn about motion and design.

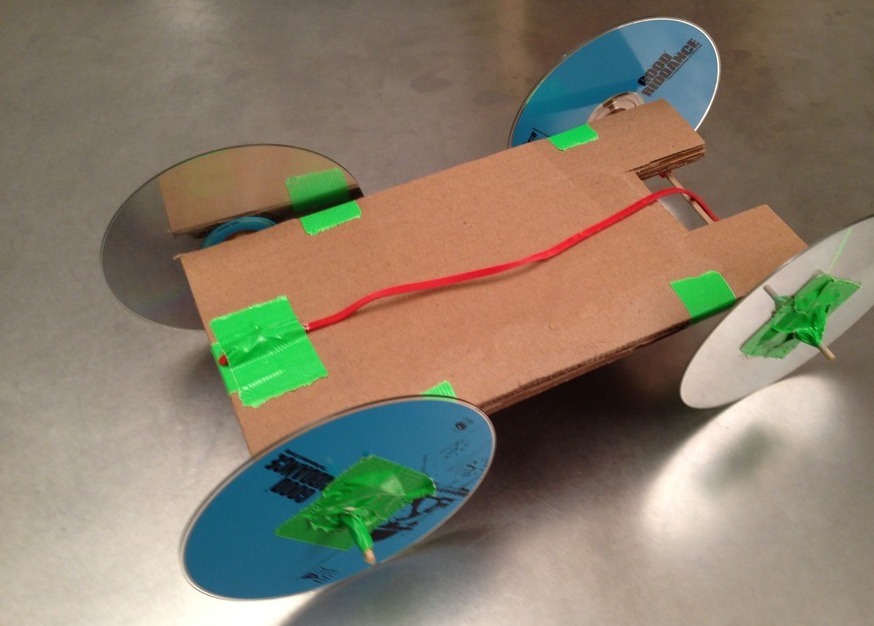

Step-by-step guide to build a small cardboard vehicle with bottle-cap wheels
How to make a cardboard car | Easy DIY project | School project easy ideas #carboardcraft
Step 1
Gather all materials and clear a flat workspace so you can build without losing pieces
Step 2
Cut a rectangle from the cardboard about 15 cm by 8 cm to make the car base
Step 3
Use the ruler to mark two axle positions about 2 cm from each short end of the base
Step 4
Push the pushpin through each marked spot to make two holes for the axles
Step 5
Make a small centered hole in each bottle cap by pressing the pushpin through the cap
Step 6
Slide two bottle caps onto each straw or dowel so each axle has one wheel on each end
Step 7
Push the two axles through the holes in the cardboard so the wheels sit under the car and can spin
Step 8
Tape the ends of each axle under the cardboard so the axles cannot slide sideways but can still rotate
Step 9
Loop a rubber band around the rear axle and tape the other end of the rubber band under the front of the car to make a twist motor
Step 10
Wind the rubber-band motor by turning the wheels backward about ten full turns
Step 11
Place the car on a smooth floor and let it go to test the rubber-band propulsion and watch how it moves
Step 12
Remove the rubber band from the car to try a different propulsion method
Step 13
Tape a fresh straw to the top of the car with the straw tip pointing out the back so air can push the car forward
Step 14
Put an uninflated balloon onto the straw tip then blow up the balloon while pinching the straw closed and release the balloon to test the air-propulsion and compare results
Step 15
Share your finished creation on DIY.org
Help!?
If I can't find bottle caps or straws, what can I substitute so the wheels and axles still work?
Use old CDs, round jar lids, or large buttons as wheels and wooden skewers or pencils as axles, then follow the step to 'Make a small centered hole...' so they slide through the cardboard base.
My wheels won't turn or the axles keep sliding — what should I check and fix?
If wheels stick or axles slide, widen the pushpin holes slightly so the axle can rotate, trim straw ends so wheels sit flush, and be sure to 'Tape the ends of each axle under the cardboard' only to prevent sideways movement.
How can I modify this activity for different age groups?
For preschoolers have an adult pre-cut the 15 cm × 8 cm cardboard and make the pushpin holes while they assemble and decorate the car, and for older kids have them measure axle positions with the ruler and experiment with winding the rubber-band motor or the straw-and-balloon step themselves.
How can we make the car go faster, farther, or look cooler?
To improve speed or distance, smooth or tape the bottle-cap wheels to reduce friction, add extra turns when you 'Wind the rubber-band motor,' lower weight on the cardboard base, and personalize the look by painting or adding a decorated cardboard body before testing the straw-and-balloon propulsion.
Watch videos on how to build a small cardboard vehicle with bottle-cap wheels
How to Build a Toy Car - Science Project
4 Videos
How to Build a Toy Car - Science Project
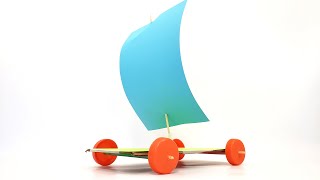
Build a Wind-Powered Car | STEM Activity
Build a Self-Driving Arduino Car | Science Project
DIY Car | How to make a cardboard car (foldable)
Facts about motion and simple vehicle design
🛞 Wheels cut rolling resistance a lot — rolling friction is usually much smaller than sliding friction, so rolling objects need far less push than dragging ones.
🔧 Even tiny axle or wheel misalignment (a few degrees or millimetres) can make a toy car veer off course, so straight axles help it go straighter.
🪢 A twisted or stretched rubber band stores elastic energy; when released that energy can spin axles and send small cars zooming several metres.
⚖️ Moving weight changes balance — shifting the center of mass forward, back, or sideways affects steering, traction, and whether the car might tip.
📦 Corrugated cardboard is much stiffer across the flutes than along them — orient the corrugation right and your chassis gets stronger without extra pieces.
How do I build a small cardboard vehicle with bottle-cap wheels and test different axles and propulsion methods?
What materials do I need to build a cardboard vehicle with bottle-cap wheels?
What ages is this cardboard vehicle activity suitable for?
What are the benefits of building a bottle-cap wheeled cardboard vehicle?
