Make real gears
Make working gears from cardboard and wooden dowels; cut, assemble, and test different gear ratios to learn how gears transfer motion.


Step-by-step guide to make real gears
School Science Projects | Gear Working Model
Step 1
Gather all the materials and ask an adult to help with sharp tools.
Step 2
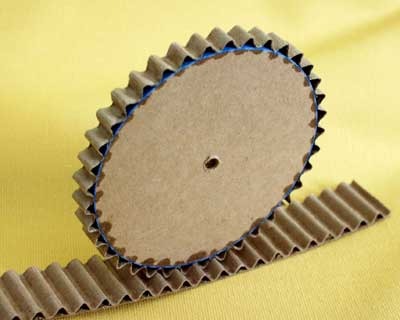
Trace three different sized circles twice each on the cardboard using your templates.
Step 3
Draw evenly spaced teeth around the edge of each traced circle.
Step 4
Cut out all the gear shapes carefully along the outer edge including the teeth.
Step 5
Glue each matching pair of the same size together to make thicker stronger gears.
Step 6
Cut a center hole in each gear that fits snugly onto a wooden dowel.
Step 7
Prepare a flat cardboard base and mark the spots where you want each gear axle to sit.
Step 8
Make a small hole in the base at each marked spot to fit a dowel through.
Step 9
Insert a dowel through each hole to form the axles for your gears.
Step 10
Secure each dowel under the base with tape or glue so the axles stand straight.
Step 11
Slide one gear onto each dowel so the gears sit above the base and can turn.
Step 12
Move dowels or shift gear positions until the gear teeth mesh smoothly without binding.
Step 13
Swap different sized gears on the axles to create and test different gear ratios.
Step 14
Turn one gear slowly to test motion and observe how the others change speed and direction.
Step 15
Share your finished gear machine on DIY.org
Help!?
If I can't find wooden dowels, what can I use instead for the axles?
If you can't find wooden dowels, use thick pencils, bamboo skewers, or sturdy straws as axles when you 'Insert a dowel through each hole to form the axles for your gears,' making sure to cut the gear center holes to fit snugly.
What should I do if the gears don't turn smoothly or the teeth keep catching?
If teeth bind when you 'Move dowels or shift gear positions until the gear teeth mesh smoothly,' reinforce the gears by ensuring each matching pair is glued firmly, slightly round or trim any sharp tooth edges, and adjust dowel positions so the gears sit parallel and not tilted.
How can I adapt this activity for younger kids or make it more challenging for older children?
For younger children, have an adult complete the 'Cut out all the gear shapes' and 'Cut a center hole' steps while they glue pairs and slide gears on dowels, and for older kids challenge them to 'Swap different sized gears' to calculate gear ratios and add additional gear stages.
How can we extend or personalize the finished gear machine?
To enhance the project, decorate and label each glued gear, add a small hobby motor or hand crank at the 'Turn one gear slowly' step, and insert washers between gears and the base to reduce friction for smoother, multi-stage gear trains.
Watch videos on how to make real gears
School Science Projects | Cycle Gear Working Model
4 Videos
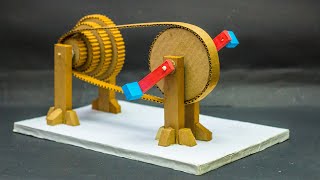
School Science Projects | Cycle Gear Working Model
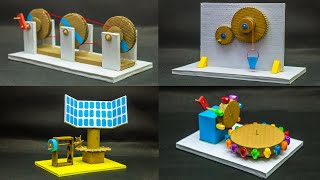
Gear Science Projects

Simple Machines - Gears

Making a GOOGOL:1 Reduction with Lego Gears
Facts about gears and simple machines
⚙️ The Antikythera mechanism (around 100 BCE) is the oldest known geared device — ancient gears helped model the heavens!
🔁 A gear ratio shows how speed and torque swap places: a big driving gear turning a smaller gear makes the smaller spin faster but with less force.
🧮 Count the teeth: if a 10-tooth gear drives a 30-tooth gear, the ratio is 1:3 — the small gear turns three times for every turn of the big one.
🪵 Wooden dowels make excellent DIY axles — wood was commonly used in early clocks and machines before metal gears took over.
📏 Most commonly used gear teeth follow an involute shape so gears mesh smoothly and keep a constant speed ratio without jerking.
How do you make working gears from cardboard and wooden dowels?
What materials do I need to make cardboard and dowel gears?
What ages is this cardboard gear activity suitable for?
What safety tips should I know when making cardboard and dowel gears?
