Build a soap box car
Build a small soap box car from wood or cardboard, attach wheels and axles, learn basic tools and test rolling performance with adult supervision.


Step-by-step guide to build a soap box car
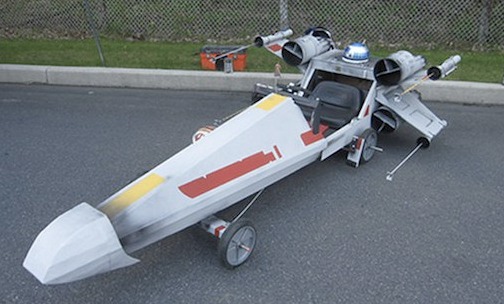
DIY Soapbox Car
Step 1
Put on your safety goggles
Step 2
Choose whether to build your soap box car from wood or from cardboard
Step 3
Measure and mark a rectangle about 20 cm long and 10 cm wide on your chosen material using the ruler and pencil
Step 4
Cut out the rectangle along your marks using a handsaw for wood or a craft knife for cardboard with adult help
Step 5
Sand the edges and corners of the chassis until they are smooth
Step 6
Measure and mark the centerline and place two marks about 3 cm from each short end where the axles will go
Step 7
Make axle holes at the marks by drilling small holes for wood or carefully poking holes for cardboard with a craft knife or awl with adult help
Step 8
Cut two wooden dowels or skewers to be slightly wider than the chassis and sand the ends
Step 9
Make holes in the bottle caps or wheels and push the dowels through each pair of wheels and secure them with a small dab of glue so the wheels stay on but can turn
Step 10
Slide each axle with its wheels through the chassis holes so the wheels sit under the car and can spin freely
Step 11
If the wheels rub or wobble adjust the axle position or add short straw bushings under the chassis until the wheels roll straight
Step 12
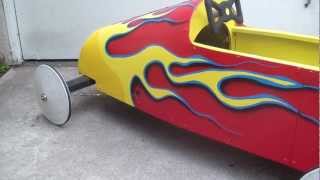
Decorate your car with paint or colouring materials and let it dry completely
Step 13
Test your soap box car by rolling it down a gentle ramp or smooth floor and watch how fast and straight it goes
Step 14
Make one small improvement like tightening a wheel or shifting an axle and test again
Step 15
Share your finished soap box car on DIY.org
Help!?
What can we use if we can't find wooden dowels, bottle caps, or a handsaw?
If you can't find wooden dowels use bamboo skewers, chopsticks, or straight pencils as axles, replace bottle-cap wheels with jar lids or old toy car wheels, and swap a handsaw by buying pre-cut wood or building the chassis from cardboard cut with a craft knife by an adult.
What should we do if the wheels rub or wobble or don't spin freely?
If wheels rub or wobble, adjust the axle position as the instructions suggest, sand the dowel ends and wheel holes, ensure the axle holes are straight when drilling or poking, and add short straw bushings under the chassis so the wheels roll straight.
How can we adapt this project for younger or older children?
For younger children use a pre-cut cardboard chassis, tape or school glue instead of strong adhesives, and adult help for cutting and making holes, while older kids can cut and sand a wooden chassis, drill precise axle holes, and fine-tune axle alignment and wheel sanding themselves.
How can we enhance or personalize the soap box car beyond the basic build?
Enhance your car by decorating with paint and stickers as instructed, smoothing aerodynamic edges, trying larger or lighter wheels, adding a removable weight to test speed, or building a simple steering or brake using extra skewers and straws.
Watch videos on how to build a soap box car
How to Build a Soap Box Derby® Stock Car
4 Videos
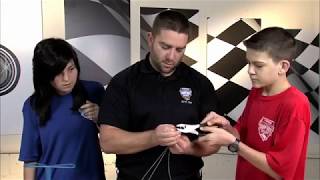
How to Build a Soap Box Derby® Stock Car
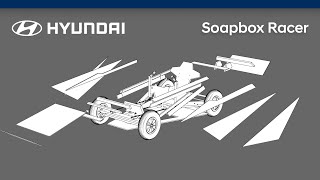
Hyundai Soapbox | How to build
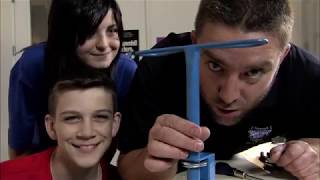
How to Build a Soap Box Derby® Super Stock Car
Soapbox Derby Race Car Building Tips
Facts about woodworking and basic mechanics for kids
🚗 The first Soap Box Derby kicked off in Dayton, Ohio in 1934 and made kids' gravity racing famous across the U.S.
🪵 The Pinewood Derby — a pint-sized wooden-car race — was invented by Cub Scout leader Don Murphy in 1953.
⚙️ The wheel-and-axle is one of six classic simple machines and helps tiny cars roll much more easily.
⛰️ Soap box cars race without engines: gravity turns height (potential energy) into speed (kinetic energy) as they go downhill.
🧴 Dry graphite or small bearings are common lubricants in youth races because they can cut axle friction and speed up a run.
How do you build a soap box car?
What materials do I need to build a soap box car?
What ages is a soap box car project suitable for?
What safety tips and fun variations are there for a soap box car build?
