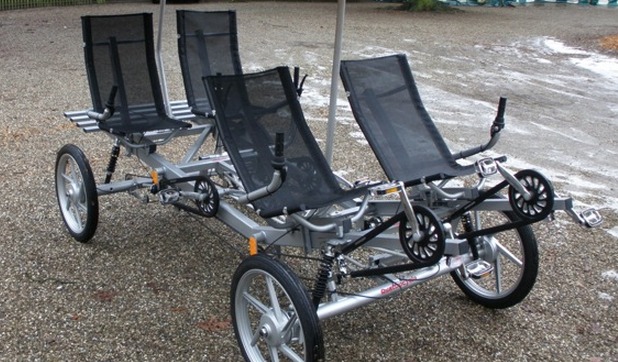
Make a human powered vehicle
Build a simple human powered vehicle using cardboard, wheels, axles, and string; design, assemble, and test it to learn about motion and forces.


Step-by-step guide to make a human powered vehicle
How to Make Balloon Powered Car | SCIENCE PROJECT | DIY Balloon Car
Step 1
Gather all the materials on a clear table and ask an adult to help you.
Step 2
Use the ruler and pencil to draw a rectangle about 20 cm long and 10 cm wide on the cardboard for the vehicle chassis.
Step 3
Cut out the rectangle carefully with scissors or a craft knife while an adult helps.
Step 4
Measure and mark two axle positions about 2 cm in from each short end across the width of the chassis.
Step 5
Make one small hole at each mark large enough to fit a straw through using scissors or the tip of a skewer.
Step 6
Cut the plastic straws into two pieces about 4 cm long each.
Step 7
Push each straw piece into one of the holes so the straw sits across the thickness of the cardboard.
Step 8
Tape each straw piece flat to the cardboard so it cannot move and acts as an axle bearing.
Step 9
Make a small center hole in each wheel if the wheel does not already have one.
Step 10
Slide two wheels onto one skewer to form a rear axle and slide the other two wheels onto the second skewer to form a front axle.
Step 11
Thread both axles through the straw bearings so the wheels sit outside the chassis and can spin.
Step 12
Secure the ends of each skewer with small pieces of tape or trim the ends so the wheels cannot slide off.
Step 13
Tie one end of the string to the front center of the chassis and tape the knot so it holds.
Step 14
Pull the string gently to test how your vehicle rolls and watch how it speeds up or slows down.
Step 15
Take a photo and share your finished human powered vehicle on DIY.org.
Final steps
You're almost there! Complete all the steps, bring your creation to life, post it, and conquer the challenge!

Help!?
What can we use if plastic straws, wooden skewers, or ready-made wheels are hard to find?
Use tightly rolled paper tubes pushed into the holes in place of plastic straws for the bearings, pencils or thin dowels instead of wooden skewers for the axles, and cut wheels from bottle caps or extra cardboard to slide onto the axles.
My wheels won't spin or the axles keep getting stuck—what should I check and fix?
Check that the straw bearings you taped flat to the cardboard are not taped over the axle, trim any long skewer ends, and add tiny paper or tape spacers between the wheel and chassis so the axle can rotate freely when you thread it through the straw bearings.
How can I adapt this project for younger or older kids?
For younger children, have an adult pre-cut the 20 cm × 10 cm cardboard chassis and make the holes so the child can push in straws and tape wheels, while older kids can measure and cut the chassis themselves, design new shapes, and experiment with a rubber-band or balloon drive instead of just pulling the string.
How can we enhance or personalize the human-powered vehicle after building the basic version?
Decorate or paint the cardboard chassis, add glued cardboard collars as axle stops instead of tape, try a rubber-band drive on the rear skewer to compare speeds with the 'pull the string' test, and take a photo to share on DIY.org.
Watch videos on how to make a human powered vehicle
Remote Control Car Using Arduino for Beginners
4 Videos
Remote Control Car Using Arduino for Beginners
Build a Self-Driving Arduino Car | Science Project

Water Powered Car STEM Project Tutorial - Design a Water-Powered Rocket Car!
Balloon Powered Car more easy | Easy Science Project
Facts about motion and forces
📦 Cardboard is light, surprisingly strong for its weight, and super easy to cut, fold, and glue — perfect for quick prototypes.
🌍 Friction slows things down but a little bit of friction gives wheels the grip they need so your vehicle doesn't just spin out.
🚲 Human-powered vehicles include bicycles, pedal cars, and even pedal-powered boats — they move using people’s muscles, not fuel!
🛞 The wheel and axle is one of the six classic simple machines and it helps reduce the effort needed to move things.
🧵 Wrapping string around an axle can transfer pulling motion into turning motion, letting you make simple steering or braking systems.
How do you build a simple human-powered vehicle with cardboard and string?
What materials and tools do I need to make a cardboard human-powered vehicle?
What ages is this cardboard human-powered vehicle activity suitable for?
What are the benefits and safety tips for making a human-powered vehicle?


One subscription, many ways to play and learn.
Only $6.99 after trial. No credit card required