Identify a mushroom
Collect and observe a common safe mushroom with adult supervision, note cap, gills, stem, color, and spore print to identify it.

Step-by-step guide to identify a mushroom
50 Types of Mushrooms: The Ultimate Guide to Identification, Edibility & Benefits
Step 1
Go outside with an adult and find one common fresh mushroom that you both agree is safe to handle.
Step 2
Clean your hands with sanitizer or wipes and put on gloves if you have them.
Step 3
Use the knife or scissors to cut the mushroom at the base of the stem.
Step 4
Gently place the mushroom into your basket or paper bag.
Step 5
Open your notebook and write the date and the place where you found the mushroom.
Step 6
Look at the top of the mushroom and note the cap’s shape size and color in your notebook.
Step 7
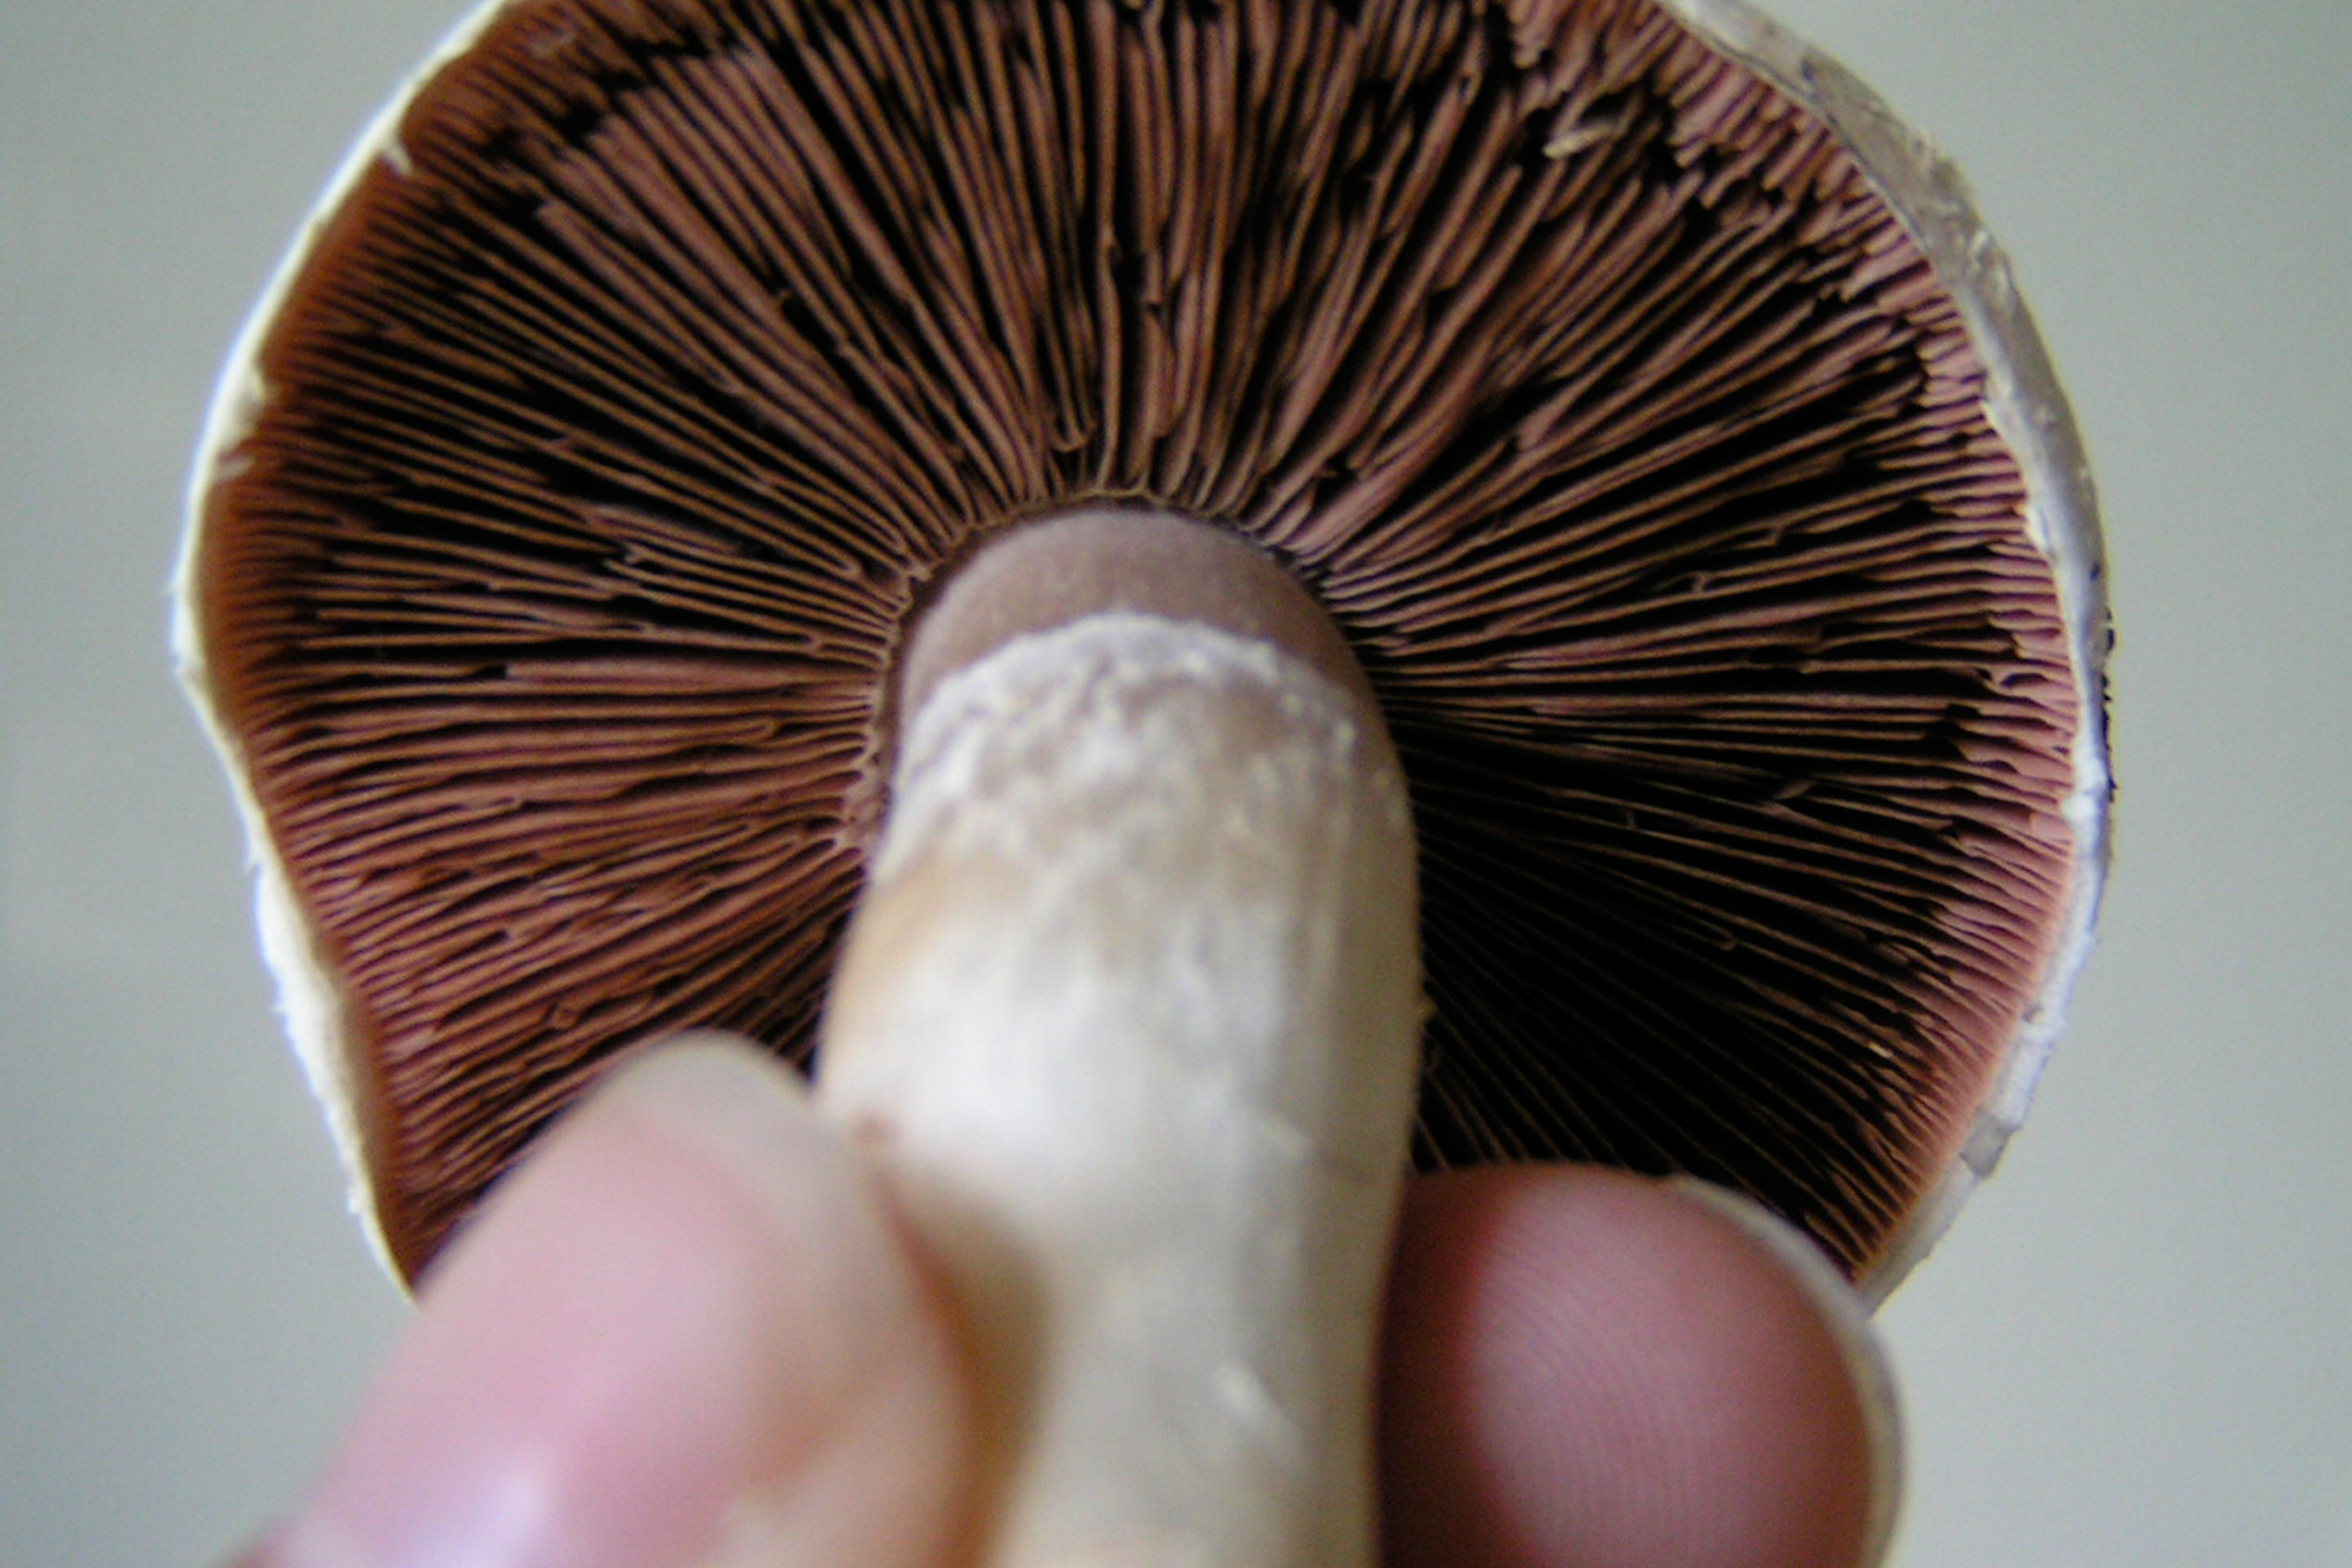
Turn the mushroom over to see the underside and look for gills pores or teeth.
Step 8
Write the gill or pore color spacing and whether they are attached to the stem in your notebook.
Step 9
Look at the stem and write its length thickness texture and any rings or bumps in your notebook.
Step 10
Cut off the stem so you are left with just the cap for the spore print.
Step 11
Place the cap gills-down on a sheet that has white paper on one side and black paper on the other so spores can show up.
Step 12
Cover the cap with the clear jar or cup to keep it still and wait for at least four hours or overnight.
Step 13
Lift the jar and remove the cap to see and write down the spore print color and pattern in your notebook.
Step 14
Share a photo or drawing of your finished mushroom notes and spore print on DIY.org.
Help!?
What can we use if we don't have gloves, a basket, or a clear jar for the spore print?
If you don't have gloves, use hand sanitizer or wipes from step 2; carry the mushroom in a clean paper bag or plastic container instead of a basket (step 4); and cover the cap for the spore print with a clear plastic cup or glass bowl if you don't have a clear jar (steps 12–13).
My spore print showed nothing—what might have gone wrong and how do we fix it?
If no spores appear, check that you cut off the stem so only the cap sits gills-down on the white/black paper (step 11–10), that the cap was fresh and not dried, the cap stayed still under the clear jar (step 12), and wait overnight as recommended (step 12) before concluding it failed.
How can I adapt the activity for a 4-year-old versus a 10-year-old?
For a 4-year-old, have the adult do the cutting (steps 3 and 11) while the child looks at cap shape and color and feels stem texture to draw simple pictures in the notebook (steps 5 and 7), and for a 10-year-old, let them measure stem length and gill spacing, record detailed notes (steps 8–9), make the spore print overnight (steps 11–13) and upload photos to DIY.org (step 14).
What are simple ways to extend or personalize our mushroom identification project?
Make a nature-journal page that combines your date/place notes (step 5), labeled drawings or photos of the cap, gills, and stem (steps 6–9), glue the spore print onto the page (step 13), and share or compare photos on DIY.org (step 14) or between different mushrooms to study patterns.
Watch videos on how to identify a mushroom
Mushroom Types 101 🍄 | DoubleBlind
4 Videos

Mushroom Types 101 🍄 | DoubleBlind
How to Identify Common Mushrooms
Types of Edible Mushrooms with Names & Images | Learn with Us

Mushrooms 101: Identification and Anatomy - Part 1
Facts about mushroom identification and safety
🍄 Mushrooms are the fruiting bodies of fungi — they release spores (tiny reproductive cells) to make more fungi.
🧪 A spore print's color (white, pink, brown, black, etc.) is one of the quickest clues scientists use to identify a mushroom.
🌈 Some mushrooms are bioluminescent and can glow in the dark to attract insects that help spread spores.
🧠 Fungi are actually more closely related to animals than to plants — cool family-tree surprise!
👀 The gills under a mushroom cap act like packed pages, giving a huge surface area so millions of spores can form.
How do you safely collect and observe a mushroom to identify it?
What materials do I need to identify a mushroom with my child?
What ages is mushroom-identifying suitable for for children?
Is mushroom identification safe for kids and what are the benefits?
