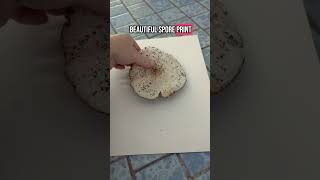
Perform a spore print
Make a mushroom spore print by placing a mushroom cap gill-side down on paper, cover it, wait several hours, and observe with adult supervision.


Step-by-step guide to make a mushroom spore print
How to Make a Spore Print
Step 1
Wash your hands with soap and water so your work stays clean.
Step 2
Find a flat table or counter and place your papers there so they lie smooth and flat.
Step 3
Use a store-bought mushroom or only a mushroom that an adult who knows mushrooms has safely identified.
Step 4
Put the white paper and the black paper side by side so you can catch spores on both colors.
Step 5
Ask an adult to cut the mushroom stem off flush with the cap so the cap will sit flat.
Step 6
Set the mushroom cap gill-side down so it sits across the seam between the white and black papers.
Step 7
Cover the cap with the clear glass or cup so the cap cannot move and air is kept away from the spores.
Step 8
Leave the covered cap completely still and undisturbed for at least 6 hours or up to overnight.
Step 9
Carefully lift the glass or cup straight up without sliding it.
Step 10
Gently lift the mushroom cap straight up to reveal the spore print on the paper.
Step 11
Let the spore print air dry for a few minutes so the spores do not smear.
Step 12
Use the pencil to write the date and the mushroom name next to your spore print.
Step 13
Share your finished spore print creation on DIY.org.
Help!?
What can we use if we don't have the clear glass or the black paper listed in the instructions?
Use a clean clear plastic container or jar instead of the clear glass or cup, and substitute dark construction paper or black cardboard for the black paper while still placing the two contrasting papers side by side.
My spore print came out faint or smeared—which step likely caused this and how can I fix it?
A faint or smeared print usually happens if the cap wasn't sitting flat across the seam or the cover moved, so make sure to 'Ask an adult to cut the mushroom stem off flush with the cap,' set the cap gill-side down across the seam, cover it so air can't move spores, leave it undisturbed for at least 6 hours, and lift the glass and cap straight up without sliding.
How can I adapt the activity for younger children or make it more challenging for older kids?
For younger children have an adult perform the 'Ask an adult to cut the mushroom stem off flush with the cap' and the careful lifting steps while the child helps place the cap and write the date with the pencil, and for older kids encourage identifying the mushroom species, comparing prints on the white paper and black paper, and sharing detailed photos on DIY.org.
How can we extend or personalize the finished spore print project?
Create a multicolored collage by placing several different caps across the seam to make multiple prints, let each spore print air dry for a few minutes, write the date and mushroom name with the pencil, and then frame, photograph, or share your finished spore print creation on DIY.org.
Watch videos on how to make a mushroom spore print
🍄 How to Make a Spore Print from a Toxic Mushroom 🍄
3 Videos
🍄 How to Make a Spore Print from a Toxic Mushroom 🍄
How to Make Mushroom Spore Prints
How To Make a Mushroom Spore Print at Home
Facts about mycology for kids
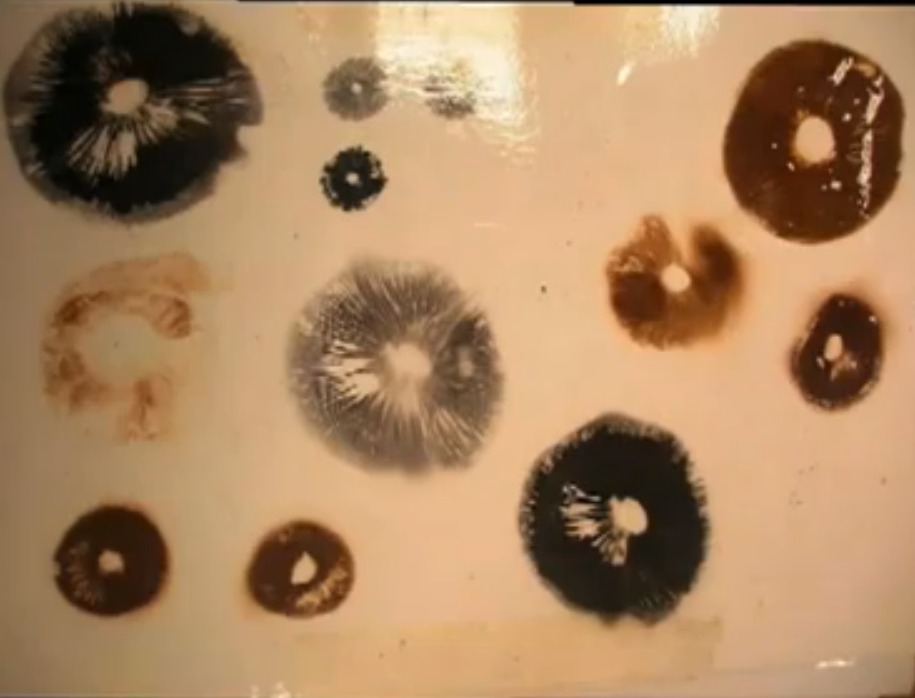
🍄 Mushroom caps leave spore prints that often show a mushroom's spore color — a super-helpful ID clue!
🌬️ A single mature mushroom can release millions to billions of tiny spores that travel on the wind.
🎨 Kids and artists sometimes use colorful spore prints like natural stamps or ink for art projects.
🔬 Spores are microscopic reproductive cells — most are too small to see clearly without a microscope.
⚠️ Some wild mushrooms are poisonous — always do spore-print experiments with an adult and never eat wild mushrooms.
How do you make a mushroom spore print?
What materials do I need for a mushroom spore print?
What ages is this activity suitable for?
What safety tips should I follow when making a spore print?
