Build custom furniture
Design and build a small custom shelf or stool from cardboard or simple wood pieces, measure, assemble with adult help, then decorate it.


Step-by-step guide to build custom furniture
EASY DIY Kids Desk With Storage And Chair - Beginner-friendly 1-Day Project!
Step 1
Pick whether you will build a small shelf or a stool.
Step 2
Decide how tall and wide it should be and write down the measurements.
Step 3
Draw a simple plan showing the front and side views and label each measurement.
Step 4
Measure and mark the shapes on your cardboard or wood using the ruler and pencil.
Step 5
Ask an adult to cut the marked pieces along your lines with the right cutting tool.
Step 6
If you used wood, ask an adult to help sand the edges until they are smooth.
Step 7
Dry-fit the cut pieces together to check that they line up and make any small pencil marks to adjust.
Step 8
Apply glue along the joints and press the pieces together firmly.
Step 9
Use masking tape to hold glued joints in place while the glue dries.
Step 10
If your project is wood, ask an adult to fasten the joints with screws or nails for extra strength.
Step 11
Decorate your shelf or stool with paint and colouring materials and allow it to dry completely.
Step 12
Test the stability with an adult present and make any small fixes if something feels wobbly.
Step 13
Share your finished creation on DIY.org.
Help!?
What can we use instead of wood or cardboard if those are hard to find?
If you can't find wood or strong cardboard, use double-layered corrugated cardboard or foam-core board and follow the 'measure and mark' and 'apply glue along the joints' steps while asking an adult to cut thicker material with a craft knife.
What should we do if the pieces don't line up during the dry-fit step?
If pieces don't line up during the 'dry-fit' step, make small pencil adjustment marks, sand or trim the edges (with adult help), then re-fit and use masking tape or clamps to hold joints straight while the glue dries.
How can this activity be adapted for younger or older kids?
For younger children, have an adult pre-cut cardboard pieces and let them draw the plan, assemble with masking tape, and decorate, while older kids can do full 'measure and mark', cut wood with supervision, sand edges, and fasten joints with screws.
How can we personalize or strengthen the finished shelf or stool?
To personalize and strengthen the project, add extra shelves or decorative panels in your 'draw a simple plan', sand and paint during 'decorate', attach felt pads under legs, and reinforce joints with screws before the final 'test the stability'.
Watch videos on how to build custom furniture
How to Build a Kids Floor Bed--From Dowels and 2x4s!
4 Videos
How to Build a Kids Floor Bed--From Dowels and 2x4s!
Amazing furniture DIY using cardboard Very simple and easy crafts |Cardboard furniture craft at home
10 DIY Furniture Ideas For Absolute Beginners
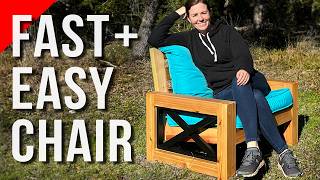
DIY Modern Chair for Indoors or Out | Super Easy Build!
Facts about woodworking for kids
🪑 Ancient stools are among the oldest furniture—Egyptian stools over 5,000 years old have been found in tombs.
📦 Cardboard gets much stronger when folded or layered; designers sometimes make entire chairs and shelves from corrugated board.
📏 Woodworkers say “measure twice, cut once” because small measurement mistakes are the most common cause of wasted materials.
🪵 Plywood is made by gluing thin wood veneers with grains at right angles, which gives it extra strength and resistance to warping.
🎨 A fresh coat of paint, stencils, or decoupage can turn a plain shelf or stool into a bright, personalized masterpiece.
How do you build a small custom shelf or stool with your child?
What materials do I need to make a cardboard or simple wood shelf or stool?
What ages is building simple furniture suitable for?
What safety tips should parents know when making a small shelf or stool with kids?
