Invent a phobia and design a solution
Invent a made-up phobia, draw its scary symbol, and design a comforting tool or game that helps someone feel brave and calm.


Step-by-step guide to invent a phobia, draw its scary symbol, and design a comforting tool or game
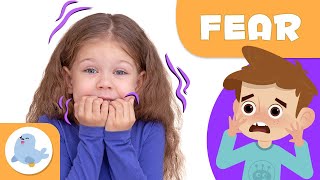
Proven Strategies to Help Children Overcome Fears | Age-Related Fears | Why is my Child Afraid?
Step 1
Think up a funny or spooky made-up phobia name and write it big at the top of your paper.
Step 2
Write one short sentence that explains what makes this phobia feel scary.
Step 3
Imagine a simple symbol or little creature for the phobia and draw it in the center of the paper.
Step 4
Use your coloring materials to add bold lines and colors to make the symbol look spooky.
Step 5
Brainstorm three comforting ideas that could help someone feel brave and calm and write each idea on a separate sticky note.
Step 6
Pick your favorite comforting idea and draw a quick sketch of the tool or game on your paper.
Step 7
Gather cardboard and cut the shapes you need to build the tool or game.
Step 8
Tape or glue the cardboard shapes together to make the base of your comforting tool or the game pieces.
Step 9
Attach soft fabric or a small toy piece and decorate your tool with bright colors and happy symbols.
Step 10
Write two short instructions on a sticky note that explain how to use the tool or play the game to feel brave.
Step 11
Pretend you are scared and use your new tool or play your game one time to see how it helps you calm down.
Step 12
Share your finished creation on DIY.org and include the phobia name the scary symbol and a short note about how your tool or game helps someone feel brave.
Help!?
If we don't have sticky notes, soft fabric, or cardboard, what can we use instead?
Use small squares cut from printer paper or index cards for the sticky notes, a clean sock scrap, felt, ribbon, or cotton balls instead of soft fabric, and a cereal box, pizza box, or mailing box flattened for the cardboard you need to cut and build the base.
My cardboard pieces keep tearing or the glue won't hold when I tape or glue the shapes together—what should we try?
Score fold lines with a blunt knife before cutting thin cardboard, reinforce glued seams with clear tape or an extra layer of cardboard, and use hot glue with adult help or strong craft glue and allow full drying time after the 'Tape or glue the cardboard shapes together' step.
How can I adapt this activity for different ages?
For younger kids, have an adult pre-write the phobia name, pre-cut the cardboard shapes and let them use stickers and crayons for the 'draw' and 'decorate' steps, while older kids can design moving parts, measured templates, or electronics, write more complex game rules, and take photos to 'share' on DIY.org.
What are easy ways to enhance or personalize our comforting tool or game?
Add a favorite scent to the attached fabric, glue on a small toy or bell for sound, include extra happy-symbol stickers and bold colors from your coloring materials, or make a tiny instruction booklet to go with the two short sticky-note instructions before sharing the finished creation on DIY.org.
Watch videos on how to invent a phobia, draw its scary symbol, and design a comforting tool or game
How to Help Children Manage Fear | Child Mind Institute
4 Videos

How to Help Children Manage Fear | Child Mind Institute

🌈 "Every Child Has Fears 😨 — But You Can Help Them Overcome It 💪✨"
FEAR for Kids 😱 What is fear? 😰 Emotions for Kids

Afraid of the Dark? How to Help Kids Overcome Fear
Facts about emotional regulation and coping strategies for kids
🧠 The word "phobia" comes from the Greek word phobos, which means fear or panic!
🎨 Art therapy helps people show scary feelings through drawing or play instead of just words.
🎮 Games and playful steps are often used by therapists to help someone face a fear safely.
📚 There are thousands of named phobias — and making up a silly one is a creative way to explore feelings.
🤝 Sharing a worry with a friend or using a comfort tool (like a worry stone or brave badge) can make fear feel smaller.
How do you do the 'invent a phobia' and calming tool activity with a child?
What materials do I need to invent a made-up phobia and design a comforting tool?
What ages is this phobia-invention and calming-tool activity suitable for?
What are the benefits, safety tips, and variations for this activity?
