Assemble a butterfly net
Assemble a simple butterfly net using a wooden dowel, mesh fabric, tape, and glue, then practice safe catching and observing butterflies outdoors.
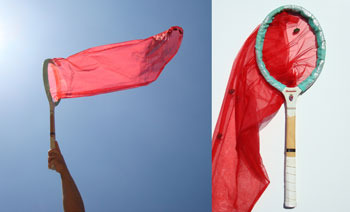
About this activity
Assemble a simple butterfly net using a wooden dowel, mesh fabric, tape, and glue, then practice safe catching and observing butterflies outdoors.
What you need
Step by step
- 1
Step 1
Lay out your materials on a flat table so you can see everything.
- 2
Step 2
Cut the mesh into a rectangle about 3 feet long by 2 feet wide.
- 3
Step 3
Fold the short edges of the rectangle so they overlap and form a cone shape.
- 4
Step 4
Glue the overlapped edges together to secure the cone shape.
- 5
Step 5
Wrap tape around the glued seam to reinforce the cone.
- 6
Step 6
Trim the small tail end of the cone so it will slide onto the dowel about 4 inches.
- 7
Step 7
Slide the small end of the cone onto the end of the wooden dowel until it fits snugly.
- 8
Step 8
Wrap tape tightly around the place where the mesh meets the dowel to hold it in place.
- 9
Step 9
Apply a thin line of glue under the taped joint to strengthen the hold.
- 10
Step 10
Let the glue dry completely before you use the net.
- 11
Step 11
Gently tug the mesh where it meets the dowel to test that the net is secure.
- 12
Step 12
With an adult, go outside and sweep the net low and slow to gently catch a butterfly.
- 13
Step 13
When a butterfly is inside, hold the net still until the butterfly settles so you can observe it.
- 14
Step 14
Tip the net open near a flower or plant and let the butterfly fly away on its own.
- 15
Step 15
Share a photo or story about your finished butterfly net and your observation on DIY.org.
Fun facts
How do I assemble a simple butterfly net and use it safely?
Cut a circular piece of lightweight mesh about 18–24 inches across. Center the wooden dowel at one edge, gather the mesh around the end to form a pouch, and secure it with tape and a dab of glue. Wrap extra tape for strength and trim leftovers; sand any rough dowel edges. Outdoors, approach butterflies slowly, scoop underneath in a smooth motion, hold them gently for quick observation, then release them unharmed.
What materials and tools do I need to make a butterfly net?
You’ll need a wooden dowel (24–36 inches), lightweight mesh fabric (nylon or tulle), strong tape (duct or cloth), and glue (hot glue or white craft glue). Also have scissors, sandpaper for smoothing the dowel, a rubber band or extra tape for reinforcement, and an optional clear container for quick observations. Adult supervision and a washable work surface are helpful.
What ages is this butterfly net activity suitable for?
This craft is ideal for children aged about 5–12. Younger kids (3–4) can participate with close adult help for cutting, gluing, and handling. Older children can build and decorate their nets more independently. Adjust the complexity and supervision to match your child’s fine-motor skills and safety awareness; always supervise outdoor catching to protect insects and children.
What are the safety tips and benefits of making a butterfly net?
Safety: smooth rough wood, use low-heat glue with care, supervise scissors, and teach gentle handling—never squeeze butterflies or keep them confined long. Benefits: making and using a net builds fine motor skills, patience, observation and an appreciation for nature. Variations like decorating handles or adding measurement marks turn it into a science activity for learning species, wingspan, and habitats.
Watch & Learn
Need help?
What can I use instead of the mesh or wooden dowel if they’re hard to find?
If you don't have mesh, use tulle, a lightweight mosquito net, or a clean pantyhose stretched into a rectangle, and if you don't have a wooden dowel use a broom handle, straight stick, or a 1" PVC pipe cut to size to slide the cone onto as described in 'Trim the small tail end of the cone so it will slide onto the dowel about 4 inches.'
The glued seam or the mesh where it meets the dowel is coming loose—what should I try?
After 'Glue the overlapped edges' and 'Wrap tape around the glued seam,' reinforce by adding extra tape layers, a zip tie or a bead of hot glue under the taped joint, and roughen the dowel end with sandpaper so the cone fits more snugly before 'Let the glue dry completely.'
How can I adapt this butterfly net activity for different ages?
For toddlers have an adult pre-cut the mesh and pre-fit the cone onto the dowel so they can do simpler steps like wrapping tape and gentle sweeping, while older kids can cut the full rectangle themselves, sew the seam instead of using glue, and try adding a wire hoop for a professional-looking rim.
What are some ways to extend or personalize the finished net?
Decorate the wooden dowel with washable paint, add a foam grip or wrist strap at the handle, insert a coat-hanger hoop before sliding the cone on to keep the opening round, and attach a small mesh observation pouch for the butterflies before sharing your photo/story on DIY.org.