Make a bug catcher
Build a safe handheld bug catcher using a jar, breathable lid or mesh, soft paintbrush and magnifying lens to observe insects gently and release them.


Step-by-step guide to make a bug catcher
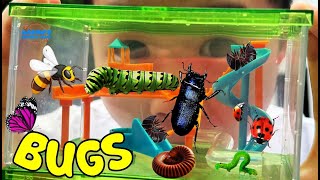
Kids Bug Hunt at home and learn about Bugs facts with Ryan!
Step 1
Gather all the materials listed and bring them to a flat workspace outside or near a window.
Step 2
Wash the jar with soap and water and dry it so it is clean for the insect.
Step 3
Put a small leaf or twig inside the jar to give the insect a soft place to rest.
Step 4
Cut a piece of mesh a little larger than the jar opening so it will fully cover the top.
Step 5
Place the cut mesh next to the jar so you can cover the jar quickly when the insect is inside.
Step 6
Go outside slowly and find a small insect to observe without chasing or hurting it.
Step 7
Use the soft paintbrush to gently coax the insect toward the jar opening.
Step 8
Guide the insect onto the leaf in the jar by very gently nudging it with the paintbrush.
Step 9
Immediately cover the jar opening with the mesh and secure it in place with the rubber band.
Step 10
Hold the jar gently and use the magnifying lens to look closely at the insect for a short time.
Step 11
Remove the mesh and let the insect go back where you found it by tipping the jar gently outdoors.
Step 12
Share your finished bug catcher and what you learned on DIY.org
Help!?
What can we use if we can't find mesh, a rubber band, or a magnifying lens?
If you can't find mesh, use a clean nylon stocking or a paper coffee filter over the jar opening, replace the rubber band with string or tape, and use a smartphone camera zoom or a handheld reading magnifier in place of the magnifying lens.
What should we do if the insect won't go into the jar or the jar fogs up?
Place the small leaf or twig right at the jar opening and gently coax the insect with the soft paintbrush (steps 3 and 6–7), make sure the jar is washed and fully dry (step 2) to prevent fogging, and cut the mesh a little larger than the jar opening (step 4) so it covers quickly without trapping air.
How can we adapt this bug catcher activity for younger or older children?
For younger kids use a shallow plastic container, have an adult pre-cut the mesh and handle the jar (steps 1–4 and 8), and for older kids add a notebook and use the magnifying lens or smartphone to record detailed observations before releasing the insect (steps 9–12).
How can we extend or personalize the bug catcher activity after we release the insect?
Decorate and label your jar, keep an observation journal with sketches made while looking through the magnifying lens, try different leaf or twig types inside the jar (step 3), and photograph or write up your findings to share on DIY.org as suggested in the final step.
Watch videos on how to make a bug catcher
🕷CATCHING BUGS OUTSIDE! Caleb & Mommy GO on a BUG HUNT and Learn about Insects for kids!
4 Videos
🕷CATCHING BUGS OUTSIDE! Caleb & Mommy GO on a BUG HUNT and Learn about Insects for kids!
Bug Catching at Home Kids learn about insects and nature
Stink Bugs for Kids | Learn all about these smelly insects
KIDS! 🐞Real BUG Playground! 🐛Watch Bugs Go Crazy! | EDUCATIONAL KIDS NATURE SHOW🌿
Facts about entomology for kids
🐞 Insects are the most diverse animals — scientists have described over one million insect species!
🔍 A magnifying glass (2–10×) can reveal tiny wing veins, antennae segments, and body hairs kids can't see with the naked eye.
🖌️ Using a soft paintbrush is a gentle way to guide delicate insects into a jar without hurting them.
🌬️ A breathable lid or mesh keeps air flowing so captured insects can breathe and stay healthy until release.
🌍 When kids log insect sightings on platforms like iNaturalist, they help scientists track biodiversity and environmental change.
How do I make and use a handheld bug catcher to observe insects safely?
What materials do I need to build a safe handheld bug catcher?
What ages is this bug catcher activity suitable for?
What safety tips should parents follow when using a bug catcher?
