Analyze an animal's gait
Observe and analyze an animal's gait by filming or sketching steps, measuring stride length and timing, then compare walking, trotting, and running patterns.
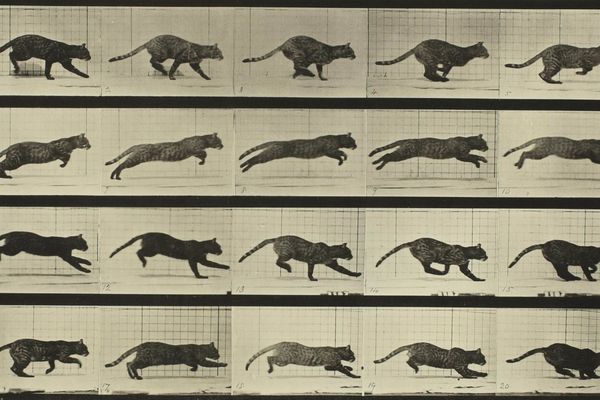
About this activity
Observe and analyze an animal's gait by filming or sketching steps, measuring stride length and timing, then compare walking, trotting, and running patterns.
What you need
Step by step
- 1
Step 1
Pick one animal to study and write its name at the top of your notebook.
- 2
Step 2
Find a safe flat straight area where the animal can walk and tell an adult where you will work.
- 3
Step 3
Use the measuring tape to measure 2 meters on the ground and note the two end points.
- 4
Step 4
Mark the two end points clearly with chalk or masking tape.
- 5
Step 5
Decide whether you will film the animal or sketch its steps and get your camera set up or stand ready with your notebook.
- 6
Step 6
Encourage the animal to walk across the 2-meter path at a normal walking speed while you film or watch.
- 7
Step 7
Time the crossing with your stopwatch from the moment the animal’s first foot crosses the start line until the last foot crosses the end line and write the time in your notebook.
- 8
Step 8
Count the number of full strides the animal made across the 2 meters and write that number down.
- 9
Step 9
Calculate the average stride length by dividing 2 meters by the number of full strides and record the result.
- 10
Step 10
Repeat Steps 6 to 9 two more times: once while the animal trots and once while it runs, recording times and stride counts for each gait.
- 11
Step 11
Write short notes comparing walking trotting and running by listing which gait had the longest stride and which was the fastest and add a quick sketch of the foot positions for each gait.
- 12
Step 12
Share your finished observations sketch photos or video and your notes on DIY.org.
Fun facts
How do I analyze an animal's gait by filming or sketching steps?
To analyze an animal's gait, pick a calm subject and get a clear side view. Film a steady video or sketch successive footfalls, marking start and finish. Place a known-length object in frame, then measure stride length and use a stopwatch to time several steps for cadence. Repeat for walking, trotting, and running and compare stride length, step frequency, and footfall sequence. Keep a safe distance and avoid stressing the animal.
What materials do I need to measure an animal's stride length and timing?
You’ll need a smartphone or camera (tripod helps), a tape measure or meter stick, a stopwatch or timer, markers or chalk to mark footfalls, and a notebook with pen for notes and sketches. Include a scale reference (ruler or known-length object in the frame) and optional sketch paper. For wild animals use binoculars and observe from a distance. Adult supervision and a basic first-aid kit are recommended when handling pets.
What ages is this animal gait activity suitable for?
This activity suits children roughly ages 6–16 with adjustments: ages 6–8 can observe, sketch footprints, and describe differences; ages 9–12 can measure stride length, time steps, and record data; teens can calculate speed, analyze patterns, and compare biomechanics. Always supervise younger children, use gentle animals, and simplify math or measurement tasks to match attention span and skill level.
What are the benefits of observing and comparing walking, trotting, and running patterns?
Observing gait builds observation, measurement, and scientific thinking—kids learn recording methods, units, and how to compare data. It connects biology (how animals move), physics (speed and stride), and math (timing, averages). The activity encourages outdoor exploration, patience, and empathy toward animals, and makes a strong hands-on science project that fosters teamwork when children film, measure, and discuss results together.
Watch & Learn
Need help?
What can we use if we don't have a measuring tape, chalk, or a stopwatch?
Use a known-length rope or two 1‑meter sticks taped together to mark the 2 meters (step 3), small rocks or a jump rope instead of chalk/masking tape to mark endpoints (step 4), and a smartphone timer for the stopwatch and camera (steps 5–6).
What should we do if the animal won't walk straight or keeps stopping during the trial?
If the animal won't walk cleanly across the 2‑meter path (steps 5–6), have an adult guide or gently encourage it with a familiar person or treat, film from the side to catch every footfall for accurate counting (steps 6–8), and re-mark the start/end if the tape or chalk has moved (step 4).
How can we adapt the activity for younger children or make it more challenging for older kids?
For younger kids, reduce the distance to 1 meter and have an adult do the timing and stride counting (steps 3, 6–8), while older kids can repeat runs for multiple animals, compute average stride lengths, and compare gaits with graphs (steps 9–11).
How can we extend or personalize the gait analysis to make it more interesting?
Extend the project by using slow‑motion video to study foot positions for your sketches (steps 5–6 and 11), compare stride length versus crossing time across walking, trotting and running (steps 8–9), and upload annotated photos or a short report to DIY.org (step 12).