Make a track casting
Make a plaster cast of an animal track using safe plaster, water, and a cardboard frame; practice observation, measuring, and careful pouring techniques.


Step-by-step guide to make a track casting
How To Cast An Animal Track Animal Science Experiment
Step 1
Go outside and find a fresh animal track in soft soil or mud.
Step 2
Look closely at the track and notice details like toe marks claws and pad shape.
Step 3
Gently brush away loose dirt and pebbles from inside and right around the track.
Step 4
Measure the track length and width with the ruler and say or write the numbers.
Step 5
Cut a rectangle from the cardboard that will fit around the track.
Step 6
Fold up the rectangle edges and tape them to make a shallow frame.
Step 7
Press the cardboard frame gently into the soil around the track so the bottom edge seals to the ground.
Step 8
Put on disposable gloves if you choose to use them.
Step 9
Pour 1/2 cup (about 120 ml) of water into the mixing cup.
Step 10
Slowly add about 1 cup (about 240 ml) of plaster powder to the water to make a 2 to 1 plaster to water mix.
Step 11
Stir the plaster mixture with the stick until it is smooth and has no lumps.
Step 12
Wait one minute for the mixture to thicken slightly before pouring.
Step 13
Carefully pour the plaster into the framed track starting at one edge and let it flow until the frame is filled.
Step 14
Let the plaster harden undisturbed for 30 to 60 minutes until it feels firm to the touch.
Step 15
Remove the cardboard frame and gently dig around and lift out your plaster track cast and share your finished creation on DIY.org.
Help!?
What can we use instead of plaster powder if it's hard to find?
If plaster powder isn't available, press air‑dry clay into the cardboard frame to make a cast or use a quick‑setting cement mixed in your mixing cup following package directions and then pour and let it harden as in the instructions.
What should we do if the plaster leaks under the cardboard frame or the cast comes out lumpy?
If plaster leaks under the cardboard or the cast looks lumpy, press the bottom edge of the cardboard frame firmly into the soil and retape seams, then stir more plaster powder into the water in the mixing cup until smooth, wait the one minute to thicken, and pour slowly from one edge.
How can we adapt the steps for different age groups?
For younger children, have an adult press air‑dry clay into the framed track and read and record the ruler measurements while older kids can measure the track themselves, mix and stir the plaster in the mixing cup, time the 30–60 minute hardening, and upload detailed photos to DIY.org.
How can we enhance or personalize our finished plaster track cast?
After you lift the plaster cast, smooth edges with sandpaper, paint details with acrylics, write the animal name, date, and ruler measurements on the back, and mount it in a labeled box or post it on DIY.org to personalize the outcome.
Watch videos on how to make a track casting
How to Make Your Own Animal Track Cast
4 Videos
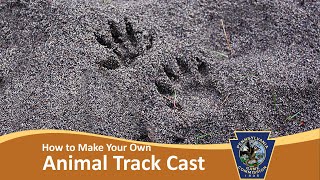
How to Make Your Own Animal Track Cast
How to Make a Track Cast
Most Amazing & EASY WAY to make TRAIN TRACKS || How to make tracks || 18mm guage
How to make a silicone rubber mould using a toy train track as a model. Prince August Hobby Casting.
Facts about animal tracking
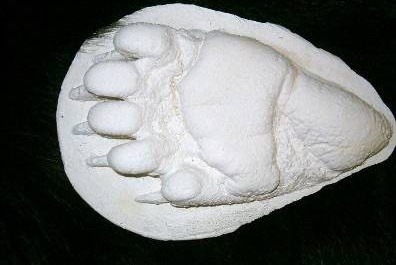
🦶 Plaster casts can capture tiny details like toe pads and claw marks, helping you identify which animal made the track.
🐾 Different animals leave different patterns — deer prints are two-toed, while dogs and foxes show four toes and a pad.
🧪 Plaster of Paris usually starts setting in 10–30 minutes, so mix and pour quickly but carefully.
🔬 Scientists and paleontologists use track casts to study movement and behavior — some fossil trackways are millions of years old.
📏 A snug cardboard frame and a ruler help you measure and level your cast so it doesn't leak and comes out clear.
How do I make a plaster cast of an animal track?
What materials do I need to make a track casting with plaster?
What ages is making a plaster animal track cast suitable for?
What are the safety tips and benefits of making plaster track casts?
