Find animal remains
Carefully search outdoors with an adult to locate and document animal remains like bones, feathers, and tracks using photos, sketches, and identification guides.


Step-by-step guide to find animal remains
What are Fossils? Science For Kids
Step 1
Gather the materials listed and put them where you can reach them easily.
Step 2
Ask an adult to come with you to help and stay nearby the whole time.
Step 3
Decide with your adult on a safe outdoor area to search.
Step 4
Walk slowly to the search area with your adult.
Step 5
Scan the ground and nearby plants carefully for bones feathers or tracks.
Step 6
If you spot a possible animal remain stop where you are.
Step 7
Ask your adult to check that it is safe to approach the find.
Step 8
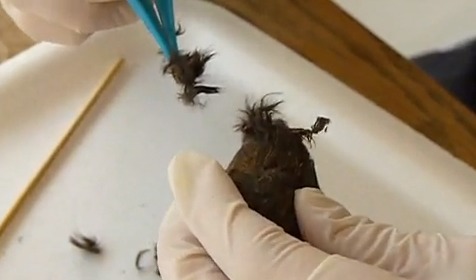
Observe the item from a safe distance without touching it.
Step 9
Place a ruler or coin next to the item and take a close-up photo to show its size.
Step 10
Sketch the item in your notebook and label any features you notice.
Step 11
Use the field guide to compare features and write your best guess of which animal it came from.
Step 12
Record the location date and time of your find in your notebook.
Step 13
Keep pets and people away from the find and do not move or collect the remains.
Step 14
Wash your hands with soap and water after finishing the search.
Step 15
Share your finished documentation sketches and photos on DIY.org
Help!?
What can we use if we don't have a field guide, ruler, or camera?
Use a field-identification app or printed online images instead of the field guide, a coin or a paper strip with marked centimeters instead of a ruler, and a phone or borrowed camera for the close-up photo called for in the "Place a ruler or coin next to the item and take a close-up photo" step.
My photo didn't show the scale or the find got disturbed—how do we fix that?
Stop where you are, ask your adult to check it is safe to approach, then put a ruler or coin clearly next to the item and retake several close-up photos from different angles and update your sketch in the notebook as the instructions recommend.
How should we change the activity for a 3-year-old versus a 12-year-old?
For a 3-year-old, keep it short and supervise closely with the adult pointing out large feathers or tracks while the adult records photos and sketches, whereas a 12-year-old can follow the full steps independently by scanning carefully, sketching in their notebook, using the field guide to identify the find, placing a ruler or coin for scale, and recording the location, date, and time.
How can we extend or personalize the activity beyond sharing on DIY.org?
Turn your documented sketches and photos into a mapped log or scrapbook, create a display of your photos and labeled sketches (without moving remains), compare identifications using different field guides or apps, or submit observations to a citizen-science project while always keeping pets and people away from the find.
Watch videos on how to find animal remains
Fossils for Kids | Learn all about how fossils are formed, the types of fossils and more!
3 Videos

Fossils for Kids | Learn all about how fossils are formed, the types of fossils and more!
Fun Facts about Fossils | Interactive | Learn about what fossils are and how they form
Fossil Facts for Kids | Digging into the Past: The Fascinating World of Fossils!
Facts about wildlife tracking and field biology
🦴 Bones are living tissue — they repair themselves and contain blood vessels and cells, not just hard rock-like stuff.
🪶 Feathers are made mostly of keratin, the same material as your hair and fingernails.
🐾 Tracks can often identify an animal at a glance: the number of toes, the shape, and stride tell big clues about who passed by.
🔍 Taphonomists study how animals decay and become fossils — they help scientists read the story of animal remains.
📸 A photo with a ruler or a coin for scale makes it much easier to identify bones, feathers, and tracks later on.
How do I find and document animal remains safely with my child?
What materials do I need to search for and document animal remains?
What ages is this activity suitable for?
What safety and legal rules should parents follow when looking for animal remains?
