Shade an object with scribbles
Shade an object by using scribbled lines and varying pencil pressure to create light and dark tones, learning about form and value.

Drawing Apps
Step-by-step guide to shade an object with scribbles
Step 1
Choose a small object to shade and place it on a table under one light source.
Step 2
Put a plain sheet of paper next to the object so you can draw comfortably.
Step 3
Study the object to find the brightest highlight and the deepest shadow.
Step 4
Lightly sketch the basic outline of the object with a thin pencil line.
Step 5
On a scrap of paper practice three scribble pressures: light medium and heavy.
Step 6
Shade the highlight areas using very light scribbled lines that follow the object's form.
Step 7
Shade the midtone areas using medium pressure scribbles to build up value.
Step 8
Shade the deepest shadow areas using heavy pressure scribbles to create dark tones.
Step 9
Layer scribbles in different directions to smooth the transitions between light and dark.
Step 10
Use the eraser gently to lift tiny highlights where the light hits strongest.
Step 11
Step back and look at your drawing from a little distance to compare values with the object.
Step 12
Make small scribble adjustments to any areas that need to be darker or lighter.
Step 13
Sign your name in a corner of the paper when you are happy with your shading.
Step 14
Share your finished shaded drawing on DIY.org
Help!?
What can I use if I don’t have a thin pencil, plain paper, or a dedicated lamp for the light source?
Use a sharpened colored pencil or mechanical pencil instead of a thin pencil, plain printer or notebook paper in place of the plain sheet, and a desk lamp, phone flashlight, or sunny window as the single light source so you can study highlights and shadows.
My drawing looks flat — which steps should I redo to get stronger contrast and smoother transitions?
Practice the three scribble pressures on scrap paper, then layer light, medium, and heavy scribbles in different directions over the midtones and shadows, gently lift tiny highlights with the eraser, and step back to compare values with the real object.
How can I adapt this activity for different age groups?
For younger children pick a simple object and a chunky crayon to practice light/medium/heavy scribbles while an adult points out the brightest highlight and deepest shadow, and for older kids use a thin pencil for a light outline, finer pressure gradations, more directional scribble layers, and careful eraser highlights.
What are some ways to extend or personalize the shaded scribble drawing activity?
Try using colored pencils for midtones, experiment with moving the light source to create new cast shadows, draw a series of the same object under different lights to compare values, and then sign your name and share your finished shaded drawing on DIY.org.
Watch videos on how to shade an object with scribbles
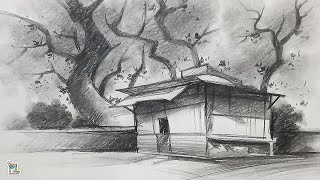
Learn Scribble Scenery Drawing with Pencil for Beginners | Easy Pencil Art
4 Videos
Learn Scribble Scenery Drawing with Pencil for Beginners | Easy Pencil Art
Pencil Drawing and Shading with Scribble Strokes
EASY DRAWING TIPS: How to teach someone to draw? 🖌️🎨
Scribble Easy and Simple Pencil Drawing
Facts about shading and value in drawing
✏️ Graphite pencils are graded from 9H (very hard, very light) to 9B (very soft, very dark) so you can get lots of tone options.
🎨 Chiaroscuro is an Italian word meaning “light–dark” and was used by Renaissance painters to make flat pictures look 3D.
🖍️ Hatching, cross-hatching, and scribbling are all line-based ways artists build up darker tones without solid smudging.
✨ Some professional artists use scribble-shading as a deliberate finished style—messy lines can create believable texture and shadow.
👀 Our eyes mostly read value (light and dark) to understand shape, so good shading makes objects look real even without color.
How do I teach my child to shade an object using scribbled lines and varying pencil pressure?
What materials do I need to do a scribble-shading activity with my child?
What ages is scribble shading with pencils suitable for?
What are the benefits of shading objects with scribbles for kids?
