Measure something tall with a clinometer
Build a simple clinometer from a protractor, straw, and string, then measure a tree or building height from a safe distance.


Step-by-step guide to measure something tall with a clinometer
Clinometer | Vacation Learning: Build & Use to Measure Heights (Using 45° Method)| Grade 8 & Above
Step 1
Gather all the materials on a clear table so you can reach everything easily.
Step 2
Cut a piece of string about 20 centimeters long.
Step 3
Thread one end of the string through the small hole at the center of the protractor and tie a knot so the string is secure.
Step 4
Clip the paperclip or washer to the bottom of the string so it hangs as a weight.
Step 5
Tape the straw along the straight flat edge of the protractor so the straw points straight out from the protractor.
Step 6
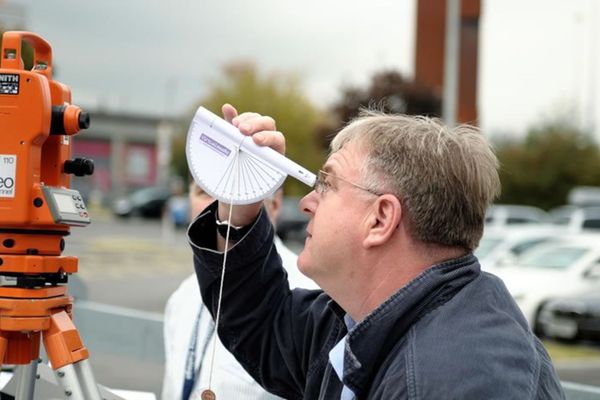
Hold the clinometer by the flat edge with your eye lined up behind the straw.
Step 7
Point the straw at the top of the tree or building and look through the straw to sight the top.
Step 8
Keep the clinometer steady and read the angle in degrees where the string crosses the protractor scale and write that angle down.
Step 9
Measure the horizontal distance from where you are standing to the base of the tree or building and write the distance down.
Step 10
Measure the height from the ground up to your eye and write your eye height down.
Step 11
Set your calculator to DEGREE mode.
Step 12
Multiply the distance to the tree by the tangent of the measured angle to find the height above your eye and write that number down.
Step 13
Add your eye height to the height above your eye to get the total height of the tree or building and write the final height down.
Step 14
Take a photo or note of your clinometer and your final measurement and share your finished creation on DIY.org.
Help!?
What can I use if I don't have a protractor, straw, or paperclip/washer?
Print and cut a paper protractor or cut a 180° sector from cardboard to use as the protractor, tape a straight pencil or unbent drinking straw along the flat edge in place of the straw, and tie a small metal nut or a ball of modeling clay to the string instead of the paperclip or washer.
The string is swinging and I can't read the angle—how do I fix it?
Make sure you followed the step to thread the string through the protractor hole and tie a secure knot, clip a weight like a washer or nut so it hangs freely, tape the straw firmly along the protractor flat edge, hold the clinometer steady with two hands and wait for the string to settle before reading where it crosses the protractor scale, and take several readings to average.
How can I adapt this clinometer activity for different age groups?
For younger children, have an adult do the string, knot, and sighting setup and help with measuring horizontal distance and eye height, for elementary kids let them sight through the taped straw and measure distances while an adult checks the calculator is in DEGREE mode for the tangent step, and for older kids require multiple trials, averaging and percent-error calculations after adding eye height to the tangent-derived height.
How can we extend or personalize the clinometer project?
Decorate and label your clinometer, add marked angle notches to the protractor, photograph each measured angle, distance, and eye height as you collect data, compare the calculated height to a smartphone clinometer app, and then share your finished creation and photo on DIY.org.
Watch videos on how to measure something tall with a clinometer
How to Use a Clinometer? | Application of Trigonometry with the help of Clinometer | Letstute
4 Videos

How to Use a Clinometer? | Application of Trigonometry with the help of Clinometer | Letstute
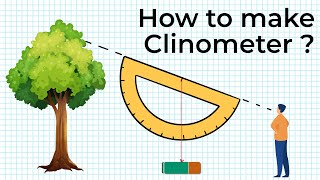
How to make a Clinometer | Application of Trigonometry | Class 9 & 10 | Letstute CBSE

HOW TO MAKE & USE A CLINOMETER:Group 2-Einstein
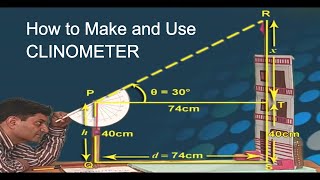
How to make and use Clinometer
Facts about surveying and measurement for kids
📐 A clinometer measures angles of elevation or slope — combine that angle with distance and you can calculate a tree or building height using basic trigonometry.
🌲 Foresters and ecologists often use clinometers to estimate tree heights quickly from the ground without climbing!
🧭 Simple angle-measuring tools like the clinometer have been used in navigation and surveying for centuries to measure tilt and elevation.
📏 A common protractor is a half-circle that reads 180° — it's the perfect base for a kid-friendly clinometer.
🪢 A DIY clinometer made from a protractor, straw, and string can be surprisingly accurate if you hold it steady and measure carefully.
How do you measure something tall with a homemade clinometer?
What materials do I need to build a simple clinometer?
What ages is using a clinometer suitable for?
What are the benefits, safety tips, and variations for measuring heights with a clinometer?
