Make string art
Make a colorful string art board with adult help by hammering nails into foam or wood, wrapping thread to form patterns and learning symmetry.
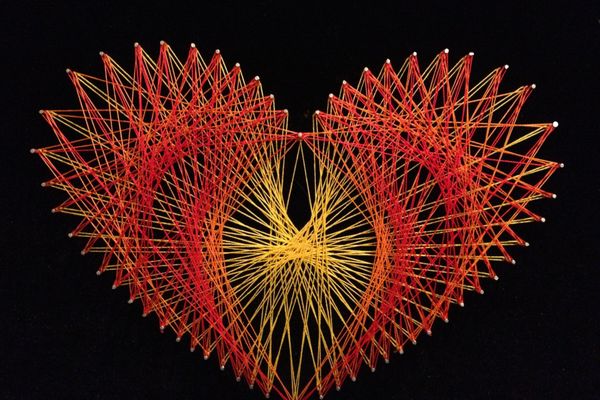
About this activity
Make a colorful string art board with adult help by hammering nails into foam or wood, wrapping thread to form patterns and learning symmetry.
What you need
Step by step
- 1
Step 1
Gather all your materials on a clear table so everything is ready to use.
- 2
Step 2
Fold a sheet of paper in half to prepare a template for a symmetrical design.
- 3
Step 3
Draw half of a simple shape along the folded edge of the paper.
- 4
Step 4
Cut along the line to make a full symmetrical paper template.
- 5
Step 5
Place the paper template where you want the design on the board.
- 6
Step 6
Trace around the template with a pencil to mark the outline on the board.
- 7
Step 7
Use a ruler to mark evenly spaced dots along the traced outline for nail placement.
- 8
Step 8
Have an adult hammer a nail into each marked dot leaving about half the nail sticking out.
- 9
Step 9
Tie the end of one color thread to a starting nail with a tight knot.
- 10
Step 10
Wrap the thread from nail to nail following the same pattern around the shape to build a symmetrical design.
- 11
Step 11
Tie off the end of the first color to a nail when you finish that layer.
- 12
Step 12
Tie a second color thread to a nail to start a new layer of string art.
- 13
Step 13
Wrap the second color around the nails to add more patterns and color.
- 14
Step 14
Tuck or tape any loose ends under nearby strings and put tools away with adult help.
- 15
Step 15
Share a photo of your finished colorful string art board on DIY.org.
Fun facts
How do you make a colorful string art board with adult help?
Start by choosing a foam or wooden board and draw a simple symmetrical pattern. With adult help, hammer small nails evenly along the outline, leaving heads exposed. Tie a knot to secure the thread on one nail, then wrap the thread between nails to fill shapes, keeping even tension. Change colors by tying off and starting new threads. Finish with a secure knot, trim excess, and optionally seal or frame the board. Discuss symmetry as you wrap.
What materials do I need for a kids' string art board?
You'll need a foam board or smooth wooden plank, small nails or panel pins, a small hammer, embroidery floss or thin yarn in several colors, a pencil and ruler for drawing the pattern, scissors, and tape or clips to hold templates. Optional: paint or acrylics for the background, glue, safety goggles, and felt pads for the base. Always supervise hammering and keep sharp items out of children's reach.
What ages is string art suitable for and how much adult help is needed?
String art suits children aged about 5 and up with adult supervision. Ages 5–7 enjoy planning and wrapping threads while an adult hammers nails and supervises. Ages 8–12 can measure, hammer with guidance, and create more detailed patterns. Teenagers can plan and execute more complex designs independently. Adjust complexity, nail size, and tools to match motor skills and always supervise dangerous steps like hammering.
What are the benefits, safety tips, and fun variations for kids' string art?
Benefits include improved fine motor skills, pattern recognition, and patience; it’s great for learning symmetry and color mixing. Safety tips: always wear eye protection when hammering, let adults handle nails, keep threads tidy to avoid trips, and use blunt-ended pins for younger kids. Variations: use foam instead of wood, try geometric shapes, make name or animal outlines, or create layered color gradients. Frame the finished piece for a keepsake.
Watch & Learn
Need help?
What can I use if I don't have a wooden board, nails, or embroidery thread?
Use thick corrugated cardboard or a foam board instead of a wooden board, pushpins or thumbtacks in a cork sheet as a substitute for nails and hammering, and use yarn or embroidery floss in place of thread.
My nails are bending or the thread keeps slipping—what should I do?
Have an adult pre-drill shallow pilot holes or use smaller finishing nails and make sure each nail is hammered leaving about half the nail sticking out so the thread can wrap securely without slipping.
How can I change the activity for different ages?
For toddlers and preschoolers have an adult fold and cut the paper template and pre-hammer the nails so they can focus on tying and wrapping thick yarn, while older kids can use a ruler to mark evenly spaced dots, create more complex templates, and add multiple color layers of thread themselves.
How can we personalize or make the string art more advanced?
Paint or stain the board before tracing the paper template, add beads as you wrap the second color thread for texture, experiment with denser wrapping patterns to create shading, and then tuck or tape any loose ends and share a photo on DIY.org.