Stitch a pocket
Sew a simple fabric pocket onto a shirt or tote using hand stitches, pins, and scissors, with adult help, learning measuring and basic stitching skills.


Step-by-step guide to sew a fabric pocket
How to Sew a Perfect Lined Patch Pocket | Pocket 101
Step 1
Gather all Materials Needed and set them on a clean flat workspace.
Step 2
Lay your Shirt or tote flat and smooth the fabric so there are no wrinkles.
Step 3
Use the Measuring tape or ruler and Fabric marker to measure and mark where you want the pocket so it will be centered and at a comfortable height.
Step 4
Fold the edges of the Scrap fabric pocket piece under about 1/4 inch on all sides.
Step 5
Press the folded edges with the Iron if available to make the creases neat.
Step 6
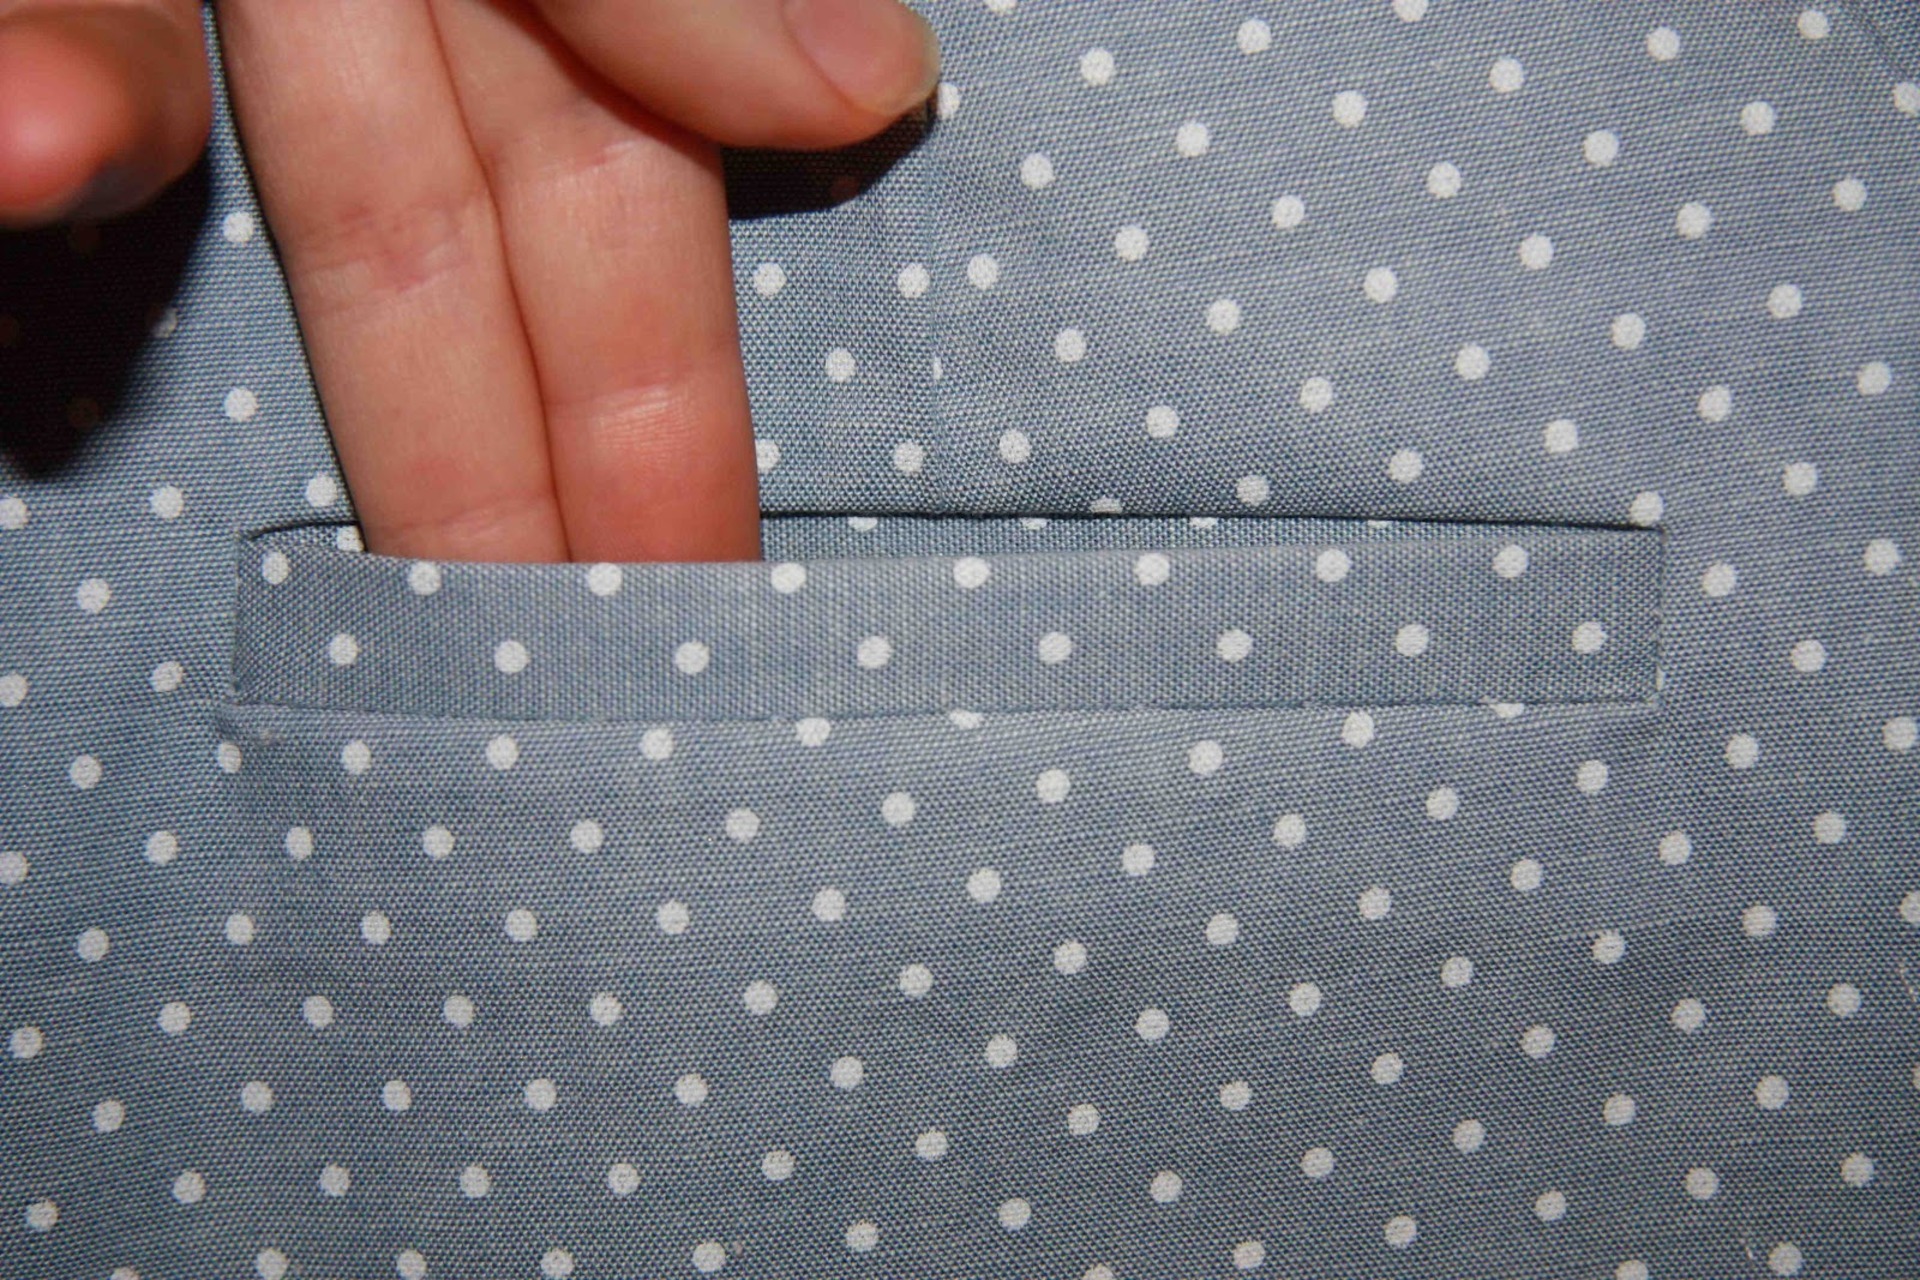
Place the pocket on the marked spot aligning the folded edges with your marks.
Step 7
Pin the pocket in place with Straight pins placing one pin near each corner.
Step 8
Cut an 18 inch length of Matching thread.
Step 9
Thread one end of the thread through the needle eye.
Step 10
Tie a small knot at the end of the thread to stop stitches from pulling through.
Step 11
Sew the pocket to the garment using small running stitches about 1/4 inch apart along the two sides and the bottom leaving the top open.
Step 12
Tie a secure knot on the inside of the pocket to finish your stitching.
Step 13
Trim the excess thread with the Scissors.
Step 14
Remove all Straight pins from the pocket area.
Step 15
Share a photo of your finished pocket on DIY.org.
Help!?
What can I use instead of a fabric marker or measuring tape if I don't have them?
Use a pencil or tailor's chalk in place of the fabric marker and a school ruler or a length of ribbon measured against a ruler instead of the measuring tape, testing any marks on scrap fabric before the 'measure and mark' step.
My pocket puckers when I sew—what should I do?
If the pocket puckers, remove the Straight pins, press the Shirt flat with the Iron, re-pin the pocket following 'place the pocket on the marked spot,' and sew with small running stitches about 1/4 inch apart while keeping even tension.
How can I adapt this activity for younger children or older kids?
For younger children have an adult do the ironing and needlework while the child helps fold the edges 1/4 inch and pin the pocket, and for older kids let them thread the needle, sew the running stitches, and tie the secure knot themselves.
How can we personalize or improve the pocket after sewing?
Personalize the pocket by using a contrasting thread when you 'cut an 18 inch length of Matching thread' for visible topstitching, adding embroidery along the top edge, or sewing on a button and loop before tying the secure knot to create a closure.
Watch videos on how to sew a fabric pocket
HOW TO sew a QUICK and EASY pocket in any seam! Step-by-step!
4 Videos
HOW TO sew a QUICK and EASY pocket in any seam! Step-by-step!
How to Sew a Cutlery Pocket - Sewing for Beginners
Teach Yourself to Sew: Patch Pockets

Sewing Tutorial: 3 Different Ways to Add Pockets to Your Garments
Facts about hand sewing for kids
🧵 Running stitch, one of the simplest hand stitches, has been used for thousands of years to join fabric.
🪡 Archaeologists have found sewing needles made from bone and ivory that are tens of thousands of years old — people have been sewing for a very long time.
📏 "Measure twice, cut once" is a rule tailors use to keep pockets straight and neat.
✂️ Sharp fabric scissors give cleaner cuts than dull ones, which helps pocket edges lie flat.
🧷 Pins and quick basting stitches let you test a pocket's placement before sewing it on for good.
How do you sew a fabric pocket onto a shirt or tote?
What materials do I need to sew a pocket?
What ages is this pocket-sewing activity suitable for?
What are the benefits and safety tips for teaching kids to sew a pocket?
