Mod your clothing
Transform old clothes by adding patches, fabric paint, and trims to create personalized outfits while learning basic sewing and design skills.


Step-by-step guide to mod your clothing
13 EASY DIY CLOTHING HACKS FOR KIDS
Step 1
Pick one piece of old clothing you want to transform.
Step 2
Lay the clothing flat on a clean table or floor.
Step 3
Use a fabric marker or chalk to draw your design where you want patches paint or trims.
Step 4
Choose fabric scraps or iron-on patches that match your design.
Step 5
Cut the fabric scraps into patch shapes with safety scissors.
Step 6
Place each patch on a marked spot and secure it temporarily with a safety pin.
Step 7
Thread a hand sewing needle with a length of thread for sewing.
Step 8
Tie a knot at the end of the thread to stop stitches from pulling out.
Step 9
Sew each patch onto the clothing with a running stitch around the edges.
Step 10
Use a paintbrush or sponge to add fabric paint details following your sketch.
Step 11
Let the painted areas dry completely before touching them.
Step 12
Attach trims like ribbons buttons or sequins to the clothing using sewing or fabric glue.
Step 13
Remove all safety pins from the clothing.
Step 14
Trim any loose threads close to the fabric with safety scissors.
Step 15
Share your finished creation on DIY.org.
Help!?
What can we use if we don't have fabric markers, safety scissors, or iron-on patches?
Use a pencil or washable marker instead of a fabric marker, small rounded-tip household scissors in place of safety scissors, and leftover cotton scraps or sticker-style patches instead of iron-on patches when preparing and cutting your patch shapes.
My patches keep shifting or my stitches look uneven—how can I fix that?
Secure patches with extra safety pins and baste them with a few large running stitches first, then go back with smaller even stitches and let fabric paint dry flat to avoid smudging while you finish sewing.
How can I adapt the steps for younger children or older kids?
For preschoolers, skip hand sewing and use fabric glue or stick-on patches with an adult to do the pinning, while older kids can follow all steps including threading a hand sewing needle, sewing running stitches, detailed painting with a fine brush, and attaching ribbons, buttons, or sequins.
What are some ways to extend or personalize the finished clothing beyond the basic steps?
Add embroidered initials around the edges after sewing patches, layer contrasting fabric scraps before stitching, use stencils with fabric paint for crisp motifs, or add a hidden pocket and then test a small painted area for washability before sharing your finished creation on DIY.org.
Watch videos on how to mod your clothing
✅💥 How to turn old clothes into stunning new clothes ! | passionate DIY fashion makeover ✂️🧵
4 Videos
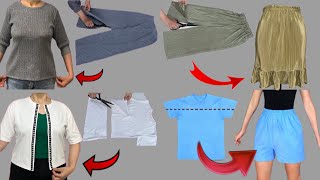
✅💥 How to turn old clothes into stunning new clothes ! | passionate DIY fashion makeover ✂️🧵
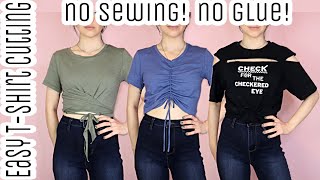
DIY T-Shirt Cutting | Easy Alterations Part 2 | 3 Tutorials | No Sewing or Glue
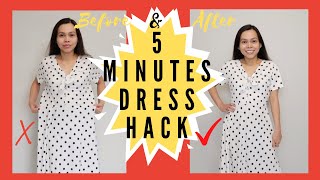
5 Minutes Dress Tricks Tutorial | Dress Alterations you can Do at Home! EASY & SIMPLE TO DO

How to make a Kids Apron, FREE PATTERN, Baby Lock Zest, sewing for beginners
Facts about clothing upcycling and basic sewing for kids
🧵 Sewing needles made of bone and ivory have been found from over 20,000 years ago — people have been stitching clothes for ages!
♻️ Upcycling old clothes keeps them out of landfills; around 92 million tonnes of textile waste are produced worldwide every year.
🎨 Heat-setting fabric paint with an iron helps the paint stick and stay flexible through many washes.
🪡 Many home sewing machines can stitch several hundred to over a thousand stitches per minute — perfect for quick mending!
✂️ Patches started as practical repairs on workwear and later became trendy fashion statements on jeans and jackets.
How do I mod clothing with my child step-by-step?
What materials do I need to mod clothes with kids?
What ages is clothing modding suitable for?
What are the benefits of modding clothes with kids?
