Set up a sewing space
Set up a safe sewing space with a small table, good light, basic tools, and organized storage; practice threading needles and simple stitches.

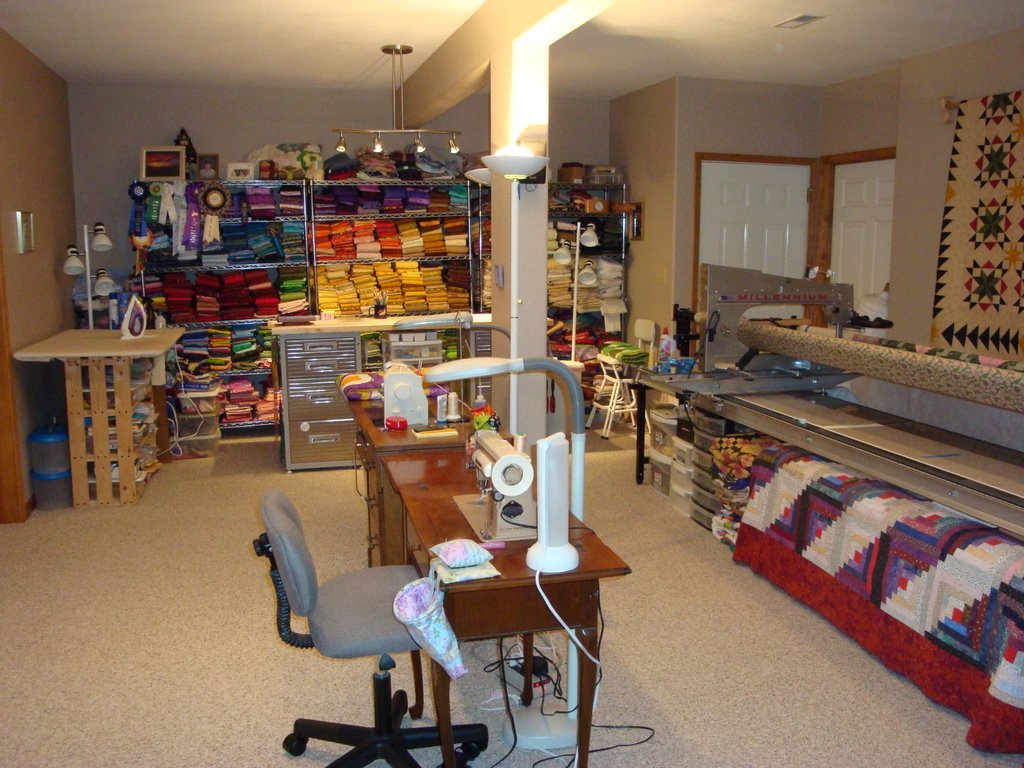

Step-by-step guide to set up a safe sewing space and practice basic stitches
Tips For Teaching Children How To Sew (Ages 2-11+) | Paige Handmade
Step 1
Move the small table and chair near a window or a bright lamp so you can sit comfortably and see your work.
Step 2
Turn on the lamp and aim it so the light shines directly on the table surface.
Step 3
Put the small storage box on the side of the table within easy reach.
Step 4
Place the pincushion or jar on the table to hold needles safely.
Step 5
Put the scissors on the table with the blades closed and pointing away from you.
Step 6
Lay out a few small fabric scraps on the table where you can reach them.
Step 7
Ask an adult to check your sewing space and confirm it is safe before you touch needles.
Step 8
Cut a piece of thread about as long as your arm using the scissors.
Step 9
Thread the needle by pushing the end of the thread through the needle’s eye.
Step 10
Tie a small knot at the far end of the thread so it won’t pull through the fabric.
Step 11
Make ten even running stitches across one fabric scrap to practice stitch size and spacing.
Step 12
Line up two fabric scraps and sew them together along the edge using a whip stitch.
Step 13
Snip the thread close to the fabric and push the needle into the pincushion or jar when you finish.
Step 14
Put all needles scissors thread and fabric scraps back into the storage box to tidy your sewing space.
Step 15
Share your finished sewing practice on DIY.org
Help!?
What can we use instead of a pincushion if we can't find one?
If you don't have a pincushion, put needles into a clean jar partly filled with cotton or use a small foam block or a stuffed fabric square and place it on the table (step 4) to hold needles safely.
I'm having trouble threading the needle — what should we try?
If the thread won't go through the needle's eye (step 9), snip the thread end cleanly with the scissors, flatten or wet it slightly, or switch to a larger-eye needle and aim the lamp directly at the table to make threading easier.
How can we adapt the activity for different ages?
For younger children use blunt plastic needles, round-tipped scissors, and adult help with cutting thread (step 8) and threading (step 9) while older kids can practice the ten even running stitches (step 11), sew more scraps together with a whip stitch (step 12), or try simple embroidery.
How can we extend or personalize the sewing practice?
Turn your practice into a project by arranging colorful fabric scraps into a patchwork and sewing them together along the edge (step 12), embellishing the running stitches (step 11) with embroidery thread, and saving finished pieces in the storage box to share on DIY.org.
Watch videos on how to set up a safe sewing space and learn simple stitches
😱 ORGANIZE YOUR SEWING SPACE - PART 2 DECLUTTER YOUR SPACE
4 Videos
😱 ORGANIZE YOUR SEWING SPACE - PART 2 DECLUTTER YOUR SPACE

How to DESIGN AND PLAN YOUR BEST SEWING SPACE, using the space you have!-Get 'Sew Organized' Phase 1
ORGANIZE YOUR SEWING SPACE - PART 1
✅ YOUR SEWING SPACE PART 3 - ORGANIZATIONAL ZONES
Facts about sewing for kids
🧵 Archaeologists found bone sewing needles and evidence of sewing over 40,000 years ago — sewing is one of the oldest crafts!
🪡 Hand-sewing needles come in many sizes and shapes; larger-eyed needles (like embroidery needles) are easier for kids to thread.
💡 Good lighting makes threading needles and stitching much easier and safer — a bright desk lamp reduces mistakes and eye strain.
📦 Simple organizers like muffin tins, ice cube trays, or divided boxes are perfect for sorting buttons, threads, and pins.
🪢 Learning three basic stitches — running stitch, backstitch, and whipstitch — gives kids the skills to mend or make small projects.
How do I set up a safe sewing space and teach simple stitches?
What materials do I need to create a child-friendly sewing area?
What ages is a beginner sewing space suitable for?
What safety tips should I follow when my child is learning to sew?
