Time-lapse a plant's growth
Set up a camera or smartphone to photograph a growing plant daily, compile images into a time-lapse video, and observe plant development.


Step-by-step guide to time-lapse a plant's growth
Realistic Plant Growth Time-Lapse - From Seed to Sprout Under the Sun
Step 1
Choose a healthy potted plant for your time-lapse project.
Step 2
Move the plant to a spot with steady light and away from drafts where it can stay for weeks.
Step 3
Attach the plain poster board behind the plant with tape to make a simple background.
Step 4
Mark the exact spot for the pot and the camera base with tape so you can return them to the same positions.
Step 5
Place your camera or smartphone on the tripod or stack of books at the marked camera base.
Step 6
Adjust the camera height and angle until the plant fills the frame the way you like.
Step 7
Put the ruler next to the plant so its numbers are visible in the camera frame for scale.
Step 8
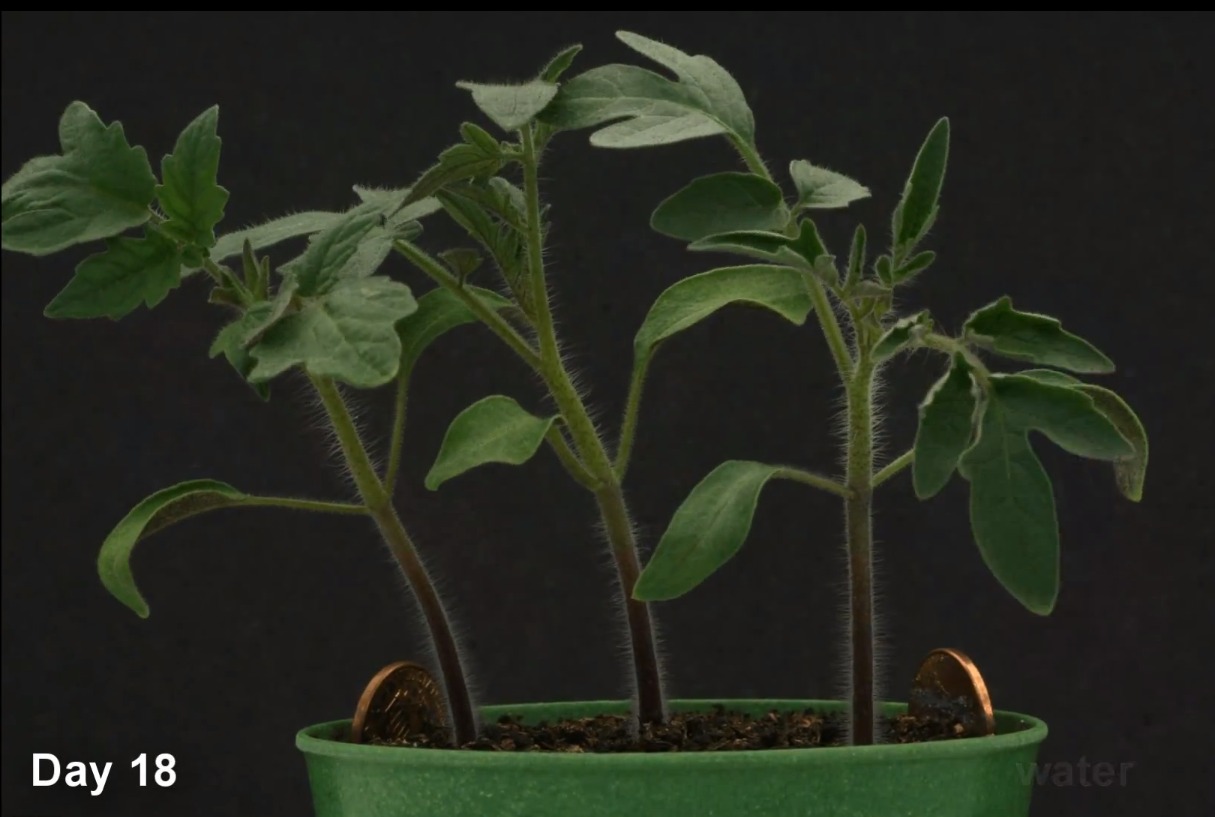
Take the first photo to record the plant’s starting look.
Step 9
Pick one time each day to take a photo and promise yourself to do it at that same time.
Step 10
Every day at that same time take one photo using the same framing and camera position.
Step 11
Once a week measure the plant height with the ruler to watch how much it grows.
Step 12
After you collect many photos transfer them to a computer or a time-lapse app on your device.
Step 13
Import the photos in chronological order into the time-lapse app or video editor.
Step 14
Export the time-lapse video from the app or editor using a frame rate around 8–12 frames per second.
Step 15
Share your finished time-lapse video of the plant growing on DIY.org
Help!?
What can we use if we don't have a tripod or plain poster board for the background?
Use a stable stack of books at the marked camera base instead of a tripod and a large piece of plain cardboard or a white bed sheet taped behind the plant as the poster board background.
What should we do if the camera framing or plant position changes during the project?
Re-mark the exact spot for the pot and the camera base with tape, tighten or restack the books/tripod so the camera height and angle stay the same, and use your phone's timer or a remote to take each daily photo at the same time.
How can we adapt this activity for younger or older kids?
For younger children have an adult set up the plant, poster board, and camera while the child presses the shutter and helps put the ruler next to the plant for weekly measurements, and let older kids adjust the camera height, manage daily photos, and edit the time-lapse at 8–12 frames per second themselves.
How can we extend or personalize the basic time-lapse project?
Add colored poster boards or seasonal props behind the plant, keep the ruler numbers visible in every frame for annotated growth, take occasional close-up shots from a second angle, and export the final video at about 8–12 fps before sharing on DIY.org.
Watch videos on how to time-lapse a plant's growth
Growing Plants Seed to Harvest 4K Time Lapse Compilation (~3 Years)
3 Videos
Growing Plants Seed to Harvest 4K Time Lapse Compilation (~3 Years)
HOW TO Make Your Own Plant TIMELAPSE

Life Cycle of a Plant for Kids! | Learn Parts of a Plant 🌱 | Twinkl USA
Facts about plant growth and time-lapse photography
🌱 Plants can begin sprouting in as little as 24–72 hours when they have water, warmth, and air!
⏱️ Take 1 photo per hour (24 photos/day) and play at 24 fps — 1 day of growth becomes about 1 second of video, so a month ≈ 30 seconds!
☀️ Plants bend toward light (phototropism); the hormone auxin helps the shaded side grow faster so the plant curves.
📱 Most smartphones include a built-in time-lapse mode, so you can make an impressive video without special gear.
🌙 Some plants move with daily rhythms (nyctinasty), opening and closing leaves — time-lapse makes those slow motions visible.
How do I create a time-lapse video of a plant growing with my child?
What materials and tools do I need to time-lapse a plant's growth?
What ages is plant time-lapse suitable for and what can kids do?
What are the benefits of making a plant time-lapse and are there safety tips or variations?
