Dissect a flower
Carefully dissect a flower using safe tools like tweezers and a magnifying glass, identify and label each part, and record observations.


Step-by-step guide to dissect a flower
Step 1
Wash your hands with soap and water.
Step 2
Put the tray on the table and lay out your materials.
Step 3
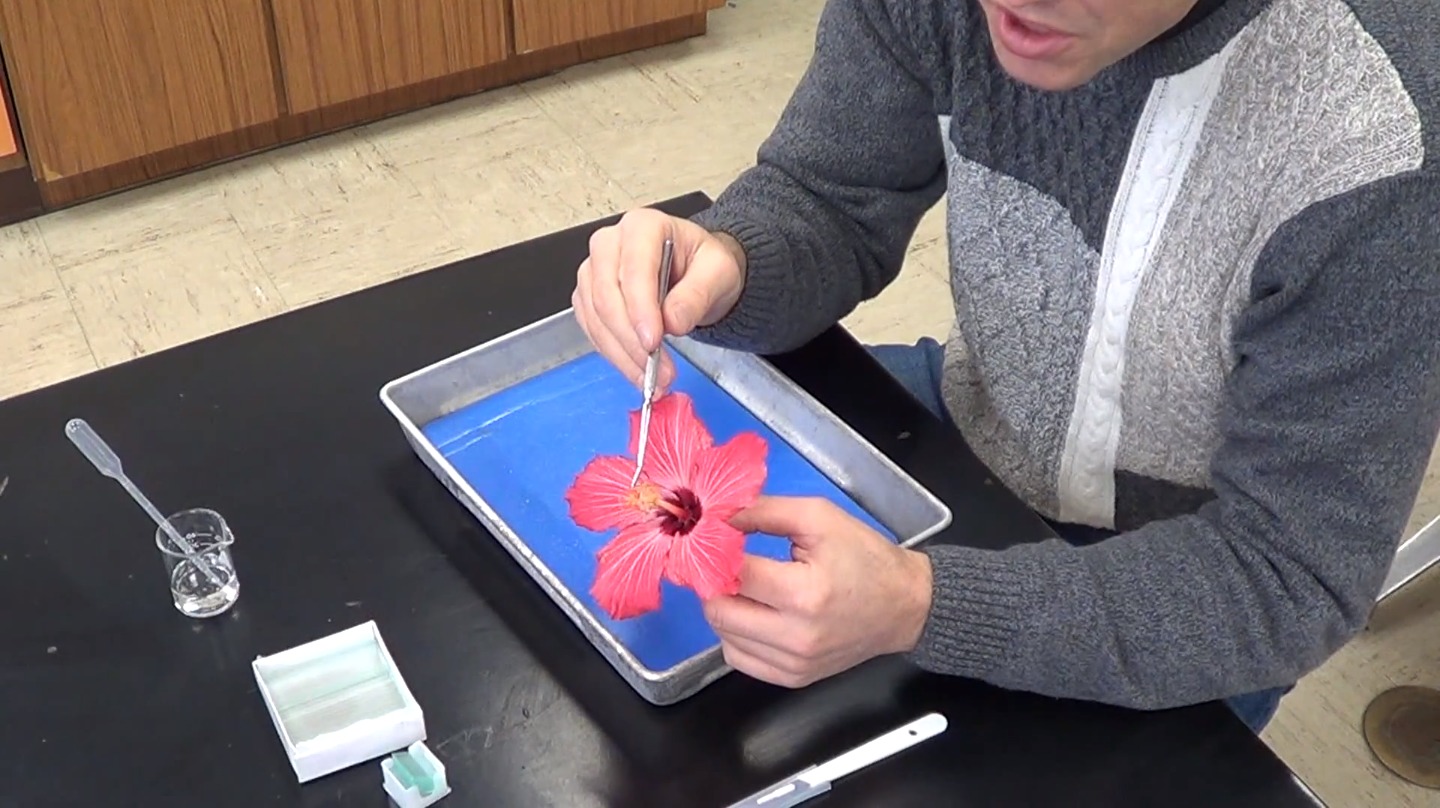
Place the whole flower gently on the tray.
Step 4
Use the magnifying glass to look closely at the outside of the flower.
Step 5
Write three things you notice about the flower in your notebook.
Step 6
Gently remove the petals one at a time with the tweezers and lay them in a row on the tray.
Step 7
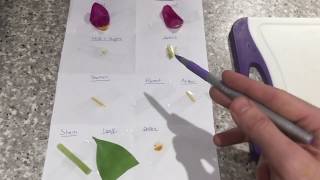
Write "Petal" on a small label and tape it next to the petals.
Step 8
Carefully pull off the green sepals and place them on the tray.
Step 9
Write "Sepal" on a label and tape it next to the sepals.
Step 10
Carefully remove each stamen with the tweezers and place them on the tray.
Step 11
Write "Stamen" on a label and tape it next to the stamens.
Step 12
With an adult, carefully cut the pistil's ovary open with the small scissors and look inside.
Step 13
Draw and label the parts you found in your notebook and write one sentence about what surprised you.
Step 14
Share your finished creation on DIY.org
Help!?
What can we use if we don't have tweezers, a magnifying glass, or the small scissors listed in the materials?
Use clean kitchen tweezers or a toothpick to remove petals and stamens, use a smartphone camera zoom or reading glasses instead of the magnifying glass to inspect the flower, and have an adult use a clean kitchen paring knife to open the pistil's ovary carefully in place of small scissors.
I'm having trouble removing petals or pulling off stamens without tearing them — how do we fix that?
Stabilize the flower on the tray with one finger, grip the petal or stamen base with the tweezers and pull gently or snip the base with small scissors, and work slowly over the tray so parts don't fall away when you lay them in a row.
How can we adapt the activity for different ages so it's safe and engaging?
For ages 3–5 have an adult remove parts while the child observes and sticks pre-written labels, for ages 6–8 let the child use tweezers and the magnifying glass with close supervision, and for 9+ let the child help open the pistil's ovary with an adult and draw detailed labeled diagrams to share on DIY.org.
What are simple ways to extend or personalize the flower dissection after we've labeled and drawn the parts?
Press the petals in your notebook as a keepsake, photograph each labeled row with your smartphone to document differences between flowers, count and record the number of stamens and sepals for a comparison chart, and then share your photos and notes on DIY.org.
Watch videos on how to dissect a flower
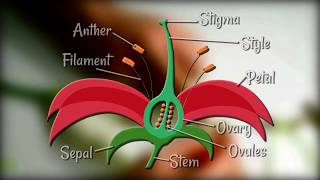
Parts of a Flower | Functions of the Parts of a Flower | Flower Dissection | Structure of a Flower
4 Videos

Parts of a Flower | Functions of the Parts of a Flower | Flower Dissection | Structure of a Flower
Dissection of a Flower - Plant reproduction
Flower Dissection - Reproduction in flowering plants
Parts of a Flower | Flower Dissection Lab | Pollination
Facts about botany for kids
🌸 Many flowers are "perfect" — they contain both male (stamen) and female (pistil) parts in the same bloom.
🌻 A sunflower head is actually made of hundreds of tiny flowers called florets, each able to form a seed.
🐝 Bees can see ultraviolet patterns on petals that guide them straight to nectar — humans can't see those patterns unaided.
🧪 The largest single flower is Rafflesia arnoldii, which can grow nearly 1 meter (3 feet) across and smells like decay.
🌱 Flowering plants (angiosperms) first appeared about 140 million years ago and quickly became the planet's dominant plants.
How do I carefully dissect a flower with my child?
What materials do I need to dissect a flower at home or in class?
What ages is flower dissection suitable for?
What are the benefits and safety tips for dissecting a flower?
